
User guide


Chapter 2
Configuration
2
PrintServer for USB with 4-Port Switch
Chapter 2:
Configuration
The PrintServer has been designed to be functional right
out of the box with the default settings in the Setup
Wizard. However, if you’d like to change these settings, you
can use the PrintServer’s web-based utility. This chapter
will describe each web page in the utility and each page’s
key functions. The utility can be accessed via your web
browser through the use of a computer.
How to Access the Web-Based Utility
To access the web-based utility, launch your web browser,
and enter the PrintServer’s IP address in the Address field.
Then press Enter.
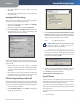
Internet Explorer Address Bar
NOTE: Use the PrintServer’s IP address that you
noted during the Setup Wizard. If you did not
note the IP address or if you have lost it, insert
the Setup CD-ROM, and when the Welcome
screen appears, click Setup Wizard. Follow the
instructions until you reach the third screen,
where the IP address is shown. After you note
the IP address, click Back until you reach the
Welcome screen of the Setup Wizard. Click Exit.
How to Use the Web-Based Utility
The web-based utility has five main tabs: Setup, Protocol,
Printer, Status, and Exit. Click a tab to display its screen. If
the tab is divided into subfunctions, the names of those
subfunctions will appear below the main tab. Select the
desired subfunction to display its screen. The default
screen for a tab is its first listed subfunction.
NOTE: Screens are identified by the convention
Tab > Sub, where Tab is a main tab, and Sub
is one of its subfunctions. For example, the
Protocol > TCP/IP screen appears when you click
the Protocol tab, then the TCP/IP subfunction.
Use the tabs and subfunctions to navigate through the
utility and make all necessary changes to the PrintServer’s
settings. When you have finished making changes on
a screen, click the Save Settings button to save the
changes, or click the Cancel Changes button to undo
your changes.
To exit the utility, click the Exit tab.
The Setup Tab
The Setup screen is the first screen you see when you
access the web-based utility. This screen allows you to
change the PrintServer ‘s general settings.
Setup
PSUS4 Device Name Enter the PrintServer’s name in this
field. The name can be located on a sticker that is on the
bottom of the PrintServer.
Password
Current Password, New Password, Verify Password To
change the PrintServer’s password, enter the current
password in the Current Password field, enter the new
password in the New Password field, and then enter the
new password again in the Verify Password field.
Protocols Select AppleTalk or NetBEUI, if they apply to
your network.
Change these settings as described here and click Save
to apply your changes or click Cancel to cancel your
changes.