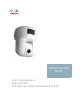
ADMINISTRATION GUIDE Cisco Small Business Model PVC300 PTZ Internet Camera with Audio and PoE
6bZg^XVh =ZVYfjVgiZgh 8^hXd HnhiZbh! >cX# HVc ?dhZ! 86 6h^V EVX^[^X =ZVYfjVgiZgh 8^hXd HnhiZbh JH6 EiZ# AiY# H^c\VedgZ :jgdeZ =ZVYfjVgiZgh 8^hXd HnhiZbh >ciZgcVi^dcVa 7K 6bhiZgYVb! I]Z CZi]ZgaVcYh 8^hXd ]Vh bdgZ i]Vc '%% d[[^XZh ldgaYl^YZ# 6YYgZhhZh! e]dcZ cjbWZgh! VcY [Vm cjbWZgh VgZ a^hiZY dc i]Z 8^hXd LZWh^iZ Vi lll#X^hXd#Xdb$\d$d[[^XZh# 889:! 88:CI! 8^hXd :dh! 8^hXd Ajb^c! 8^hXd CZmjh! 8^hXd HiVY^jbK^h^dc! 8^hXd IZaZEgZhZcXZ! i]Z 8^hXd ad\d! 98:! VcY LZaXdbZ id i]Z =jbVc CZildg` VgZ igVYZbVg`h0 8]
Contents Getting Started 6 Chapter 1: Getting to Know the PVC300 PTZ Internet Camera 7 Overview Physical Description 7 8 Digital Input Digital Output Diagram 10 Hardware Reset 11 Camera Usage Notes 11 11 Chapter 2: Installing The Camera Incorrect 12 Correct12 Camera Installation 13 Network Deployment 15 Basic Ethernet Setup 15 Power over Ethernet (PoE) Setup 15 Installing the Software 18 Installing the Setup Wizard 18 Running the Setup Wizard to Install the Camera Software 19 Ch
Contents Chapter 5: Configuring Client Settings 29 Chapter 6: Using the Setup Screen 31 Expanding the Setup Folder 32 Configuring Basic Settings 32 Device Settings 32 Network Settings 33 Configuring Advanced Camera Settings 34 HTTP 34 FTP 35 HTTPS 35 SIP 35 RTP/RTSP 36 Netfilter 38 HTTPS 39 Enable HTTPS 39 Certificate Information 40 Discovery Setting 40 UPnP Settings 40 QoS 41 CoS 41 DSCP 41 Administering the PVC300 42 Defining User Settings 42 Defining Camera M
Contents Applications 51 Enabling Motion Detection 57 Configuring Video Recording Settings 58 Configuring DDNS for the Camera 60 I/O Ports 60 Viewing Camera Status 61 Viewing System Information 61 Viewing Image Settings 61 Viewing Network Settings 61 Viewing the System Log 62 Appendix A: Troubleshooting 63 Windows Help 65 TCP/IP 65 Shared Resources 65 Network Neighborhood/My Network Places 65 Appendix B: Specifications PVC300 Appendix C: Support Contacts Cisco Small Business
Preface Getting Started This guide describes how to install, configure, and use the PVC300 PTZ Internet camera. For more information about advanced features of the camera not covered in this document, see the Cisco Small Business Video Monitoring System Administration Guide.
1 Getting to Know the PVC300 PTZ Internet Camera Overview The PVC300 PTZ Internet Camera is equipped with a Sony progressive scan CCD sensor and pan-tilt 2.6x optical zoom lens. It is a high-performance network camera for indoor surveillance applications such as security for banks, retail stores, or offices. With progressive scan techniques, this network camera is an ideal choice to provide clear, high-quality video, and capture ultra-smooth images of fast-moving objects without any pixilated edges.
1 Getting to Know the PVC300 PTZ Internet Camera Overview Physical Description Figure 1 Front Panel Lens 272873 Status Display Figure 2 Rear Panel General I/O Terminal Block Audio Out Power Cord Socket Microphone In Ethernet 10/10 RJ45 Socket 272874 Reset Button Cisco Small Business Administration Guide for the Model PVC300 PTZ Internet Camera with Audio and PoE 8
1 Getting to Know the PVC300 PTZ Internet Camera Overview Figure 3 Internal Microphone 272878 Internal microphone General I/O Terminal Block The General I/O Terminal Block allows you to connect the camera to external input/output devices. The ports are numbered from 1 to 4. If you place the camera on a table and look at the back side, port 1 is left-most port and port 4 is the right-most port. The following table describes the ports: Port # Description 1 Power 12VDC +- 5% 1.5A max, Max rating 2.
1 Getting to Know the PVC300 PTZ Internet Camera Overview Digital Input Digital Output Diagram Pins 1 to 4 are used to connect with digital input and digital output devices. Refer to the following illustration for the connection method. The color of LEDs indicates the status of the PVC300 PTZ Internet Camera. Status LED Color Description Blinking amber Power is being supplied to the PVC300 PTZ Internet Camera. Solid green The PVC300 PTZ Internet Camera is active.
Getting to Know the PVC300 PTZ Internet Camera Camera Usage Notes 1 Hardware Reset There is an indented reset button on the back panel of the PVC300 PTZ Internet Camera. It is used to reboot the PVC300 PTZ Internet Camera or restore it to the factory default. Sometimes rebooting the PVC300 PTZ Internet Camera can set it back to normal state. If the problems remain after rebooting, restore the factory default and install again. Reboot—Press and release the indented reset button with a paper clip.
2 Installing The Camera This chapter describes how to install and configure the PVC300 PTZ Internet Camera. ! CAUTION Do not pick up the Cisco PVC300 IP camera from the top (head) when removing the camera from the box or installing it. Rough treatment or turning the head manually can result in damage to the camera.
2 Installing The Camera Camera Installation Camera Installation Follow these steps to install your camera. STEP 1 Attach a ceiling mount bracket (1) to the PVC300 PTZ Internet Camera and secure it with two small screws (2).
2 Installing The Camera Camera Installation STEP 2 Drill three pilot holes into the ceiling and hammer the plastic anchors (1) into the holes. Fasten a ceiling mount bracket (2) to the ceiling with three screws (3). 1 2 271140 3 Slide the camera into the ceiling mount bracket. STEP 4 Secure the two ceiling mount brackets with a small screw 271141 STEP 3 . The camera is now ready for network connection.
2 Installing The Camera Network Deployment Network Deployment There are two options for deploying the camera on the network: • Basic Ethernet Setup • Power over Ethernet (PoE) Setup Basic Ethernet Setup Follow these steps to perform basic Ethernet setup. STEP 1 Connect the camera to a switch via the supplied Ethernet cable (1). 12V 1A Power SPKR Out EXT I/O Mic.
2 Installing The Camera Network Deployment Using a PoE-Enabled Router or Switch The PVC300 camera is PoE-compliant, which allows it to be powered via a single Ethernet cable to a PoE-enabled broadband router or switch. A power adapter is not required when powered through a PoE switch. Follow this step to connect your camera to a PoE-enabled switch. STEP 1 Connect the camera to the switch via an Ethernet cable. 12V 1A Power COLLISION 1 2 EXT I/O Mic.
2 Installing The Camera Network Deployment Using a Non-PoE Router or Switch If your broadband switch or router does not support PoE, use a PoE power injector (not included) to connect the camera to the broadband router or switch. Follow these steps to connect your camera to a non-PoE-enabled switch through a PoE power injector. STEP 1 Connect the PoE power injector (1) to the camera using an Ethernet cable (2). 12V 1A Power SPKR Out EXT I/O Mic.
2 Installing The Camera Installing the Software Installing the Software There is a Setup Wizard software program packaged in the product CD, which helps to set up your PVC300 PTZ Internet Camera in your network. There are two ways to use the Wizard: 1. You can launch the Wizard from the CD without installing it. Launching from the CD is useful if you do not want to install anything on you computer. 2. You can install the software on your computer (the installation process described in this section).
2 Installing The Camera Installing the Software Running the Setup Wizard to Install the Camera Software This section describes how to install and configure the camera software. Configuring Basic Camera Settings Follow these steps to install the PVC300 camera software and configure basic camera settings: STEP 1 Click Start on the Welcome screen of the Setup Wizard to start the installation process. The License Agreement screen appears. STEP 2 Click Next if you agree and wish to proceed.
2 Installing The Camera Installing the Software Proceed to the next section to continue camera configuration. Configuring the Camera’s Network Settings Follow these steps to configure the camera’s network settings. STEP 1 To continue configuring the camera’s network settings, click Next. The Network Settings screen appears. STEP 2 Select one of the following options to assign an IP address to the camera: • Static IP address—Select this option to assign the camera a static IP address.
2 Installing The Camera Installing the Software NOTE Microsoft Internet Explorer (IE) is the official supported browser for the Cisco PVC300 IP camera. STEP 10 In the login dialog box, enter admin in both the User name and Password fields. STEP 11 The PVC300 home page opens. The camera installation procedure is now complete. You may now proceed with Chapter 3, “Accessing the PVC300 PTZ Internet Camera.
3 Accessing the PVC300 PTZ Internet Camera This chapter explains how to access the PVC300 PTZ Internet Camera through web browsers, RTSP players, and 3GPP-compatible mobile devices. Using Web Browsers Follow these steps to access your PVC300 camera from web browsers: STEP 1 Launch Microsoft Internet Explorer. Microsoft Internet Explorer (IE) is the official supported browser for the Cisco PVC300 IP cameras.
Accessing the PVC300 PTZ Internet Camera Using RTSP Players 3 c. Click OK. If authentication succeeds, the camera’s Home page appears. Using RTSP Players To view the MPEG-4 streaming media using RTSP players, you can use one of the following players that support RTSP streaming. • Apple QuickTime Player • RealPlayer • VLC Media Player (a free download from www.videolan.org) • Any other MPEG supportable player To launch an RTSP player, perform the following: STEP 1 Launch the RTSP player.
Accessing the PVC300 PTZ Internet Camera Using RTSP Players 3 The live video is displayed in your RTSP player.
3 Accessing the PVC300 PTZ Internet Camera Using 3GPP-Compatible Mobile Devices Using 3GPP-Compatible Mobile Devices To view the streaming media through 3GPP-compatible mobile devices, make sure the PVC300 PTZ Internet Camera can be accessed from the Internet. For more information on how to set up the PVC300 PTZ Internet Camera over the Internet, see Chapter 2, “Installing The Camera.
3 Accessing the PVC300 PTZ Internet Camera Configuring Port Forwarding Rules Configuring Port Forwarding Rules There are some additional configuration settings to make in order For 2-way audio over the Internet to work on your PVC300 camera, you need to configure additional settings, as shown in the example in the following diagram. Cameras accessed over the Internet that require 2-way audio must use a unique RTSP port.
4 The Camera’s Home Page This chapter explains the Home page of the PVC300 camera. Menu Home—Click to go to the main page view. Client Settings—Click to access the Client Settings page. Setup—Click to access the PVC300 PTZ Internet Camera configuration page. Language—Click to choose a language for the displayed interface. Camera Control Panel Snapshot—Click to capture and save still images. The captured images will be displayed in a pop-up window.
The Camera’s Home Page Camera Control Panel 4 Pan /Tilt /Zoom speed—Adjust the speed of pan, tilt, and zoom. Go to—Once the Administrator has determined the preset positions, you can aim the camera using this control.
5 Configuring Client Settings This chapter explains how to select the streaming source, transmission mode, and saving options for your PVC300 camera. Please note that Microsoft Internet Explorer (IE) is the official supported browser for the Cisco PVC300 IP camera. If another browser is used, you may not be able to successfully set values on the Client Settings screen. NOTE: When completed with the settings on this page, click Save to ensure all changes take effect.
5 Configuring Client Settings UDP Unicast—Allows for more real-time audio and video streams. However, network packets may be lost due to network burst traffic and images may be obscured. Activate UDP connection when occasions require time-sensitive responses and the video quality is less important. Note that each unicast client connecting to the server takes up additional bandwidth and the PVC300 PTZ Internet Camera allows up to ten simultaneous accesses.
6 Using the Setup Screen This section explains how to use the categories on the left menu of the Setup screen. NOTE: Only Administrators can access the Setup page.
6 Using the Setup Screen Expanding the Setup Folder Expanding the Setup Folder Click the Setup folder icon to access the Basic Setup, Advanced Setup, Netfilter, and HTTPS pages. Configuring Basic Settings This section explains how to configure the basic settings for the PVC300 PTZ Internet Camera. It contains the following three areas; Device Settings, UPnP, and Network Settings. When completed with the settings on this page, click Save to ensure your changes take effect.
6 Using the Setup Screen Configuring Basic Settings Network Settings This area contains the settings for the following: Configuration Type—Two options are available. If you are not sure of the IP Address it is best to choose “Obtain IP Address Automatically (DHCP)”. If you know your network settings then select “Fixed IP Address”. If you choose to obtain an IP Address automatically, then just click Save.
Using the Setup Screen Configuring Advanced Camera Settings 6 Configuring Advanced Camera Settings This section explains how to configure the advanced settings for the PVC300 PTZ Internet Camera. It is composed of the following five areas; HTTP, FTP, HTTPS, SIP, and RTP/RTSP. HTTP Authentication—Depending on your network security requirements, the PVC300 PTZ Internet Camera provides two types of security settings for a HTTP transaction: basic and digest.
6 Using the Setup Screen Configuring Advanced Camera Settings STEP 1 Launch Mozilla Firefox or Netscape. STEP 2 In the Audio/Video/Camera section set the video mode to JPEG. See ”Configuring Audio, Video, and Camera Controls” on page 45. STEP 3 Type the URL command in the address field. Press Enter. The JPEG images will be displayed in your web browser.
Using the Setup Screen Configuring Advanced Camera Settings 6 RTP/RTSP Authentication—The three authentication options are Disabled, Basic, and Digest. • The Disabled option allows an RTP/RTSP session without a username or password. • The Basic option allows the username and password to be sent over the network (in clear text). • The Digest option is an agreed upon method a web page can use to negotiate credentials with a web user using the HTTP protocol.
6 Using the Setup Screen Configuring Advanced Camera Settings The five ports can be changed between 1024 and 65535. The multicast RTP port must be an even number and the multicast RTCP port is multicast RTP port number plus one, and thus is always odd. When the multicast RTP port changes, the multicast RTCP port will change accordingly. If the multicast RTP video ports are incorrectly assigned, a warning message is displayed.
6 Using the Setup Screen Netfilter Netfilter The Netfilter controls the access permission of clients by checking the client IP Address. Click on the check box Enable IP address filtering to enable Netfilter. There are two options for permission control in the drop down menu: Allow and Deny. Only those clients whose IP address is in the Allowed List and not in the Denied List can connect to the Video Server or PVC300 PTZ Internet Camera for receiving the audio/video streaming.
6 Using the Setup Screen HTTPS HTTPS HTTPS refers to the combination of HTTP interaction over an encrypted Secure Socket Layer (SSL) or Transport Layer Security (TLS). The HTTPS technology ensures end-to-end security and provides complete defense against eavesdrop, impersonation, and hijacking. Enable HTTPS Click the “Enable HTTPS secure connection” checkbox to enable HTTPS. You will first have to create and install a certificate.
6 Using the Setup Screen Discovery Setting Certificate Information Press the Property button to view the certificate details. After a certificate is installed or generated you cannot generate a new one. The old certificate must be removed before a new certificate can be generated. To remove the certificate, press the Remove button. The same rule applies to certificate request. Users need to remove the old certificate request to generate a new one.
6 Using the Setup Screen QoS QoS CoS Enable CoS—Set quality of service by creating a VLAN ID and a QoS priority. The priority is from 0-7, where 7 is the highest. The default is 4. Remember to also make all QoS settings on your switch. DSCP Enable DiffServ— Differentiated Services (DiffServ) is based on packet marking and queuing disciplines. The marking is done by adding a field to the IP header, called the DSCP (Differentiated Services Codepoint).
6 Using the Setup Screen Administering the PVC300 Administering the PVC300 Click the Administration folder icon to access the Users, Maintenance, and Firmware sections. Defining User Settings The Users folder has three sections that define Users Settings. They are Admin Password, Add User, and Manage User. Admin Password—The administrator account is permanent and can not be deleted. Note that if you want to add more accounts, you must first apply a password to the Admin administrator. a.
6 Using the Setup Screen Administering the PVC300 Defining Camera Maintenance Settings The Maintenance Folder has four sections that define the following settings; Export/Import Configuration File, Restore Defaults, Restore Factory Defaults, Restart, and Calibrate. Export/Import Configuration File—Exporting and importing configuration files allows you to create a camera configuration file to restore lost setups, or to create a “template” when setting up multiple cameras.
6 Using the Setup Screen Administering the PVC300 Upgrading the Firmware This folder has only one section, Firmware Upgrade. This feature allows you to upgrade the firmware on your PVC300 PTZ Internet Camera. It takes about five minutes to complete the process. Do not power off the PVC300 PTZ Internet Camera during the upgrade. Follow the steps below to download new firmware: STEP 1 Go to http://www.cisco.com/en/US/products/ps9944/prod_models_home.html. STEP 2 Choose the Cisco PVC300 IP camera.
Using the Setup Screen Configuring Audio, Video, and Camera Controls 6 Configuring Audio, Video, and Camera Controls Click the Audio/Video/Camera folder icon to display the Video, Audio, and Camera Control sections. Defining Image Settings The Video folder has three sections that define image Settings. This camera supports dual-stream. It provides two setting for video streams, and one setting for audio.
Using the Setup Screen Configuring Audio, Video, and Camera Controls 6 If JPEG mode is selected, the PVC300 PTZ Internet Camera continuously sends JPEG images to the clients, producing dynamic effects similar to movies. Every single JPEG image transmitted guarantees the same image quality, which in turn comes at the expense of variable bandwidth usage. And because the media contents are a combination of JPEG images, no audio data is transmitted to the clients.
6 Using the Setup Screen Configuring Audio, Video, and Camera Controls Overlay title and time stamp on video—Select this option to place the video title and time on video streams. Note that when the frame size is set to 176 x 144, only time will be stamped on video streams. If this feature is not selected, only one image at any one time is retained because all images are contained in one folder. When you are satisfied with the image, press Save to set the image settings.
Using the Setup Screen Configuring Audio, Video, and Camera Controls 6 your computer is played through your camera’s speakers. You can then use the icon to turn the camera’s external speakers on and off. • In Two-Way Audio mode, both the Listen Only and Talk Only icons appear on the Home page. With Two-Way audio, you can use the Talk Only icon in one of two ways: Toggle or Push. To use Toggle, if you want to talk, click the Talk Only icon. Click it again when you are done.
Using the Setup Screen Configuring Audio, Video, and Camera Controls 6 Setting Camera Control Options This section explains how to control the PVC300 PTZ Internet Camera’s Pan/Tilt/ Zoom operation by a control panel. The upper right quadrant of the camera control window holds basic camera controls for Up, Left, Home, Right, and Down. The following settings are also available: Pan Speed—Select up to 11 panning speeds from -5 to +5 to accommodate your personal preference.
Using the Setup Screen Configuring Audio, Video, and Camera Controls 6 Preset Position—In this area, you can set preset positions for the PVC300 PTZ Internet Camera. You can also select some preset positions for it to patrol. A total of twenty preset positions can be configured. Follow the steps below to set a preset position: STEP 1 Adjust the PVC300 PTZ Internet Camera to a desired position using the buttons on the right side of the window.
Using the Setup Screen Configuring Camera Applications 6 Configuring Camera Applications Click the Applications folder icon to show the following options: Applications, Motion Detection, Recording, DDNS, and I/O Ports. Applications You can use the Event, Server, and Media sections on the Applications page to configure how the PVC300 PTZ Internet Camera reacts in response to particular situation. The following illustration shows what happens when an event is triggered.
Using the Setup Screen Configuring Camera Applications 6 Configuring Event Settings Click Add to open up a window where you name an event, and configure the details that trigger the event, when to act upon it, and what action to take. Event name—The unique name for event. Enable this event—Check it to enable this event. Priority—Check this box and the event with higher priority will be executed first. Detect next event after ___ seconds—The delay to check next event.
6 Using the Setup Screen Configuring Camera Applications Configuring Server Settings Clicking on Add opens up a window where you configure Server Email, FTP, HTTP, and Network Storage settings. In the Server column, click Add to open the server setting page. In this page, you can specify where the notification messages will be send when a trigger is activated. A total of four server settings can be configured. Server name—Enter a descriptive name for the server setting.
6 Using the Setup Screen Configuring Camera Applications option to enable passive mode FTP and allow data transmission to pass through the firewall. To verify if the FTP settings are correctly configured, click Test. The result will be shown in a pop-up window. If it works, you will also receive a test.txt file on the FTP server. HTTP—Select to send the media to a HTTP server when a trigger is activated. • URL—Enter the URL of the HTTP server. • User name—Enter the user name.
6 Using the Setup Screen Configuring Camera Applications Configuring Media Settings Clicking on Add opens up a window where you can specify what kind of media to send when a trigger is activated. A total of five media settings can be configured. Media name—Enter a descriptive name for the media setting. Media Type—There are three choices of media types available: Snapshot, Video Clip, and System log. Snapshot—Select to send snapshots when a trigger is activated.
Using the Setup Screen Configuring Camera Applications 6 System log—Select to send a system log when a trigger is activated. When completed, click Save to take effect and then click Close to quit this page. The new media name appears in the media drop-down list on the Application page as below. To remove a media setting from the list, select a media name from the drop-down list and then click Delete. Note that only when the media setting is not being applied to an event setting can it be deleted.
Using the Setup Screen Configuring Camera Applications 6 Enabling Motion Detection Clicking on the Motion Detection folder shows an initial view of a video window and a checkbox labeled Enable Motion Detection. Check this option to turn on motion detection. Please note that Microsoft Internet Explorer (IE) is the official supported browser for the Cisco PVC300 IP camera. If another browser is used, you may not be able to successfully set values on the Motion Detection screen.
6 Using the Setup Screen Configuring Camera Applications How Motion Detection Works There are two parameters for setting the motion detection: Sensitivity and Percentage. Imagine frame A and frame B are two sequential images. Pixel differences between the two frames are detected and highlighted in gray, and will be compared with the sensitivity setting. Sensitivity is a value that expresses the sensitivity to moving objects.
Using the Setup Screen Configuring Camera Applications 6 File size for each recording—Specify the file size for each recording media. File name prefix—Enter the text that will be put in front of the file name. When completed, select Save to take effect. The new recording name appears in the recording drop-down list on the recording page. To remove a recording setting from the list, select a recording name from the drop-down list then and click Delete.
6 Using the Setup Screen Configuring Camera Applications Configuring DDNS for the Camera This folder explains how to configure dynamic domain name service for the PVC300 PTZ Internet Camera. DDNS is a service that allows your PVC300 PTZ Internet Camera, especially when assigned with a dynamic IP address, to have a fixed host and domain name. Enable DDNS—Select this option to enable the DDNS setting. Service Provider—Select a DDNS provider of your choice from the Provider dropdown list.
6 Using the Setup Screen Viewing Camera Status Viewing Camera Status Clicking on the Status folder icon expands it to show five sections, System, Image, Network, System Log, and Parameter List. Viewing System Information The System folder contains information is for firmware version, MAC Address, Camera name and date/time for the camera. Clicking on Refresh at the bottom of the screen updates the information.
6 Using the Setup Screen Viewing Camera Status Viewing the System Log You can configure the PVC300 PTZ Internet Camera to send the system log file to a remote server as a log backup. Before utilizing this feature, it is suggested to install a log-recording tool to receive system log messages from the PVC300 PTZ Internet Camera. One example of a tool is Kiwi Syslog Daemon. Visit http://www.kiwisyslog.com/kiwi-syslog-daemon-overview/.
A Troubleshooting This appendix provides solutions to problems that may occur during the installation and operation of the Internet Camera. Read the description below to solve your problems. If you can't find an answer here, check the Cisco Small Business website at www.cisco.com/go/smallbusiness. Which browsers can I use to access video supplied by the camera? Microsoft Internet Explorer (IE) is the official supported browser for the Cisco PVC300 IP camera.
A Troubleshooting Using the motion detection feature, I receive e-mails that don't show any moving objects. The motion detection feature doesn't actually detect motion. It compares frames to see if they are different. Major differences between frames are assumed to be caused by moving objects. But the motion detector can also be triggered by sudden changes in the level of available light or movement of the camera itself. Try to avoid these situations.
A Troubleshooting Windows Help STEP 3 In the Windows Components Wizard dialog box, make sure Networking Services is checked. STEP 4 Highlight Networking Services, and then click Details. STEP 5 In the Networking Services dialog box, select Universal Plug and Play and then click OK. STEP 6 Click Next in the following window. STEP 7 Click Finish. UPnP is enabled. Windows Help Almost all products require Microsoft Windows.
B Specifications PVC300 Standards IEEE802.3, IEEE802.3u, IEEE802.1p (QoS Priority), IEEE802.1q (VLAN) Ports Ethernet w/POE, Microphone IN, Speaker OUT, Power (12V, 1A), GPIO Protocols TCP/IP, HTTP, DHCP, SMTP, FTP, NTP, DNS, UPnP, RTP, RTSP, DDNS, Dual Stack IPv4 & IPv6, SIP Button(s) Reset Cabling UTP CAT 5 LEDs Power, Network Sensor 1/4" Progressive CCD Sensor Focal Length 0.
B Specifications PVC300 Dual Codec MPEG-4 Simple Profile, MJPEG, Simultaneous dual-stream Snapshot JPEG Image Settings Brightness and Contrast Motion Detection 4 Detection areas with individual sensitivity Audio Compression GSM-AMR for speech compression and MPEG-4 AAC for audio encoding Sampling Rate 8 Kbps Default Bit Rate 16 Kbps Video Monitoring Software Monitoring for up to 16 cameras, Monitor Live Video, Record, and Playback Simultaneously User List User Rights List to View Video an
C Support Contacts Cisco provides a wide range of resources to help you and your customer obtain the full benefits of the Cisco PVC300 camera. Product Resources Support Cisco Small Business Support Community www.cisco.com/go/smallbizsupport Cisco Small Business Support and Resources www.cisco.com/go/smallbizhelp Phone Support Contacts www.cisco.com/en/US/support/ tsd_cisco_small_business _support_center_contacts.html Cisco Small Business Firmware Downloads www.cisco.
C Support Contacts Quick Start Guide for the Cisco PVC300 Camera www.cisco.com/go/smallbizcameras Accessories Guide for the www.cisco.com/go/smallbizcameras Cisco PVC300 Camera Cisco Small Business Cisco Partner Central for Small Business (Partner Login Required) www.cisco.com/web/partners/sell/smb Cisco Small Business Home www.cisco.com/smb Cisco Small Business Surveillance www.cisco.