ADMINISTRATION GUIDE Cisco Small Business RV110W Wireless-N VPN Firewall
Revised March 2012 Cisco and the Cisco logo are trademarks or registered trademarks of Cisco and/or its affiliates in the U.S. and other countries. To view a list of Cisco trademarks, go to this URL: www.cisco.com/go/trademarks. Third-party trademarks mentioned are the property of their respective owners. The use of the word partner does not imply a partnership relationship between Cisco and any other company. (1110R) © 2011-2012 Cisco Systems, Inc.
Contents Chapter 1: Introduction Product Overview Getting to Know the Cisco RV110W 8 8 10 Front Panel 10 Back Panel 12 Installing the Cisco RV110W Placement Tips 13 13 Connecting the Equipment 13 Using the Setup Wizard 15 Using the Getting Started Page 16 Navigating through the Pages 18 Saving Changes 19 Viewing the Help Files 19 Configuration Next Steps 20 Verifying the Hardware Installation 20 Connecting to Your Wireless Network 21 Chapter 2: Configuring Networking Configuring t
Contents Configuring a DMZ Host 35 Configuring RSTP 36 Port Management 37 Cloning the MAC Address 39 Configuring Routing 40 Configuring the Operating Mode 40 Configuring Dynamic Routing 40 Configuring Static Routing 41 Configuring Inter-VLAN Routing 42 Viewing the Routing Table 43 Configuring Dynamic DNS 43 Configuring the IP Mode 44 Configuring IPv6 45 Configuring the WAN for an IPv6 Network 45 Configuring IPv6 LAN Settings 49 Configuring IPv6 Static Routing 52 Configuring
Contents Configuring Time of Day Access 70 Configuring the Wireless Guest Network 71 Configuring Advanced Wireless Settings 73 Configuring WDS 76 Configuring WPS 77 Chapter 4: Configuring the Firewall 79 Cisco RV110W Firewall Features 79 Configuring Basic Firewall Settings 81 Configuring Remote Management 83 Configuring Universal Plug and Play 84 Managing Firewall Schedules Adding or Editing a Firewall Schedule 85 85 Configuring Services Management 85 Configuring Access Rules 86 A
Contents Configuring Basic VPN Settings (Site-to-Site VPN) Viewing Default Values Configuring Advanced VPN Parameters 100 101 102 Managing IKE Policies 102 Managing VPN Policies 103 Configuring Certificate Management 108 Configuring VPN Passthrough 109 Chapter 6: Configuring Quality of Service (QoS) Configuring Bandwidth Management 111 111 Configuring Bandwidth 111 Configuring Bandwidth Priority 112 Configuring QoS Port-Based Settings 113 Configuring CoS Settings 114 Configuring DSCP
Contents Configuring Date and Time Settings 128 Backing Up and Restoring the System 129 Backing Up the Configuration Settings 130 Restoring the Configuration Settings 131 Copying the Configuration Settings 131 Generating an Encryption Key 132 Upgrading Firmware or Change the Language 132 Restarting the Cisco RV110W 134 Restoring the Factory Defaults 134 Running the Setup Wizard 134 Chapter 8: Viewing the Cisco RV110W Status 136 Viewing the Dashboard 137 Viewing the System Summary 1
1 Introduction This chapter provides information to familiarize you with the product features, guide you through the installation process, and get started using the browser-based Device Manager.
1 Introduction Product Overview LAN Ethernet Interfaces The Cisco RV110W provides four full-duplex 10/100 Fast Ethernet LAN interfaces that can connect up to four devices. You can connect a Cisco Small Business switch to one of the available ports to expand your network as needed. Wireless Access Point The Cisco RV110W wireless access point supports the 802.11n standard with MIMO technology, which multiplies the effective data rate.
1 Introduction Getting to Know the Cisco RV110W Virtual Networks The Cisco RV110W also supports multiple Service Set Identifiers (SSIDs) for the use of virtual networks (up to four separate virtual networks), with 802.1Q-based VLAN support for traffic separation. Configuration and Administration With the Cisco RV110W embedded web server, you can configure the Cisco RV110W settings using the browser-based Device Manager. The Cisco RV110W supports Internet Explorer, Firefox, and Safari web browsers.
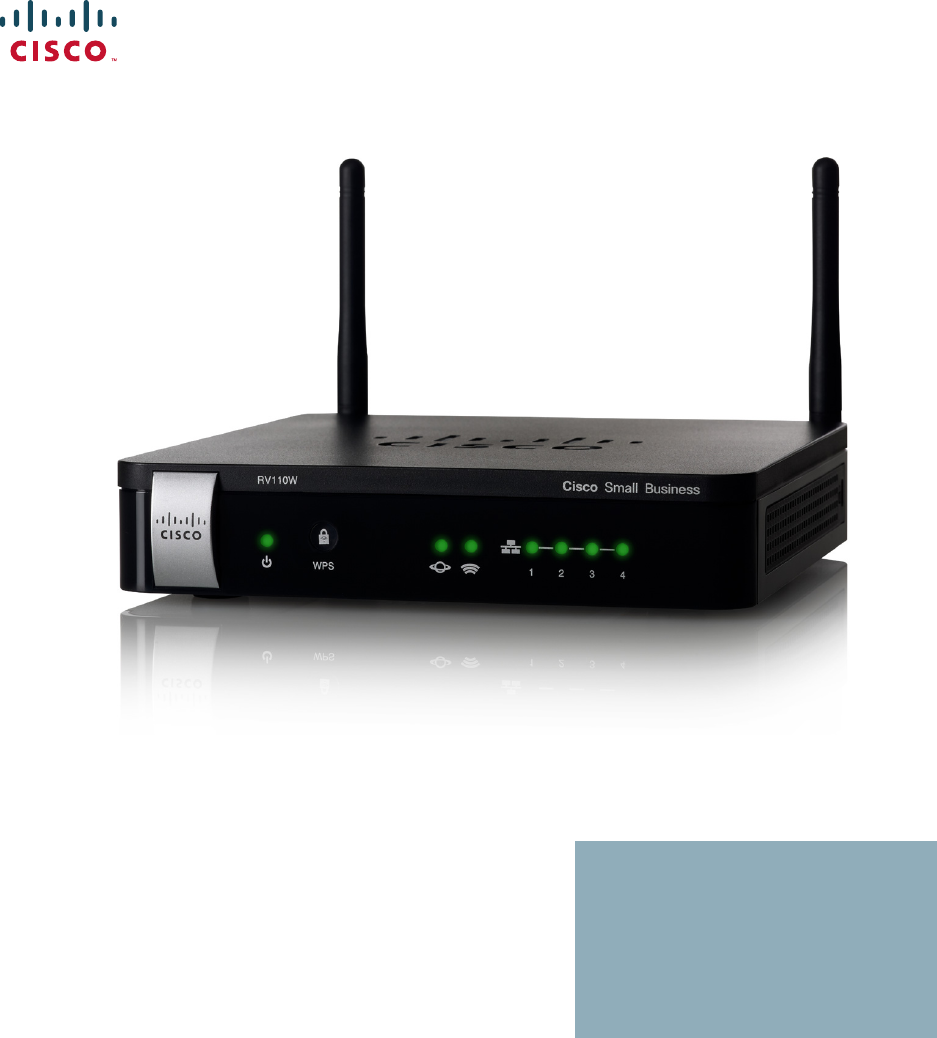
1 Introduction Getting to Know the Cisco RV110W Power The Power light is green to indicate the unit is powered on. The light flashes green when the power is coming on. WAN The WAN (Internet) light is green when the Cisco RV110W is connected to the Internet through your cable or DSL modem. The light is off when the Cisco RV110W is not connected to the Internet. The light flashes green when it is sending or receiving data The Wireless light is green when the wireless module is enabled.
1 Introduction Getting to Know the Cisco RV110W Back Panel RESET If the Cisco RV110W has problems connecting to the Internet, press the RESET button for at least 3 but no more than 10 seconds with a paper clip or similar object. This is similar to pressing the reset button on your PC to reboot it. If you are experiencing extreme problems with the Cisco RV110W and have tried all other troubleshooting measures, press and hold in the RESET button for more than 10 seconds.
1 Introduction Installing the Cisco RV110W Installing the Cisco RV110W Placement Tips • Ambient Temperature—To prevent the firewall from overheating, do not operate it in an area that exceeds an ambient temperature of 104°F (40°C). • Air Flow—Be sure that there is adequate air flow around the firewall. • Mechanical Loading—Be sure that the firewall is level and stable to avoid any hazardous conditions. Place the Cisco RV110W horizontally on a flat surface so that it sits on its rubber feet.
1 Introduction Connecting the Equipment STEP 3 Connect one end of a different Ethernet cable to one of the LAN (Ethernet) ports on the back of the unit. (In this example, the LAN 1 port is used.) Connect the other end to an Ethernet port on the PC that you will use to run the web-based Setup Wizard and Device Manager. STEP 4 Power on the cable or DSL modem and wait until the connection is active. STEP 5 Connect the power adapter to the Cisco RV110W power port (12VDC).
1 Introduction Using the Setup Wizard STEP 6 Plug the other end of the adapter into an electrical outlet. You may need to attach a specific plug (supplied) for your country. STEP 7 On the Cisco RV110W, push the POWER button in to turn on the firewall. The power light on the front panel is green when the power adapter is connected properly and the unit is turned on. Using the Setup Wizard The Setup Wizard and Device Manager are supported on Microsoft Internet Explorer 6.0 or later, Mozilla Firefox 3.
Introduction Using the Getting Started Page 1 The default user name is cisco. The default password is cisco. Passwords are case sensitive. STEP 5 Click Log In. The Setup Wizard starts. STEP 6 Follow the on-screen instructions to set up the Cisco RV110W. The Setup Wizard tries to automatically detect and configure your connection. If it cannot, the Setup Wizard may ask you for information about your Internet connection. You may need to contact your ISP to obtain this information.
1 Introduction Using the Getting Started Page Initial Settings Change Default Administrator Password Click to open the Users page where you can change the administrator password. See Configuring User Accounts. Launch Setup Wizard Click to launch the Setup Wizard. Configure WAN Settings Click to open the Internet Setup page. See Configuring the WAN Settings. Configure LAN Settings Click this link to open the LAN Configuration page. See Configuring the LAN Settings.
1 Introduction Using the Getting Started Page Other Resources Support Click to open the Cisco support page. Forums Click to visit Cisco online support forums. Navigating through the Pages Use the navigation tree in the left pane to open the configuration pages. Click a menu item on the left panel to expand it. Under it, click a menu name to perform an action or display a sub-menu.
Introduction Using the Getting Started Page 1 Saving Changes When you finish making changes on a configuration page, click Save to save the changes, or click Cancel to undo your changes. Viewing the Help Files To view more information about a configuration page, click the Help link near the top right corner of the page.
1 Introduction Verifying the Hardware Installation Configuration Next Steps Although the Setup Wizard automatically configures the Cisco RV110W, we recommend that you change some default settings to provide better security and performance. In addition, you may need to manually configure some settings. A suggested outline of steps follows: 1. Change the idle timeout value—By default, The Device Manager logs you out after 10 minutes of inactivity.
Introduction Connecting to Your Wireless Network 1 Connecting to Your Wireless Network To connect a device (such as a computer) to your wireless network, configure the wireless connection on the device with the wireless security information you configured for the Cisco RV110W by using the Setup Wizard. The following steps are provided as an example; you may need to configure your device differently. For instructions that are specific to your device, consult its documentation.
2 Configuring Networking This chapter describes how to configure the Cisco RV110W network settings. • Configuring the WAN Settings • Configuring the LAN Settings • Cloning the MAC Address • Configuring Routing • Port Management • Configuring Dynamic DNS • Configuring the IP Mode • Configuring IPv6 Configuring the WAN Settings Configuring WAN properties for an IPv4 network differs depending on which type of Internet connection you have.
2 Configuring Networking Configuring the WAN Settings STEP 3 (Optional) To configure the optional settings, see Configuring Optional Settings. STEP 4 Click Save. Configuring Static IP If your ISP assigned you a permanent IP address, perform the following steps to configure your WAN settings: STEP 1 Choose Networking > WAN. STEP 2 From the Internet Connection Type drop-down menu, choose Static IP. STEP 3 Enter this information: Internet IP Address Enter the IP address of the WAN port.
2 Configuring Networking Configuring the WAN Settings Username Enter your username assigned to you by the ISP. Password Enter your password assigned to you by the ISP. Connect on Demand Select this option if your ISP charges based on the amount of time that you are connected. When you select this option, the Internet connection is on only when traffic is present. If the connection is idle— that is, no traffic is flowing—the connection is closed.
2 Configuring Networking Configuring the WAN Settings Configuring PPTP To configure the PPTP settings: STEP 1 Choose Networking > WAN. STEP 2 From the Internet Connection Type drop-down menu, choose PPTP. STEP 3 Enter this information: Internet IP Address Enter the IP address of the WAN port. Subnet mask Enter subnet mask of the WAN port. Default Gateway Enter the IP address of the default gateway. PPTP Server Enter the IP address of the PPTP server.
2 Configuring Networking Configuring the WAN Settings Keep alive When you select this option, the Internet connection is always on. In the redial period field, enter the number of seconds after which the Cisco RV110W attempts to reconnect if it is disconnected. Authentication Type Choose the authentication type: Auto-negotiation—The server sends a configuration request specifying the security algorithm set on it.
2 Configuring Networking Configuring the WAN Settings STEP 3 Enter this information: Internet IP Address Enter the IP address of the WAN port. Subnet mask Enter subnet mask of the WAN port. Default Gateway Enter the IP address of the default gateway. L2TP Server Enter the IP address of the L2TP server. Username Enter your username assigned to you by the ISP. Password Enter your password assigned to you by the ISP.
2 Configuring Networking Configuring the WAN Settings Keep alive When you select this option, the Internet connection is always on. In the redial period field, enter the number of seconds after which the Cisco RV110W attempts to reconnect if it is disconnected. Authentication Type Choose the authentication type: Auto-negotiation—The server sends a configuration request specifying the security algorithm set on it.
2 Configuring Networking Configuring the LAN Settings MTU The Maximum Transmit Unit (MTU) is the size of the largest packet that can be sent over the network. The standard MTU value for Ethernet networks is usually 1500 bytes. For PPPoE connections, the value is 1492 bytes. Unless a change is required by your ISP, Cisco recommends that you choose Auto. The default MTU size is 1500 bytes. If your ISP requires a custom MTU setting, choose Manual and enter the MTU size. Size Enter the MTU size.
2 Configuring Networking Configuring the LAN Settings Changing the Default Cisco RV110W IP Address To configure the default LAN IP address of the Cisco RV110W: STEP 1 Choose Networking > LAN > LAN Configuration. STEP 2 In the IPv4 section, enter this information: VLAN Choose the VLAN number from the drop-down menu. Local IP Address Enter the LAN IP address of the Cisco RV110W. Make sure the address is not in use by another device.
2 Configuring Networking Configuring the LAN Settings Configuring DHCP By default, the Cisco RV110W functions as a DHCP server to the hosts on the Wireless LAN (WLAN) or LAN network, assigns IP addresses, and provides DNS server addresses. With DHCP enabled, the Cisco RV110W IP address serves as the gateway address to your LAN. The Cisco RV110W assigns IP addresses to network devices on the LAN from a pool of addresses.
2 Configuring Networking Configuring the LAN Settings STEP 4 If you selected Enable, enter this information: Starting IP Address Enter the first address in the IP address pool. Any new DHCP client joining the LAN is assigned an IP address in this range (the ending IP address in the pool is determined by the value you enter in the Maximum Number of DHCP Users field). Maximum Number of DHCP Users Enter the maximum number of DHCP clients.
2 Configuring Networking Configuring the LAN Settings To create a VLAN: STEP 1 Choose Networking > LAN > VLAN Membership. STEP 2 Click Add Row. STEP 3 Enter this information: VLAN ID Enter the numerical VLAN ID to assign to endpoints in the VLAN membership. The number you enter must be between 3 to 4094. VLAN ID 1 is reserved for the default VLAN, which is used for untagged frames received on the interface. VLAN IDs 1 and 2 are reserved and cannot be used.
2 Configuring Networking Configuring the LAN Settings Configuring Static DHCP You can configure the Cisco RV110W to assign a specific IP address to a device with a specific MAC address. To configure static DHCP: STEP 1 Choose Networking > LAN > Static DHCP. STEP 2 From the VLAN drop-down menu, choose a VLAN number. STEP 3 Click Add Row. STEP 4 Enter this information: Description Enter a description of the client. IP Address Enter the IP address of the device.
Configuring Networking Configuring the LAN Settings 2 Viewing DHCP Leased Clients You can view a list of endpoints on the network (identified by Host Name, IP address, or MAC address) and see the IP addresses assigned to them by the DHCP server. The VLAN of the endpoints is also displayed. To view the DHCP clients, choose Networking > LAN > DHCP Leased Clients. For every VLAN defined on the Cisco RV110W, a table displays a list of the clients associated with the VLAN.
2 Configuring Networking Configuring the LAN Settings STEP 3 From the VLAN drop-down menu, choose the ID of the VLAN where DMZ is enabled. STEP 4 In the Host IP Address field, enter the IP address of the DMZ host. The DMZ host is the endpoint that receives the redirected packets. STEP 5 Click Save. Configuring RSTP Rapid Spanning Tree Protocol (RSTP) is a network protocol prevents loops in the network and dynamically reconfigures which physical links should forward frames.
2 Configuring Networking Configuring the LAN Settings Forward Delay The forward delay is the interval after which an interface changes from the blocking to forwarding state. Enter a number from 4 to 30. The default is 15. Force Version Select the default protocol version to use. Select Normal (use RSTP) or Compatible (compatible with old STP). The default is Normal. STEP 3 In the Setting Table, configure the following settings: Protocol Enable Check to enable RSTP on the associated port.
2 Configuring Networking Configuring the LAN Settings STEP 2 Configure this information: Port The port number. Link The port speed. If no device is connected to the port, this field displays Down. Mode Choose from the drop-down menu one of the following port speeds: Flow Control • Auto Negotiation—The Cisco RV110W and the connected device choose a common speed. • 10Mbps Half—10 Mbps in both directions, but only one direction at a time. • 10Mbps Full—10 Mbps in both directions simultaneously.
2 Configuring Networking Cloning the MAC Address Cloning the MAC Address Sometimes, you may need to set the MAC address of the Cisco RV110W WAN port to be the same MAC address as your PC or some other MAC address. This is called MAC address cloning. For example, some ISPs register your computer NIC card MAC address when the service is first installed. When you place a router behind the cable modem or DSL modem, the MAC address from the Cisco RV110W WAN port is not recognized by the ISP.
2 Configuring Networking Configuring Routing Configuring Routing Configure the routing options. Configuring the Operating Mode To configure the Cisco RV110W operating mode: STEP 1 Choose Networking > Routing. STEP 2 In the Operating Mode field, select one of the following options: Gateway (Recommended) Click this button to set the Cisco RV110W to act as a gateway. Keep this default setting if the Cisco RV110W is hosting your network connection to the Internet and is performing the routing functions.
2 Configuring Networking Configuring Routing The router determines the network packets’ route based on the fewest number of hops between the source and the destination. RIP is disabled by default. NOTE RIP is disabled by default on the Cisco RV110W. To configure dynamic routing: STEP 1 Choose Networking > Routing. STEP 2 Configure the following settings: RIP Check Enable to enable RIP. This allows the Cisco RV110W to use RIP to route traffic.
2 Configuring Networking Configuring Routing To configure static routing: STEP 1 Choose Networking > Routing. STEP 2 From the Route Entries drop-down menu, choose a route entry. To delete the route entry, click Delete This Entry. STEP 3 Configure the following settings for the selected route entry: Enter Route Name Enter the name of the route. Destination LAN IP Enter the IP address of the destination LAN. Subnet Mask Enter the subnet mask of the destination network.
2 Configuring Networking Viewing the Routing Table Viewing the Routing Table The routing table contains information about the topology of the network immediately around it. To view the routing information on your network, choose Networking > Routing Table and choose one of the following: • Show IPv4 Routing Table—The routing table is displayed with the fields configured in the Networking > Routing page.
2 Configuring Networking Configuring the IP Mode Password Enter the password of the DDNS account. Verify Password (TZO.com, DynDNS.com, and noip.com) Reenter the password of the DDNS account. Host Name (DynDNS.com, 3322.org, and noip.com) Enter the host name of the DDNS server. Domain Name (TZO.com) Enter the name of the domain that is used to access the network. Internet IP Address (Read-only) The Internet IP address of the Cisco RV110W.
2 Configuring Networking Configuring IPv6 LAN:IPv6, WAN:IPv6 Choose this option to use IPv6 in the LAN and WAN ports. LAN:IPv4+IPv6, WAN:IPv4 Choose this option to use IPv4 and IPv6 in the LAN ports and IPv4 in the WAN ports. LAN:IPv4+IPV6, WAN:IPv4+IPv6 Choose this option to use IPv4 and IPv6 in both the LAN and WAN ports. LAN:IPv4, WAN:IPv6 Choose this option to use IPv4 in the LAN and IPv6 in the WAN ports.
2 Configuring Networking Configuring IPv6 Configuring DHCPv6 If your ISP provides you with a dynamically-assigned address, configure the Cisco RV110W to use be a DHCPv6 client. To configure the Cisco RV110W to be a DHCPv6 client: STEP 1 Choose Networking > IPv6 > IPv6 WAN Configuration. STEP 2 In the WAN Connection Type field, select Automatic Configuration-DHCPv6. STEP 3 Click Save.
2 Configuring Networking Configuring IPv6 Static DNS 1 Enter the IP address of the primary DNS server on the ISP IPv6 network. Static DNS 2 Enter the IP address of the secondary DNS server on the ISP IPv6 network. STEP 4 Click Save. Configuring PPPoE IPv6 Settings If you choose this option, your IPv6 WAN PPPoE settings must match your IPv4 WAN PPPoE settings. See Configuring PPPoE. To configure the Cisco RV110W PPPoE IPv6 settings: STEP 1 Choose Networking > IPv6 > IPv6 WAN Configuration.
2 Configuring Networking Configuring IPv6 Authentication Type Choose the authentication type: Auto-negotiation—The server sends a configuration request specifying the security algorithm set on it. Then, the Cisco RV110W sends back authentication credentials with the security type sent earlier by the server. PAP—The Cisco RV110W uses the Password Authentication Protocol (PAP) to connect to the ISP.
2 Configuring Networking Configuring IPv6 Default IPv6 Gateway Enter the IP address of the default IPv6 gateway. Static DNS 1 If you chose static address mode, enter the IP address of the primary DNS server. Static DNS 2 If you chose static address mode, enter the IP address of the secondary DNS server. STEP 4 Click Save. Configuring IPv6 LAN Settings In the IPv6 mode, the LAN DHCP server is enabled by default (similar to the IPv4 mode).
2 Configuring Networking Configuring IPv6 STEP 2 Enter the following information to configure the IPv6 LAN address: IPv6 Address Enter the IPv6 address of the Cisco RV110W. The default IPv6 address for the gateway is fec0::1 (or FEC0:0000:0000:0000:0000:0000:0000:0001). You can change this 128-bit IPv6 address based on your network requirements. IPv6 Prefix Length Enter the IPv6 prefix length. The IPv6 network (subnet) is identified by the initial bits of the address called the prefix.
2 Configuring Networking Configuring IPv6 Server Preference Enter the server preference level of this DHCP server. DHCP advertise messages with the highest server preference value to a LAN host are preferred over other DHCP server advertise messages. The default is 255. Static DNS 1 Enter the IPv6 address of the primary DNS server on the ISP IPv6 network. Static DNS 2 Enter the IPv6 address of the secondary DNS server on the ISP IPv6 network. Client Lease Time Enter the client lease time.
2 Configuring Networking Configuring IPv6 STEP 3 Enter this information: Start Address Enter the starting IPv6 address of the pool. End Address Enter the ending IPv6 address of the pool. IPv6 Prefix Length Enter the prefix length. This field determines the number of common initial bits in the network addresses. STEP 4 Click Save. To edit the settings of a pool, select the pool and click Edit. To delete a selected pool, click Delete. Click Save to apply changes.
2 Configuring Networking Configuring IPv6 STEP 3 Enter this information: Name Enter the route name. Destination Enter the IPv6 address of the destination host or network for this route. Prefix Length Enter the number of prefix bits in the IPv6 address that define the destination subnet. Gateway Enter the IPv6 address of the gateway through which the destination host or network can be reached. Interface Choose the interface for the route from the drop-down menu: LAN, WAN, or 6to4.
Configuring Networking Configuring IPv6 2 Configuring Routing (RIPng) RIP Next Generation (RIPng) is a routing protocol based on the distance vector (D-V) algorithm. RIPng uses UDP packets to exchange routing information through port 521. RIPng uses a hop count to measure the distance to a destination. The hop count is referred to as metric, or cost. The hop count from a router to a directly-connected network is 0. The hop count between two directly-connected routers is 1.
2 Configuring Networking Configuring IPv6 STEP 5 Enter the following information: • IPv6 Prefix • IPv6 Prefix Length • Border Relay • IPv4 Mask Length. STEP 6 Click Save. 4 to 6 Tunneling IPv4 to IPv6 tunneling (4-to-6 tunneling) allows IPv4 packets to be transmitted over an IPv6 network. To configure 4-to-6 tunneling: STEP 1 Select Networking > IPv6 > Tunneling. STEP 2 In the 4 to 6 Tunneling field, check Enable. STEP 3 Enter the local WAN IPv6 address on the Cisco RV110W.
2 Configuring Networking Configuring IPv6 Configuring Router Advertisement The Router Advertisement Daemon (RADVD) on the Cisco RV110W listens for router solicitations in the IPv6 LAN and responds with router advertisements as required. This is stateless IPv6 auto configuration, and the Cisco RV110W distributes IPv6 prefixes to all nodes on the network. To configure the RADVD: STEP 1 Choose Networking > IPv6 > Router Advertisement.
2 Configuring Networking Configuring IPv6 Router Preference Choose low, medium, or high from the drop-down menu. The default is medium. The router preference provides a preference metric for default routers. The low, medium and high values are signaled in unused bits in RA messages. This extension is backward compatible, both for routers (setting the router preference value) and hosts (interpreting the router preference value). These values are ignored by hosts that do not implement router preference.
2 Configuring Networking Configuring IPv6 STEP 3 Enter this information: IPv6 Prefix Type Choose one of the following types from the drop-down menu: 6to4—6to4 is a system that allows IPv6 packets to be transmitted over an IPv4 network. It is used when an end user wants to connect to the IPv6 Internet using their existing IPv4 connection Global/Local—A locally unique IPv6 address that you can use in private IPv6 networks or a globally unique IPv6 Internet address.
Configuring Networking Configuring IPv6 Cisco RV110W Administration Guide 2 59
3 Configuring the Wireless Network This chapter describes how to configure the Cisco RV110W wireless network. • Wireless Security • Cisco RV110W Wireless Networks • Configuring Basic Wireless Settings • Configuring Advanced Wireless Settings • Configuring WDS • Configuring WPS Wireless Security Wireless networks are convenient and easy to install, so small businesses and homes with high-speed Internet access are adopting them at a rapid pace.
Configuring the Wireless Network Wireless Security 3 When choosing names, do not use personal information (such as your Social Security number) because this information may be available for anyone to see when browsing for wireless networks. • Change the default password. For wireless products such as access points, routers, and gateways, you are asked for a password when you want to change their settings. These devices have a default password. The default password is often cisco.
3 Configuring the Wireless Network Cisco RV110W Wireless Networks • Turn wireless routers, access points, or gateways off when they are not being used (at night, during vacations). • Use strong passphrases that are at least eight characters in length. Combine letters and numbers to avoid using standard words that can be found in the dictionary. General Network Security Guidelines Wireless network security is useless if the underlying network is not secure.
3 Configuring the Wireless Network Configuring Basic Wireless Settings SSID Name ciscosb1 ciscosb2 ciscosb3 ciscosb4 Wireless Isolation with SSID Disabled Disabled Disabled Disabled WMM Enabled Enabled Enabled Enabled WPS Hardware Button Enabled Disabled Disabled Disabled 1. When using the Setup Wizard, select Best Security or Better Security to protect the Cisco RV110W from unauthorized access.
Configuring the Wireless Network Configuring Basic Wireless Settings 3 B/G-Mixed Choose this option if you have Wireless-B and Wireless-G devices in your network. G/N-Mixed Choose this option if you have Wireless-G and Wireless-N devices in your network. STEP 4 If you chose B/G/N-Mixed, N-Only, or G/N Mixed, in the Wireless Band Selection field, select the wireless bandwidth on your network (20MHz or 20/40MHz). If you chose N-Only, you must use WPA2 security on your network.
3 Configuring the Wireless Network Configuring Basic Wireless Settings Editing the Wireless Network Settings The Wireless Table in the Basic Settings page (Wireless > Basic Settings) lists the settings of the four wireless networks supported on the Cisco RV110W. To configure wireless network settings: STEP 1 Check the box for the networks you want to configure. STEP 2 Click the Edit button. STEP 3 Configure these settings: Enable SSID Click On to enable the network.
Configuring the Wireless Network Configuring Basic Wireless Settings 3 Configuring the Security Mode You can configure one of the following security modes for wireless networks: Configuring WEP The WEP security mode offers weak security with a basic encryption method that is not as secure as WPA. WEP may be required if your network devices do not support WPA. NOTE If you do not have to use WEP, we recommend that you use WPA2. If you are using the Wireless-N only mode, you must use WPA2.
Configuring the Wireless Network Configuring Basic Wireless Settings 3 STEP 7 (Optional) In the Passphrase field, enter an alphanumeric phrase (longer than eight characters for optimal security) and click Generate Key to generate four unique WEP keys in the WEP Key fields below. If you want to provide your own key, enter it directly in the Key 1 field (recommended).
Configuring the Wireless Network Configuring Basic Wireless Settings 3 STEP 3 In the Select SSID field, choose the SSID for which to configure the security settings. STEP 4 From the Security Mode menu, choose one of the three WPA Personal options. STEP 5 (WPA-Personal only) In the Encryption field, choose one of the following options: • TKIP/AES—Choose TKIP/AES to ensure compatibility with older wireless devices that may not support AES. • AES—This option is more secure.
Configuring the Wireless Network Configuring Basic Wireless Settings 3 STEP 3 In the Select SSID field, choose the SSID for which to configure the security settings. STEP 4 From the Security Mode menu, choose one of the three WPA Enterprise options. STEP 5 (WPA-Enterprise only) In the Encryption field, choose one of the following options: • TKIP/AES—Choose TKIP/AES to ensure compatibility with older wireless devices that may not support AES. • AES—This option is more secure.
Configuring the Wireless Network Configuring Basic Wireless Settings 3 STEP 4 In the Connection Control field, choose the type of access to the wireless network: • Prevent—Select this option to prevent devices with the MAC addresses listed in the MAC Address Table from accessing the wireless network. This option is selected by default. • Permit—Select this option to allow devices with the MAC addresses listed in the MAC Address Table to access the wireless network.
Configuring the Wireless Network Configuring Basic Wireless Settings 3 Configuring the Wireless Guest Network The Cisco RV110W supports a wireless “guest” network that is separated from the other wireless SSIDs, or networks, on the router. This router provides secure guest access that is isolated from the rest of the network, and can be configured to restrict access time and bandwidth used.
Configuring the Wireless Network Configuring Basic Wireless Settings 3 STEP 6 Choose the VLAN you created for the guest network (or, if you have not yet created a network, select Add New VLAN). STEP 7 Click Save. The system notifies you that the physical Ethernet ports on the Cisco RV110W are excluded from the VLAN that you have assigned to the guest network. In addition, Wireless Isolation with SSID and WMM are automatically enabled.
3 Configuring the Wireless Network Configuring Advanced Wireless Settings Configuring Advanced Wireless Settings Advanced wireless settings should be adjusted only by an expert administrator; incorrect settings can reduce wireless performance. To configure advanced wireless settings: STEP 1 Choose Wireless > Advanced Settings. The Advanced Settings page appears.
Configuring the Wireless Network Configuring Advanced Wireless Settings 3 Transmission Rate The rate of data transmission should be set depending on the speed of your wireless network. You can select from a range of transmission speeds, or you can select Auto to have the Cisco RV110W automatically use the fastest possible data rate and enable the Auto-Fallback feature. Auto-Fallback will negotiate the best possible connection speed between the Cisco RV110W and a wireless client. The default is Auto.
Configuring the Wireless Network Configuring Advanced Wireless Settings DTIM Interval 3 This value, between 1 and 255, indicates the interval of the Delivery Traffic Indication Message (DTIM). A DTIM field is a countdown field informing clients of the next window for listening to broadcast and multicast messages. When the Cisco RV110W has buffered broadcast or multicast messages for associated clients, it sends the next DTIM with a DTIM Interval value.
Configuring the Wireless Network Configuring WDS 3 Configuring WDS A Wireless Distribution System (WDS) is a system that enables the wireless interconnection of access points in a network. It allows a wireless network to be expanded using multiple access points without the need for a wired backbone to link them.
Configuring the Wireless Network Configuring WPS 3 Configuring WPS You can configure WPS on the Cisco RV110W to allow WPS-enabled devices to more easily connect to the wireless network. To configure WPS on client devices: STEP 1 Choose Wireless > WPS. The Wi-Fi Protected Setup page appears STEP 2 From the SSID drop-down menu, choose the wireless network on which to enable WPS. STEP 3 In the WPS field, check Enable to enable WPS. To disable WPS, uncheck the box.
Configuring the Wireless Network Configuring WPS 3 WPS Method 2 Use this method if the client device has a WPS PIN number. STEP 1 On the WPS page, enter the PIN number in the field. STEP 2 Click Register. STEP 3 After configuration is completed, click OK. Refer to your client device or its documentation for further instructions on setting up your client device. WPS Method 3 If the client device requires a PIN number from the router, use the number listed in item 3 on the WPS page.
4 Configuring the Firewall This chapter describes how to configure the firewall properties of the RV110W.
4 Configuring the Firewall Cisco RV110W Firewall Features • Rules for allowing or blocking inbound and outbound Internet traffic for specified services on specified schedules. • MAC addresses of devices whose inbound access to your network the router should block. • Port triggers that signal the router to allow or block access to specified services as defined by port number. • Reports and alerts that you want the router to send to you.
4 Configuring the Firewall Configuring Basic Firewall Settings Configuring Basic Firewall Settings To configure basic firewall settings: STEP 1 Choose Firewall > Basic Settings. STEP 2 Configure the following firewall settings: Firewall Check Enable to configure firewall settings. DoS Protection Check Enable to enable Denial of Service protection. Block WAN Request Blocks ping requests to the Cisco RV110W from the WAN.
Configuring the Firewall Configuring Basic Firewall Settings Block Java 4 Check to block Java applets. Java applets are small programs embedded in web pages that enable dynamic functionality of the page. A malicious applet can be used to compromise or infect computers. Enabling this setting blocks Java applets from being downloaded. Click Auto to automatically block Java, or click Manual and enter a specific port on which to block Java. Block Cookies Check to block cookies.
4 Configuring the Firewall Configuring Basic Firewall Settings Block Proxy Check to block proxy servers. A proxy server (or proxy) allows computers to route connections to other computers through the proxy, thus circumventing certain firewall rules. For example, if connections to a specific IP address are blocked by a firewall rule, the requests can be routed through a proxy that is not blocked by the rule, rendering the restriction ineffective. Enabling this feature blocks proxy servers.
4 Configuring the Firewall Configuring Basic Firewall Settings Remote Management Port Enter the port on which remote access is allowed. The default port is 443. When remotely accessing the router, you must enter the remote management port as part of the IP address. For example: https://:, or https:// 168.10.1.11:443 ! CAUTION When remote management is enabled, the router is accessible to anyone who knows its IP address.
Configuring the Firewall Managing Firewall Schedules 4 Managing Firewall Schedules You can create firewall schedules to apply firewall rules on specific days or at specific times of the day. Adding or Editing a Firewall Schedule To create or edit a schedule: STEP 1 Choose Firewall > Schedule Management. STEP 2 Click Add Row. STEP 3 In the Name field, enter a unique name to identify the schedule. This name is available on the Firewall Rule Configuration page in the Select Schedule list.
4 Configuring the Firewall Configuring Access Rules To create a custom service: STEP 1 Choose Firewall > Service Management. STEP 2 Click Add Row. STEP 3 In the Service Name field, enter the service name for identification and management purposes. STEP 4 In the Protocol field, choose the Layer 4 protocol that the service uses from the drop-down menu: • TCP • UDP • TCP & UDP • ICMP STEP 5 In the Start Port field, enter the first TCP or UDP port of the range that the service uses.
Configuring the Firewall Configuring Access Rules 4 To configure the default outbound policy: STEP 1 Choose Firewall > Access Rules. STEP 2 Choose Allow or Deny. Note: Ensure that IPv6 support is enabled on the Cisco RV110W to configure an IPv6 firewall. See Configuring IPv6. STEP 3 Click Save. Reordering Access Rules The order in which access rules are displayed in the access rules table indicates the order in which the rules are applied.
4 Configuring the Firewall Configuring Access Rules STEP 3 In the Connection Type field, choose the source of originating traffic: • Outbound (LAN > WAN)—Choose this option to create an outbound rule. • Inbound (WAN > LAN)—Choose this option to create an inbound rule. • Inbound (WAN > DMZ)—Choose this option to create an inbound rule. STEP 4 From the Action drop-down menu, choose the action: • Always Block—Always block the selected type of traffic.
4 Configuring the Firewall Configuring Access Rules • Telnet Secondary • Telnet SSL • Voice (SIP) STEP 6 (Optional) Click Configure Services to go to the Service Management page to configure the services before applying access rules to them. See Configuring Services Management for more information. STEP 7 In the Source IP field, select the users to which the firewall rule applies: • Any—The rule applies to traffic originating on any host in the local network.
4 Configuring the Firewall Creating an Internet Access Policy Creating an Internet Access Policy The Cisco RV110W supports several options for blocking Internet access. You can block all Internet traffic, block Internet traffic to certain PCs or endpoints, or block access to Internet sites by specifying keywords to block. If these keywords are found in the site's name (for example, web site URL or newsgroup name), the site is blocked.
4 Configuring the Firewall Configuring Port Forwarding STEP 7 (Optional) Apply the access policy to specific PCs to allow or block traffic coming from specific devices: a. In the Apply Access Policy to the Following PCs table, click Add Row. b. From the Type drop-down menu, choose how to identify the PC (by MAC address, by IP address, or by providing a range of IP addresses). c.
Configuring the Firewall Configuring Port Forwarding 4 NOTE Port forwarding is not appropriate for servers on the LAN, since there is a dependency on the LAN device making an outgoing connection before incoming ports are opened. Some applications require that, when external devices connect to them, they receive data on a specific port or range of ports in order to function properly. The router must send all incoming data for that application only on the required port or range of ports.
Configuring the Firewall Configuring Port Forwarding 4 Configuring Port Range Forwarding To add a port range forwarding rule: STEP 1 Choose Firewall > Port Range Forwarding. STEP 2 In the Application field, enter the name of the application for which to configure port forwarding. STEP 3 In the External Port field, specify the port number that will trigger this rule when a connection request from outgoing traffic is made.
Configuring the Firewall Configuring Port Forwarding 4 Some applications require that, when external devices connect to them, they receive data on a specific port or range of ports in order to function properly. The router must send all incoming data for that application only on the required port or range of ports. The gateway has a list of common applications and games with corresponding outbound and inbound ports to open.
5 Configuring VPN This chapter describes how to configure VPN and security for the Cisco RV110W. • VPN Tunnel Types, page 95 • VPN Clients, page 96 • Configuring Certificate Management, page 108 • Configuring VPN Passthrough, page 109 VPN Tunnel Types A VPN provides a secure communication channel (“tunnel”) between two gateway routers or a remote worker and a gateway router. You can create different types of VPN tunnels, depending on the needs of your business.
5 Configuring VPN VPN Clients Remote Access with Cisco QuickVPN For quick setup with basic VPN security settings, distribute Cisco QuickVPN software to your users, who can then securely access your network resources. Use this option if you want to simplify the VPN setup process. You do not have to configure VPN policies. Remote users can connect securely with the Cisco QuickVPN client and an Internet connection. 1. Add the users on the VPN > VPN Clients page, in the VPN Client Setting Table.
5 Configuring VPN VPN Clients To configure the PPTP VPN service: STEP 1 Choose VPN > VPN Clients. STEP 2 Do the following: PPTP Server Check to enable the PPTP server. IP Address for PPTP Server Enter the IP address of the PPTP server. IP Address for PPTP Clients Enter the IP address range of PPTP clients. MPPE Encryption Check the Enable box to enable MPPE encryption. Microsoft Point-to-Point Encryption (MPPE) is used when users set up and use a PPTP VPN client to connect to the Cisco RV110W.
5 Configuring VPN VPN Clients STEP 2 Enter this information: Enable Check to enable the user. Username Enter the username of the PPTP user (4 to 32 characters). Password Enter the password (4 to 32 characters). Protocol Choose PPTP from the drop-down menu. STEP 3 Click Save. To edit the settings of a PPTP user, check its box and click Edit. When you are done, click Save. To delete a PPTP user, check its box and click Delete.
5 Configuring VPN VPN Clients To delete a QuickVPN user, check its box and click Delete. Then, click Save. For more information about QuickVPN, see Appendix A, “Using Cisco QuickVPN.” Importing VPN Client Settings You can import VPN client setting files that contain the username and passwords of clients in a Comma Separated Value (CSV) text file. You can use a program such as Microsoft Excel to create a CSV file containing the VPN client settings.
Configuring VPN Configuring Basic VPN Settings (Site-to-Site VPN) 5 Configuring Basic VPN Settings (Site-to-Site VPN) The Cisco RV110W supports Site-to-Site VPN for a single gateway-to-gateway VPN tunnel. In this configuration, the Cisco RV110W creates a secure connection to another VPN-enabled router. For example, you can configure the Cisco RV110W at a branch site to connect to the router at the corporate site, so that the branch site can securely access the corporate network.
Configuring VPN Configuring Basic VPN Settings (Site-to-Site VPN) • 5 Local LAN (Local Network) Subnet Mask—Enter the private network (LAN) subnet mask of the local network (Cisco RV110W). Note: The remote WAN and remote LAN IP addresses cannot exist on the same subnet. For example, a remote LAN IP address of 192.168.1.100 and a local LAN IP address of 192.168.1.115 would cause conflict when traffic is routed over the VPN.
Configuring VPN Configuring Advanced VPN Parameters 5 Configuring Advanced VPN Parameters The Advanced VPN Setup page allows you to configure advanced VPN parameters, such as IKE and other VPN policies. These policies control how the Cisco RV110W initiates and receives VPN connections with other endpoints. Managing IKE Policies The Internet Key Exchange (IKE) protocol dynamically exchanges keys between two IPsec hosts.
Configuring VPN Configuring Advanced VPN Parameters 5 Managing VPN Policies To manage VPN policies: STEP 1 Choose VPN > IPsec > Advanced VPN Setup. STEP 2 In the VPN Policy Table, checking the box in the VPN connection row allows you to perform the following tasks: • Edit—Edit properties of the VPN policy. See Adding or Editing VPN Policies. • Enable—Enable the policy. • Disable—Disable the policy. • Delete—Delete the policy. • Add Row—Add a VPN policy. See Adding or Editing VPN Policies.
Configuring VPN Configuring Advanced VPN Parameters 5 In the IKE SA Parameters section, the Security Association (SA) parameters define the strength and mode for negotiating the SA.
Configuring VPN Configuring Advanced VPN Parameters - 5 DPD Timeout—Enter the maximum time that the Cisco RV110W should wait to receive a response to the DPD message before considering the peer to be dead. Adding or Editing VPN Policies To create an Auto VPN Policy, you need to first create an IKE policy and then add the corresponding Auto Policy for that IKE Policy. When adding or editing a VPN policy, you can configure the following settings: • Policy Name—Enter a unique name to identify the policy.
Configuring VPN Configuring Advanced VPN Parameters 5 the Subnet Mask field. The field automatically displays a default subnet address based on the IP address. IMPORTANT: Make sure that you avoid using overlapping subnets for remote or local traffic selectors. Using these subnets would require adding static routes on the router and the hosts to be used. For example, a combination to avoid would be: Local Traffic Selector: 192.168.1.0/24 Remote Traffic Selector: 192.168.0.
Configuring VPN Configuring Advanced VPN Parameters • • • 5 Integrity Algorithm—Select the algorithm used to verify the integrity of the data: - MD5 - SHA-1 - SHA2-256 Key-In—Enter the integrity key (for ESP with Integrity-mode) for the inbound policy. The length of the key depends on the algorithm chosen: - MD5—16 characters - SHA-1—20 characters - SHA2-256—32 characters Key-Out—Enter the integrity key (for ESP with Integrity-mode) for the outbound policy.
Configuring VPN Configuring Certificate Management 5 Configuring Certificate Management The Cisco RV110W uses digital certificates for IPsec VPN authentication and SSL validation (for HTTPS). You can generate and sign your own certificates using functionality available on the Cisco RV110W. Generating a New Certificate You can generate a new certificate to replace the existing certificate on the Cisco RV110W. To generate a certificate: STEP 1 Choose VPN > Certificate Management..
Configuring VPN Configuring VPN Passthrough 5 Exporting Certificates for Admin The certificate for administrator contains the private key and should be stored in a safe place as a backup. If the Cisco RV110W configuration is reset to the factory default settings, this certificate can be imported and restored on the router. To export a certificate for Admin: STEP 1 Choose VPN > Certificate Management.. STEP 2 Click Export for Admin. On a PC, the Device Manager saves the admin.
5 Configuring VPN Configuring VPN Passthrough IPsec Check Enable to allow IP security tunnels to pass through the Cisco RV110W. PPTP Check Enable to allow PPTP tunnels to pass through the Cisco RV110W. L2TP Check Enable to allow Layer 2 Tunneling Protocol (L2TP) tunnels to pass through the Cisco RV110W. STEP 3 Click Save.
6 Configuring Quality of Service (QoS) The Cisco RV110W lets you configure the following Quality of Service (QoS) features: • Configuring Bandwidth Management, page 111 • Configuring QoS Port-Based Settings, page 113 • Configuring CoS Settings, page 114 • Configuring DSCP Settings, page 114 Configuring Bandwidth Management You can use the Cisco RV110W bandwidth management feature to manage the bandwidth of the traffic flowing from the secure network (LAN) to the insecure network (WAN).
6 Configuring Quality of Service (QoS) Configuring Bandwidth Management STEP 3 In the Bandwidth Table, enter the following information for the WAN interface: Upstream The bandwidth (kb/s) used for sending data to the Internet. Downstream The bandwidth (kb/s) used for receiving data from the Internet. STEP 4 Click Save. Configuring Bandwidth Priority In the Bandwidth Priority Table, you can assign priorities to services to manage bandwidth usage.
6 Configuring Quality of Service (QoS) Configuring QoS Port-Based Settings To delete an entry from the table, check the relevant box and click Delete. Then, click Save. To add a new service definition, click the Service Management button. You can define a new service to use for all firewall and QoS definitions. See Configuring Services Management. Configuring QoS Port-Based Settings You can configure QoS settings for every LAN port on the Cisco RV110W.
Configuring Quality of Service (QoS) Configuring CoS Settings 6 To restore the default port-based QoS settings, click Restore Default. Then, click Save. Configuring CoS Settings You can map CoS priority settings to the traffic forwarding queue on the Cisco RV110W. You can use the link to the QoS Port-Based Settings Page to map the CoS priority setting to the QoS queue. To map CoS priority settings to the traffic forwarding queue: STEP 1 Choose QoS > CoS Settings.
Configuring Quality of Service (QoS) Configuring DSCP Settings 6 This maps the DSCP value to the selected QoS queue. STEP 4 Click Save. To restore the default DSCP settings, click Restore Default. Then, click Save.
7 Administering Your Cisco RV110W This chapter describes the administration features of the Cisco RV110W, including user creation, network management, system diagnostics and logs, date and time, and other settings.
7 Administering Your Cisco RV110W Setting Password Complexity Setting Password Complexity The Cisco RV110W can enforce minimum password complexity requirement for password changes. To configure password complexity settings: STEP 1 Choose Administration > Password Strength. STEP 2 In the Password Complexity Settings field, check Enable. STEP 3 Configure password complexity settings: Minimum Password Length Enter the minimum password length (0-64 characters).
7 Administering Your Cisco RV110W Configuring User Accounts Configuring User Accounts The Cisco RV110W supports two user accounts for administering and viewing settings: an administrative user (default user name and password: “cisco”) and a “guest” user (default user name: “guest”). The guest account has read-only access. You can set and change the username and password for both the administrator and guest accounts. To configure the user accounts: STEP 1 Choose Administration > Users.
Administering Your Cisco RV110W Setting the Session Timeout Value 7 Setting the Session Timeout Value The timeout value is the number of minutes of inactivity that are allowed before the Device Manager session is ended. You can configure timeout for the Admin and Guest accounts. To configure session timeout: STEP 1 Choose Administration > Session Timeout. STEP 2 In the Administrator Inactivity Timeout field, enter the number, in minutes, before a session times out due to inactivity.
7 Administering Your Cisco RV110W Configuring Simple Network Management (SNMP) To enable SNMP: STEP 1 Choose Administration > SNMP. STEP 2 Check Enable to enable SNMP. STEP 3 Enter this information: SysContact Enter the name of the contact person for this firewall (for example, admin or John Doe.) SysLocation Enter the physical location of the firewall (for example, Rack #2, 4th Floor.) SysName Enter a name for easy identification of the firewall. STEP 4 Click Save.
7 Administering Your Cisco RV110W Configuring Simple Network Management (SNMP) Security Level Choose the SNMPv3 security level: No Authentication and No Privilege—Doesn't require any Authentication and Privacy. Authentication and No Privilege—Submit only Authentication algorithm and password. Authentication and Privilege—Submit Authentication/privacy algorithm and password. Authentication Algorithm Server Select the type of authentication algorithm (MD5 or SHA).
7 Administering Your Cisco RV110W Using Diagnostic Tools Community Enter the community string to which the agent belongs. Most agents are configured to listen for traps in the Public community. SNMP Version Select the SNMP version: v1, v2c, or v3. STEP 3 Click Save. Using Diagnostic Tools The Cisco RV110W provides several diagnostic tools to help you troubleshoot network problems. • Network Tools • Configuring Port Mirroring Network Tools Use network tools to troubleshoot the network.
Administering Your Cisco RV110W Using Diagnostic Tools 7 Using Traceroute The Traceroute utility displays all the routers present between the destination IP address and this router. The router displays up to 30 hops (intermediate routers) between this router and the destination. To use Traceroute: STEP 1 Choose Administration > Diagnostics > Network Tools. STEP 2 In the IP Address / Domain Name field, enter the IP address to trace. STEP 3 Click Traceroute. The Traceroute results appear.
Administering Your Cisco RV110W Configuring Logging 7 Configuring Port Mirroring Port mirroring monitors network traffic by sending copies of all incoming and outgoing packets from one port to a monitoring port. You can use port mirroring as a diagnostic or debugging tool, especially when fending off an attack or viewing user traffic from LAN to WAN to see if users are accessing information or websites they are not supposed to.
7 Administering Your Cisco RV110W Configuring Logging STEP 4 Configure the following settings: Remote Log Server Enter the IP address of the log server that will collect logs. Log Severity for Local Log and Email Click to choose the severity of logs you want to configure. Note that all log types above a selected log type are automatically included and you cannot deselect them. For example, choosing “error” logs automatically includes emergency, alert, and critical logs in addition to error logs.
7 Administering Your Cisco RV110W Configuring Logging Configuring the E-Mailing of Logs You can configure the Cisco RV110W to send logs by email. We recommend that you set up a separate email account for sending and receiving logs. You must first set up the severity of logs you want to capture; see Configuring Logging Settings. To configure the e-mailing of logs: STEP 1 Choose Administration > Logging > E-mail Settings. STEP 2 To enable the e-mailing of log events, check Enable.
7 Administering Your Cisco RV110W Configuring Logging Authentication with SMTP Server If the SMTP (mail) server requires authentication before accepting connections, choose the type of authentication from the drop-down menu: None, LOGIN, PLAIN, and CRAM-MD5. E-mail Authentication Username Enter the email authentication username (example, logging@companyname.com).
Administering Your Cisco RV110W Configuring Bonjour 7 Configuring Bonjour Bonjour is a service advertisement and discovery protocol. On the Cisco RV110W, Bonjour only advertises the default services configured on the device when Bonjour is enabled. To enable Bonjour: STEP 1 Choose Administration > Bonjour. STEP 2 Check Enable to enable Bonjour. STEP 3 To enable Bonjour for a VLAN listed in the Bonjour Interface Control Table, check the corresponding Enable Bonjour box.
7 Administering Your Cisco RV110W Backing Up and Restoring the System STEP 2 Configure this information: Time Zone Select your time zone, relative to Greenwich Mean Time (GMT). Adjust for Daylight Savings Time If supported for your region, check the Adjust for Daylight Savings Time box. This check box is enabled if you click Auto in the Set Date and Time field below.
7 Administering Your Cisco RV110W Backing Up and Restoring the System ! CAUTION During a restore operation, do not try to go online, turn off the firewall, shut down the PC, or use the firewall until the operation is complete. This should take about a minute. When the test light turns off, wait a few more seconds before using the firewall. Backing Up the Configuration Settings To backup or restore the configuration: STEP 1 Choose Administration > Backup/Restore Settings.
Administering Your Cisco RV110W Backing Up and Restoring the System 7 By default, the file (startup.cfg, mirror.cfg, or backup.cfg) is downloaded in the default Downloads folder; for example, C:\Documents and Settings\admin\My Documents\Downloads\. STEP 4 To clear the selected configuration, click Clear. Restoring the Configuration Settings You can restore a previously-saved configuration file: STEP 1 Choose Administration > Backup/Restore Settings.
Administering Your Cisco RV110W Upgrading Firmware or Change the Language 7 To copy a configuration (for example, to copy a startup configuration to the backup configuration): STEP 1 Choose Administration > Backup/Restore Settings. STEP 2 In the Copy field, choose the source and destination configurations from the drop- down menus. STEP 3 Click Start to Copy. Generating an Encryption Key The router allows you to generate an encryption key to protect the backup files.
Administering Your Cisco RV110W Upgrading Firmware or Change the Language 7 Upgrading the Firmware To update the router with a newer version of the firmware: STEP 1 Choose Administration > Firmware/Language Upgrade. STEP 2 (Optional) Click Download to download the latest version of the firmware. STEP 3 In the File Type field, click the Firmware Image button. STEP 4 Click Browse to locate and select the downloaded firmware.
Administering Your Cisco RV110W Restarting the Cisco RV110W 7 Restarting the Cisco RV110W To restart the router: STEP 1 Choose Administration > Reboot. STEP 2 Click Reboot. Restoring the Factory Defaults ! CAUTION During a restore operation, do not try to go online, turn off the router, shut down the PC, or use the router until the operation is complete. This should take about a minute. When the test light turns off, wait a few more seconds before using the router.
Administering Your Cisco RV110W Running the Setup Wizard Cisco RV110W Administration Guide 7 135
8 Viewing the Cisco RV110W Status This chapter describes how to view real-time statistics and other information about the Cisco RV110W.
Viewing the Cisco RV110W Status Viewing the Dashboard 8 Viewing the Dashboard The Dashboard page provides you with a bird's-eye view of important router information. To view the Dashboard: STEP 1 Choose Status > Dashboard. STEP 2 To display an interactive view of the router back panel, click Show Panel View. The view of the back panel shows you which ports are used (colored in green) and allows you to click the port to obtain information about the connection.
Viewing the Cisco RV110W Status Viewing the Dashboard • Critical • Error • Warning 8 To view the logs, click details. For more information see Viewing Logs. To manage logs, click manage logging. For more information see Configuring Logging Settings. LAN (Local Network) Interface • MAC Address—The MAC address of the router. • IPv4 Address—The local IP address of the router. • IPv6 Address—The local IP address of the router (if IPv6 is enabled).
Viewing the Cisco RV110W Status Viewing the System Summary 8 VPN • QuickVPN Users—The number of QuickVPN users. • PPTP Users—The number of Point-to-Point Tunneling Protocol (PPTP) users. Viewing the System Summary The System Summary page displays a summary of the router settings. To view a summary of system settings: STEP 1 Choose Status > System Summary. STEP 2 Click Refresh to obtain the latest information.
Viewing the Cisco RV110W Status Viewing the System Summary 8 IPv4 Configuration • LAN IP—LAN address of the device. • WAN IP—WAN Address of the device. You can release the current IP address and obtain a new one by clicking Release or Renew. • Gateway—The IP address of the gateway to which the Cisco RV110W is connected (for example, the cable modem). • Mode—Displays Gateway if NAT is enabled, or Router. • DNS 1—Primary DNS server IP address of the WAN port.
Viewing the Cisco RV110W Status Viewing the Wireless Statistics • 8 SSID 4—The public name of the fourth wireless network. - Security—The security setting for SSID 4. Firewall Setting Status • Dos (Denial of Service)—Whether DoS prevention is on or off. • Block WAN Request—Whether WAN request blocking is on or off. • Remote Management—Whether remote management is on or off (for example, if the Cisco RV110W Device Manager can be accessed remotely).
8 Viewing the Cisco RV110W Status Viewing the VPN Status The Wireless Statistics page displays this information: SSID Name The name of the wireless network. Packet The number of received/sent wireless packets reported to the radio over all configured and active SSIDs. Byte The number of received/sent bytes of information reported to the radio, over all configured SSIDs. Error The number of received/sent packet errors reported to the radio, over all configured SSIDs.
8 Viewing the Cisco RV110W Status Viewing the IPSec Connection Status Status Displays the current status of QuickVPN client. OFFLINE means that QuickVPN tunnel is not initiated/established by the VPN user. ONLINE means that QuickVPN Tunnel, initiated/established by the VPN user, is active. Start Time The time of the VPN user establishing a connection. End Time The time of the VPN user ending a connection. Duration (Seconds) The duration between the VPN user establishing and ending a connection.
Viewing the Cisco RV110W Status Viewing Logs 8 • Duration—Displays the elapsed time for which the connection is or was active. • Packet—Displays the received (Rx) and transmitted (Tx) packets on the connection. • Byte—Displays the received (Rx) and transmitted (Tx) bytes on the connection. • State—Displays the state of the connection (for example, active or not connected). • Action—Displays actions you can perform on the connection (for example, disconnect).
8 Viewing the Cisco RV110W Status Viewing Connected Devices • Warning—System warning occurred. • Notification—System is functioning properly, but a system notice occurred. • Informational—Device information. • Debugging—Provides detailed information about an event. To delete all entries in the log window, click Clear Logs. To save all log messages from the firewall to the local hard drive, click Save Logs. To specify the number of entries to show per page, choose a number from the drop-down menu.
8 Viewing the Cisco RV110W Status Viewing Port Statistics Wired Displays a list of all devices connected through the Ethernet ports on the router. WDS Displays a list of all Wireless Distribution System (WDS) device connected to the router. Viewing Port Statistics The Port Statistics page displays port statistics. To view port statistics: STEP 1 Choose Status > Port Statistics. STEP 2 From the Refresh Rate drop-down menu, choose a refresh rate.
8 Viewing the Cisco RV110W Status Viewing the GuestNet Status Multicast The number of multicast packets sent over this radio. Collisions The number of signal collisions that occurred on this port. A collision occurs when the port tries to send data at the same time as a port on another router or computer that is connected to this port. Viewing the GuestNet Status The guest network statistics displays information about the wireless guest network configured on the Cisco RV110W.
A Using Cisco QuickVPN Overview This appendix explains how to install and use the Cisco QuickVPN software that can be downloaded from Cisco.com. QuickVPN works with computers running Windows 7, Windows XP, Windows Vista, or Windows 2000. (Computers using other operating systems will have to use third-party VPN software.
Using Cisco QuickVPN Installing the Cisco QuickVPN Software A Installing the Cisco QuickVPN Software Installing from the CD-ROM STEP 1 Insert the Cisco RV110W CD-ROM into your CD-ROM drive. After the Setup Wizard begins, click the Install QuickVPN link. The License Agreement window appears. License Agreement STEP 2 Click Yes to accept the agreement. STEP 3 Click Browse and choose where to copy the files to (for example, C:\Cisco Small Business\QuickVPN Client).
Using Cisco QuickVPN Installing the Cisco QuickVPN Software A STEP 4 Click Next. The Setup Wizard copies the files to the chosen location. Copying Files Finished Installing Files STEP 5 Click Finish to complete the installation. Proceed to “Using the Cisco QuickVPN Software,” on page 151.
Using Cisco QuickVPN Using the Cisco QuickVPN Software A Downloading and Installing from the Internet STEP 1 In Appendix B, “Where to Go From Here,” go to the Software Downloads link. STEP 2 Enter Cisco RV110W in the search box and find the QuickVPN software. STEP 3 Save the zip file to your PC, and extract the .exe file. STEP 4 Double-click the .exe file, and follow the on-screen instructions.
Using Cisco QuickVPN Using the Cisco QuickVPN Software A STEP 3 In the User Name and Password fields, enter the User Name and Password that were created in Creating and Managing QuickVPN Users. STEP 4 In the Server Address field, enter the IP address or domain name of the Cisco RV110W. STEP 5 In the Port For QuickVPN field, enter the port number that the QuickVPN client uses to communicate with the remote VPN router, or keep the default setting, Auto. STEP 6 To save this profile, click Save.
Using Cisco QuickVPN Using the Cisco QuickVPN Software A STEP 10 Enter your password in the Old Password field. Enter your new password in the New Password field. Then enter the new password again in the Confirm New Password field. STEP 11 Click OK to save your new password. NOTE You can change your password only if the Allow User to Change Password box has been checked for that username. See Creating and Managing QuickVPN Users.
B Where to Go From Here Cisco provides a wide range of resources to help you obtain the full benefits of the Cisco RV110W. Product Resources Support Cisco Small Business Support Community www.cisco.com/go/smallbizsupport Online Technical Support www.cisco.com/support and Documentation (Login Required) Phone Support Contacts www.cisco.com/en/US/support/ tsd_cisco_small_ business_support_ center_contacts.html Software Downloads (Login Required) Go to tools.cisco.