Digital P hoto P rinter Userʼs Manual DS40 DS80 Version 0.
● Concerning Copyright The copyrights for this document are the property of CITIZEN SYSTEMS JAPAN CO.,LTD. Reproduction of any or all of the contents of this document without consent of the company is a violation of copyright law. However, one back-up copy may be made for non-commercial, personal purposes. Also, the contents of this document are subject to change in the future without prior notice.
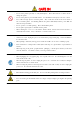
Introduction Thank you for purchasing this device. This document explains the handling and operation required to use this printer. Please read this document well before use. Be sure to read “For Safe Operation” (Pg 2-4), and operate the printer correctly. For Safe Operation ・ Be sure to read this document before use. After reading, keep it in a safe place, where it can be re-read as needed.
WARNI NG ・ Use only with the designated voltage and frequency. Improper connection could cause electric shock or fire. ・ Avoid overstressing outlets and using extension cords. The outlet could overheat and cause a fire. ・ Do not damage, destroy, bundle, or alter the power cord. Also, placing heavy objects on, pulling on, or bending the cord excessively can damage it, and could cause a fire. ・ Do not set the printer up in places with salinity or corrosive gases in the air. This could cause a fire.
CAUTI ON ・ Do not set the printer up in dusty or overly humid places. This could cause fire or electric shock, or damage the printer. ・ Do not set the printer up on an unstable surface. It could fall and cause injury to the user or others. ・ Do not allow foreign objects to enter the printer. They could cause electric shock, short circuit, or fire, or break the printer. If something falls into the printer, immediately turn the power OFF, and call a service representative.
Cautions for Set-up ・ Prior to operation, read “For Safe Operation” carefully and observe the rules therein. ・ Use care when moving the printer. Never try carrying the printer alone. Dropping it could cause injury or damage to other property. ・ Do not use or store the printer near fire, excessive moisture, in direct sunlight, near an air conditioner or heater, or any other source of unusually high or low temperature or humidity, or excessive dust.
● Japanese Users Cord set No 5-AB0632-1 (60001080) Parts number Rating Acquired Standard No Plug KP-300 125V 12A JET-1807-43001-1004 Cord VCTF 1.25mm2 3G JET-2178-12009-1003 Connector KS-16A 125V 12A JET-1807-43004-1005 ● American, Canadian Users Cord set No INQ.1417 (60000980) Parts number Rating Acquired Standard No Plug CAT-009 125V 13A UL:E69228 CSA:LL93534 Cord SJT 1.
Regul at or y compl i ance st at ement s American FCC users part 15 This equipment has been tested and found to comply with the limits for a Class B digital device, pursuant to Part 15 of the FCC Rules. These limits are designed to provide reasonable protection against harmful interference in a residential installation.
Table of Contents Introduction ・・・・・・・・・・・・・・・・・・・・・・・・・・・・・・・・・・・・・・・・・・・・・・・・・・・・2 For Safe Operation ・・・・・・・・・・・・・・・・・・・・・・・・・・・・・・・・・・・・・・・・・・2 Cautions for Set-up ・・・・・・・・・・・・・・・・・・・・・・・・・・・・・・・・・・・・・・・・・・5 Table of Contents ・・・・・・・・・・・・・・・・・・・・・・・・・・・・・・・・・・・・・・・・・・・・7 Setting Up the Printer . . . . . . . . . . . . . . . . . . . . . . . . . . . . . . . . . . . . . . . . . . . . . .
Setting Up the Printer Checking the Contents Please check that the printer and all accessories are included in the package. Pri nt er Uni t Power Cor d User' s Manual CD User' s Manual Pri nt er Dr i ver Paper Hol der (To be set i n pr i nt er ) *Remove wr appi ng bef or e use Paper Casset t e (t o be set i n pr i nt er ) Ri bbon Casset t e (t o be set i n pr i nt er ) CAUTION ・ When removing the printer from its package, carrying it, or moving it, be sure to use care.
Setting Up the Printer Names of Components [Front of Unit] LED Print Feed Out Power Switch Latch Lever Scrap Box Platen Roller [Back of Unit] Ventilation USB port [Side of Unit] Power Plug Socket Ventilation CAUTION ・ Please be careful not to hurt yourself or damage anything on the edges of the printer.
Setting Up the Printer Connecting the Power Cord 1. Make sure that the printer’s power switch is set to the OFF position. 2. Plug the cord connector end into the printer Power Plug Socket. 3. Plug the cord into the wall outlet. Connecting to the Computer 1. Make sure that both the printer and computer power switches are set to the OFF position. 2. Connect the USB cable to the printer and the computer. 3. Turn on the power.
Setting Up the Printer Paper and Ribbon CX Type CXW L, 2L PC, A5W 8*12 Width: 127mm Width: 152mm Width: 203mm Width: 134mm Width: 159mm Width: 210mm Paper Ribbon 12
Setting Up the Printer Setting the Media 1. Pull out the mechanism unit. 2. Open the Paper Release lever. Paper Release Lever 3. Remove the scrap box Scrap Box 4. Set a new roll of paper on the paper holders. Do not leave a gap between the paper and the paper holders. When setting the paper, do not place it directly on the work surface (table top, etc). Any dust that sticks to the paper will get inside the printer, affecting the print quality.
Setting Up the Printer 5. Set the paper holder into the printer’s paper cassette.(Set it all the way in) The paper direction should be as shown below. Paper direction Seal 6. Remove the seal. 7. Turn the paper in the direction of the arrow. When it is advanced enough, the buzzer will beep, and the flashing LED (orange) will go out. It is easier to set if the paper is turned while securing the holder with one hand.
Setting Up the Printer 8. Set the new ribbon into the ribbon cassette. Advance the ribbon in the direction of the arrow, and take up any slack. Take Up Supply 9. Set it with the supply side in front. Supply side Set here 10. Set the scrap box. The printer will not operate without the scrap box. If the mechanism unit is closed without the scrap box attached, there will be a “No Scrap Box Error”, and the LED will flash (red).
Setting Up the Printer 11.Close the mechanism unit. *When the mechanism unit is closed, the printer will run initialization (4 blank sheets will be fed out). However, if the power is turned ON after the paper is set, it won’t run the initialization. By running initialization, the dirty outer layer of paper is cut off. *In order to facilitate media color adjustment, media type recognition, and print quantity management, an IC chip is built into the ink ribbon.
Setting Up the Printer *When setting a smaller diameter paper roll back in, use the following procedure. 1. Take out the whole paper cassette unit. 2. After setting the paper holder into the paper cassette, rotate it in the direction shown. paper about 5 mm past the rollers. As seen from above 3. Set the paper cassette into the printer. The printer is ready for printing.
Trouble-shooting Error Displays Power Ribbon Paper Error The flashing LED indicates the printer status LED display Status Power Ribbon Paper Refer to Solution Error Paper End *1 Ribbon End *1 Door is Open (no paper) Door is Open ● Put in a new roll of paper P.12 ● Put in a new roll of ribbon P.14 ● Set the paper mechanism unit ● Close the mechanism unit P.15 No Scrap Box ● Set the scrap box P.14 Paper Error ● ● Free the paper, and reset it correctly P.
Trouble-shooting Solving Media Errors 1. Pull out the mechanism unit. 2. Remove the ribbon cassette. a. If the paper is jammed: 1. Pull any paper remaining in the printer in the direction shown, and cut off any wrinkled or partially printed areas evenly with scissors. Printing over an already printed area will cause the ribbon to stick, and the paper will jam again. When pulling the paper out, pull it slowly. Application of too much force could damage the printer.
Trouble-shooting 2. Remove the scrap box, and rewind the paper. 3. Cut off any partially printed, wrinkled, or otherwise inferior paper evenly with a pair of scissors, and reset the paper. If wrinkles or partially printed areas are left, it could cause the paper to jam again. Cutting the paper × ○ Then follow the methods as for setting the media.
Trouble-shooting b. If the ribbon is pulled into the mechanism: 1. Cut the ribbon. 2. Carefully remove any ribbon remaining in the mechanism. Any pieces of ribbon left inside the mechanism could affect print quality. In this case, clean the platen roller see P.22 3. Reattach the ribbon with cellophane (or similar) tape. Tape 4. Rotate the up-take ribbon several times until the tape is out of sight. Take care that there is no slack in the ribbon. Then, refer to a. If the paper is jammed.
Trouble-shooting c. If the printer is stopped in the middle of cutting: 1. Turn the power back ON. Free the jammed paper, and return the cutter blade to its ready position. If the jammed paper cannot be freed, please contact a service representative. 2. Remove any partially printed material from inside the mechanism unit. Then, refer to a. If the paper is jammed. d. If power is cut during printing: *If the power is cut during printing, you will not be able to pull out the mechanism unit. 1.
Cleaning Platen Roller If there is an indent on the pictures at a regular interval, or if the back of the picture (white side) is dirty, clean the platen roller. There may be dust, grime, adhesives, etc. from the ribbon or paper on the platen roller. 1. Prepare a piece of gauze or other soft cloth soaked in ethyl alcohol. Benzenes or thinners other than ethyl alcohol may permeate the resin, so they should not be used. 2. Wipe off any grime while turning the platen roller.
Specifications and Options Speci f i cat i ons Model DS40 DS80 Print type Thermal dye sublimation transfer Print mode High- speed mode High quality mode High- speed mode High quality mode Resolution 300× 300dpi 300× 600dpi 300× 300dpi 300× 600dpi Print size Print sheet Print time L 89*127mm 8*4 203× 102mm PC 101*152mm 8*5 203× 127mm 2L 127*178mm 8*6 203× 152mm A5 152*203mm 8*8 203× 203mm A5W 152*229mm 8*10 203× 254mm 8*12 L 400 sheets 203× 305mm 110 sheets PC 400 s