User’s Manual Handy Printer PD-22
Latest Information Printer Drivers, Servicing and Consumables For the latest information on you PD-22 printer: • where to obtain service inside or outside of the warranty period • printer drivers for the latest operating systems • additional consumables and accessories please contact Citizen’s office in your region: United States, Canada, South America: Citizen America Corporation www.citizen-america.
Contents FCC Declaration of Conformity ................................................ 4 Declaration of Conformity ....................................................... 5 Compliance Statements ........................................................... 6 Safety Instructions ................................................................... 7 Accessories ............................................................................ 14 Included Accessories ...................................................
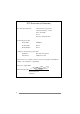
FCC Declaration of Conformity We, the Responsible Party: declares that the product: Trade Name: Product Name: Model Number: Citizen America Corporation 2102 Alton Parkway – Unit A Irvine, CA 92606 U.S.A. Telephone (949) 838-0327 CITIZEN Printer PD-22 confirms to the following specifications: Regulation: FCC Part 15B, Class B Test Method: ANSI C63.4-1992 and therefore is in compliance with the protection requirement of FCC Rules relating to electromagnetic compatibility.
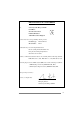
DECLARATION OF CONFORMITY We, Citizen Systems Europe GmbH Park House 643-651 Staines Road Feltham, Middlesex TW14 8PA.
Compliance Statements FCC Compliance Statement for American Users This equipment has been tested and found to comply with the limits for a Class B digital device, pursuant to Part 15 of the FCC Rules. These limits are designed to provide reasonable protection against harmful interference in a residential installation.
Safety Instructions The Symbols Instructions that must be followed to prevent any risk to the user and other people and any damage to property are indicated as shown below. The degree of risk and damage that will occur if a user operates the machine improperly by failing to obey any of the indicated instructions are categorized as follows. Read the User’s Manual after you fully understand this categorization.
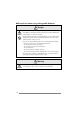
7 Precautions to be followed when handling the printer Warning • If the printer is used after it has become hot or produced smoke, a strange smell, etc., it will start a fire. Immediately cut off the power, remove its battery, and contact your service representative. • If any foreign matter (metal scraps, water, or other fluid) gets inside the printer, first cut off the power and remove the battery, then contact your service representative. If you use it in this condition, it will start a fire.
Safety Instructions 7 Precautions to be followed when operating the printer Warning • Be extremely careful not to touch the print head or paper cutter when replacing the paper. When the print head has become heated, there is a danger of it burning your hand. And part of the cutter might cut your hand. Precaution • If you use any paper other than the designated kind, the print quality will fall and the service life of the print head (printing unit) will be reduced.
7 Precautions when using rechargeable batteries Danger • If the fluid of a rechargeable battery gets in your eyes, you will be in danger of being blinded, so immediately wash them with clean water without rubbing them and promptly go to a doctor for treatment • The plus and minus directions of rechargeable batteries are preset. When placing batteries in the printer, check the plus and minus directions. If you do not, the batteries may leak, overheat, or crack.
Safety Instructions Precaution • Do not touch or moisten rechargeable batteries with fresh water or seawater. If a battery is moistened, it will heat up or rust. • Do not use or leave rechargeable batteries in hot places. If a rechargeable battery is used or left in a hot place, it will leak, reducing its performance and service life. • Store rechargeable batteries where they are out of the reach of infants and small children.
7 Precautions when using thermal paper (printing paper) Precaution • The darkness (density) of printing varies according to the type of printing paper used. The printing darkness (density) is adjusted either in the printer driver or using a software command. For details of this command, please refer to the Command Reference Manual available from your supplier. • When using copy type printing paper, set two sheets of copy paper with either in the printer driver or using a software command.
Safety Instructions 7 Precautions when installing the printing paper Precaution • Begin printing only after you have made sure that the printing paper is straight where it is ejected from the printing (thermal) head. If it is not straight, the paper will jam. • To prevent the paper from being bent as it is fed into the printer, make sure that the front end of the paper is as shown below.
Accessories Included Accessories After opening the package, confirm that the printer and the following standard accessories have been included. User's Manual (This Volume) Roll Paper (φ30 mm x 10 m) Size AA Alkaline Batteries (4) Optional Accessories The following optional accessories are available for use with this printer. Purchase as needed. RS-232C Cable (9-pin D-sub type connector) (Part No. PD79901-0S) AC Adaptor AC Adaptor Kit (Part No.
External Appearance and Part Descriptions 9 - 0 8 1 2 5 6 7 4 3 1 POWER LED (POWER: Green) The green indicator lights up when the power button ( ) is pressed continuously for 2 to 3 seconds. Additionally, the indicator blinks according to the printer mode (refer to the Error Indication Table). The indicator blinks more slowly when the batteries are running low. Replace the batteries when this occurs.
External Appearance and Part Descriptions 3 Optical Receiver Receives printing data through infrared transmission. 4 Serial Port Connect the optional RS-232C cable here when using the cable for printing. 5 POWER Button( ) Turns the printer’s power on and off. To turn on the power, press this button continuously (2 to 3 seconds) until the power LED lights up. 6 FEED Button (Paper Feed/Clear Error) The paper is fed while this button is held down.
External Appearance and Part Descriptions Inside the Printer = Paper Feed Roller = ~ ! @ # This feeds the paper to the paper exit slot. ~ Paper Holder The roll paper is placed here. ! Cover Sensor Detects whether the roll paper cover is open or closed. @ Paper End/Black Mark Detector Detects whether or not paper is loaded. 7 About the Black Mark This is a black marking that is pre-printed on the paper’s print side.
About the Power Source The printer only runs on four AA rechargeable or dry cell batteries. This section explains how the batteries are loaded and provides additional information about the batteries. Loading the Batteries Have on hand the four AA alkaline batteries provided with the printer. (Follow the same sequence of steps when replacing the batteries.) 1 2 Slide the battery cover downwards to open the cover.
Use These Batteries 7 You can use the following batteries with this product. Use only four batteries of identical type. • AA rechargeable NiMH batteries (Recommended) • AA rechargeable NiCd batteries • AA alkaline batteries 7 Do not use any batteries other than those listed above. Use of batteries other than those specified may result in damage to the unit. 7 The service life of AA alkaline batteries may be reduced according to the environment or the way they are used.
About the Power Source Turning the Power On and Off Press the power button ( ) continuously for 2 to 3 seconds to turn on the power. • The green POWER LED lights. • The red ERROR LED blinks rapidly if no paper is set in the printer. Press the POWER button ( ) again to turn off the power. • The POWER LED goes off. Lights in green when power is turned on. Goes off when power is turned off.
Connecting the Printer Data Reception Methods The printer provides two interfaces for receiving print data and other information: the serial port and the infrared port (optical interface). The interface selection automatically switches according to whether or not the RS-232C cable is connected to the serial port. Data is transferred through the serial port only if the RS-232C cable is connected before the printer is turned on.
Connecting the Printer 7 Connecting with the Serial Port (Cable) First obtain the optional RS-232C cable (PD79901-0S). 1 2 Turn off the power to the printer and the device to be connected. Insert the cable connector straight into the printer’s serial port. • Take care not to connect it upside down. (The connector is connected with the side marked “PUSH” facing upwards). Forcing the connection may damage the unit. • To disconnect the connector, pull it out while pressing the part marked “PUSH”.
Loading the Paper Loading Roll Paper 1 Turn on the printer. • The ERROR LED blinks if no paper is set in the printer. 2 Slide the Cover Open button towards you to open the cover. 3 Place roll paper in the paper holder so that the end of the paper is extending toward you, as shown in the figure. 4 Move the cover towards you so that the end of the paper extends slightly from the paper exit slot. 2 3 4 • Close the cover after removing slack from the roll paper that you are using.
Loading the Paper 7 If the Paper is Not Loaded Straight Slide the cover OPEN button to open the cover, then adjust the paper by hand. After confirming that the paper is completely straightened, securely close the cover. Do not allow the printed paper to enter the single sheet (cutsheet) insertion slot. 7 When Printing is Finished When you have finished printing using the roll paper, slowly pull back the printed paper at an angle along the paper cutter, allowing you to cut it from the roll.
Loading the Paper Feeding Single Sheets (Cutsheets) 1 Turn the printer on. • Confirm that the roll paper cover is closed. • The ERROR LED blinks if no paper is set in the printer. 2 Insert the paper as shown in the figure, by feeding the end of a single sheet into the single sheet insertion slot. • The printer automatically takes up about 15 mm (0.6 inch) of the paper, the ERROR LED goes off, and the unit is ready for printing.
Printing Test You can conduct print tests to check the printer settings and confirm that the printer is operating correctly. POWER Button ( POWER LED ERROR LED FEED Button ) Self-Print Function 1 With the paper loaded, simultaneously hold down the POWER button ( ) and FEED button. 2 When the POWER LED and the ERROR LED are blinking together, release the POWER button ( ). 3 When the POWER LED and the ERROR LED begin to blink alternately, release the FEED button.
Hex Dump Function The HEX dump function is used to judge whether or not the transmitted data is correct or not. 1 With the paper loaded, simultaneously hold down the POWER button ( ) and FEED button. 2 When the POWER LED and the ERROR LED are blinking together, release the POWER button ( ). 3 The POWER LED and the ERROR LED start blinking alternately, slowly at first. When the LED starts blinking faster, release the FEED button. 4 Press the FEED button to execute the hex dump.
Printing Test Internal Menu Settings List Print Function 1 With the paper loaded, simultaneously hold down the POWER button ( ) and FEED button. 2 When the POWER LED and the ERROR LED are blinking together, release the POWER button ( ). 3 The POWER LED and the ERROR LED alternately blink, slowly at first, then a little faster, then very fast; when they are flashing very fast, release the FEED button. 4 Press the FEED button to begin printing of the internal menu settings.
Care and Maintenance If the paper becomes jammed inside the printer, or if some other such problem occurs, remove the paper and clean the printer's interior. 1 Turn off the printer. 2 Slide the cover OPEN button towards you to open the cover. 3 Use a cotton swab or other such soft object to wipe any grime and paper dust from the feed roller and print (thermal) head. Print head Feed roller Paper feed roller • Never bring any hard object in contact with the head. This may result in damage to the unit.
Troubleshooting No malfunction may be indicated in the following situations. Check these points before considering malfunction as the cause of your problem. Problem Printer not operating Cause • Printer is not turned on. • Battery “+” and “–” terminals are reversed. • Batteries are running low. • Rechargeable batteries are not sufficiently charged. Paper cannot feed • A foreign object is caught on the Solution • Press the POWER button ( ).
Optional AC Adaptor Kit Installing the Battery Adaptor 1 Remove the battery cover from the printer. (Remove batteries if there are any loaded.) 2 Push in the battery adaptor as shown in the figure. 3 Connect the AC adaptor cord. 4 Attach the battery adaptor cover. Notes: • This kit is for use with this printer only. You cannot use it with other products. • Be sure to insert the battery adaptor before connecting the AC adaptor.
Specifications Category Specification Printing Method Direct Thermal Print Speed Normal thermal paper (1 sheet type): 300 dotlines/second (maximum) (64 dots/line or less) • Print speed with batteries fully charged and printer set to fast printing Copy thermal paper (2 sheet type): 100 dotlines/second (64 dots/line or less) • Print speed with batteries fully charged and printer set to fast printing Printhead Total Dot Count: 384 dots/dotline Dot Pitch: 8 dots/mm Print Width: 48 mm (1.89 in.
Category Specification Print Columns 21 columns (10 CPI), 25 columns (12 CPI), 32 columns (15 CPI), 36 columns (17 CPI) Character Font Dot Matrix Sizes 18 H x 24 V (10 CPI), 15 H x 24 V (12 CPI), 12 H x 24 V (15 CPI), 10.5 H x 24 V (17 CPI) Barcodes UPC-A, UPC-E, JAN13(EAN), JAN8(EAN), ITF, CODABAR, CODE39, CODE128 Print Paper 1) Paper Feed Method 2) Media Width 3) Paper Path 4) Media Types 5) Recommended Papers Friction Feed 0 0 58–1 mm (2.28 –0.04 in.
Specifications Category Specification Power Source 4 x AA cells (Rechargeable NiMH/Rechargeable NiCd/Alkaline) Supply Voltage Rechargeable NiMH: 4.8 V DC NiCd: 4.8 V DC Dry Cell Alkaline: 6.
Citizen America Corporation 2102 Alton Parkway – Unit A Irvine, CA 92606 Tel: (949) 838-0327 U.S.A. Citizen Systems Europe GmbH http://www.citizen-europe.com Park House 643-651 Staines Road, Feltham Middlesex, TW14 8PA United Kingdom Mettinger Strasse 11 D-73728 Esslingen Germany Japan CBM Corporation CBM Bldg.