Applicable to CSRA-09 CSRA-12 CSRA-18 Split Type Wall-mounted Room Air Conditioner Instruction Manual Thank you for purchasing of CITIZEN air conditioner. To guarantee safety and best efficiency, please read this manual carefully and keep a suitable storage for reference.
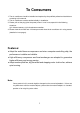
To Consumers 1. The air conditioner should be installed and repaired by the qualified professional technicians according to this manual. 2. The air conditioner must be earthed reliably in installation. 3. Please pull out the plug (shut the power) when it is not in use,especial in the following situations: In disused seasons In thunderstorm weather. 4. Please clean the air filter nets 1-2 times per month when the air conditioner is in using season (detailed in inner pages).
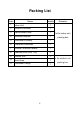
Packing List Order Name Quantity Remarks 1 Indoor Unit 1 2 Remove Controller 1 3 Wall-mounted Plate 1 In the indoor unit 4 Instruction Manual 1 packing box 5 Certificate of Quality 1 6 Guarantee Certificate 1 7 Remote Controller s Brace 1 8 Batteries (AAA SIZE 1.
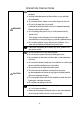
SAFETY PRECAUTIONS Please read the Safety Precaution carefully before operating the unit to ensure correct usage of the unit. Please observe the following safety precautions when using your air conditioner. If you fail to observe the precautions, it could cause fire, electrical shock or personalinjury. WARNING This sign warns of risk of death or serious injury. CAUTION This sign warns of injury or damage to property. This symbol denotes an action that is PROHIBITED.
OPERATION PRECAUTIONS Do not touch or operate with wet hands, this could cause fatal accident. Avoid an extended period of direct airflow, or you well feel uncomfortable. Do not insert sticks, fingers or any other object into the unit. Do not try to repair the unit yourself. It will lead to electricity shock or fire if it is treated improperly. WARNING Please contact with the seller. Do not damage the power cord, or it will cause electricity shock or fire.
Contents To Consumers 1 Features 1 Packing List 2 Safety Precautions 3 Part : Operation Instruction Parts Names and Functions 6 Preparations before Operation 9 Operation Contents Setting 9 Operation of Timer 10 Running Mode
Part Operation Instruction 1.
Intake vent Indicator Iamps Outlet vent Signal receiving window Air filter nets(2) Auxiliary buckle(4) CSRA-18 Emergency Switch 1-2 Outdoor Unit Intake vent Intake vent Outlet vent Outlet vent CSRA-18 CSRA-09,CSRA-12 7
1-3 Remote Controller Display Section Operation Section Infrared transmit tube Transmit signal to indoor unit Mode key Choose cooling/dehumidifying/heating Temperature setting key(16 J30 ) Wind speed key Choose Low/Medium/High/Auto Air direction adjusting key Timer key Timer on/off/cancel Liquid crystal display Time setting key (1-18hr) Switch key (on/off) Remote Controller’s Brace Slide upwards Insert downwards Screw Fix brace Set remote controller Remove remote controller (to use at hand)
1. There may be difference between the temperature set by the remote controller (The air 2. 3. 4. 5. conditioner will stop working while cooling or heating reach this temperature) and measured by temperature measuring device. You can regulate the temperature you want only by the remote controller. It is not certain that the room temperature can reach the temperature displayed on the remote controller. Only when the room area is proper, the heat preservation is very good, etc .
3-2 Pre-set Temperature Operation Press “MODE” button and select “cooling” or “heating” (Heat Pump Type)mode, then press the temperature setting “ ” or “ ” button once, the pre-set temperature will be raised or lowered by 1 . 3-3 Up and Down Air Direction Controlling Press the air “DIRECTION” button, the ventilating door will act in turns as following: static up and down swing change in turn If you need different static angle.
5-4Emergency Operation Remove the front girll of the indoor unit ,and you may see the emergency switch(refer to1-1) At“off”state,press the emergency switch button,the air coditioner then it operation,which will choose cooling/dehumidifying automatically according to the indoor temperature. At“on”state,press the emergency switch button,the air coditioner stops operating. Note:The function can be adopted only when the remote controller has been damaged or missed. 6.
Clean the air filter (once per two weeks is suitable) 1. Hold the two ends of the grille and pull it up-forward, then draw out the air filters downward gently (Do not shake them,or the dust will be raised). 2. Use vaccum cleaner or water to clean them.Please dry them in shade after they have been washed. 3. Hold the two ends of the inlet grille,install the air filters according to the diagram,then shut the inlet grille.
9. Trouble Shooting Before calling a serviceman,please check the followings: Symptom Possible reason The electrical wiring is plugged into the socket incorrectly. Mal-operation of the remote controller. The air conditioner The voltage is too low. The electricity was transmitted back immediately after been cut off. does not work The voltage is uneven or owing to the thunder weather, please pull out the plug, restart the units in 3 minutes.
Part Installation Instruction Preface To guarantee the unit working normally,please read the manual carefully before installation, and try to install it strictly according to this manual. Earth the air conditioner properly. Check the connecting cables and pipes carefully,make sure they are correct and firm before connecting the power of the air conditioner. The maximum length of the connecting pipe between the indoor unit and outdoor unit should be less than 5 metres.
2. Installation of Indoor Unit 2-1 Fix the Wall-mounted Plate Find a rigid parts of the wall (such as pillar etc.),install the plate at the same level,the plate must be fixed horizontally,or it will result in the indoor unit dropping water and abnormal noise.
2-4 Installation of Drain Hose The drain hose should be put below the refrigerant pipe (copper pipe) Do not bend the drain hose or raise it. Do not wrap the drain hose in tensile state. 2-5 Arrangement of Pipes Put together the refrigerent pipe,drain hose and the connecting wire of indoor and outdoor units etc.Wrap them with binding belt. Arrange the pipes can toward five directions such as back, right, down, left, and left-back etc.
While installing the outdoor unit, there should be more than 50cm space kept in front of the unit, more than 10cm space kept at rear left and up sides, and more than 35cm space kept at right side. 3-1 Flaring Joint There are flaring joint equipments on the indoor unit and the outdoor unit. As follow diagram indicates,the refrigerant pipe is used to connect the indoor unit and outdoor unit.
Connection of indoor unit External diameter(mm) Wring torque(kgf cm) Connect the thick and thin pipes to the indoor unit. 1/4 150~210 Apply a thin coat of refrigerating oil at the pipes joint. 3/8 380~450 When connecting, first aim at the centre, then screw 1/2 400~460 the first 3-4 turns of the connecting nut by hand. Take the wring torque diagram as the standard of indoor pipe’s connection, use two spaners to tighten them, over-tighten will damage the flared part.
The method of installation is as the diagram indicates, connect the power wires according to the stipulated fixed colour and order. a. Distinguish the colour, order and diameter of wires clearly while installation,the power wires between the indoor unit and the outdoor unit must be corresponding with each other, never be misconnected. b. The yellow-green( ) wire is the wire connecting to earth, it must be connected to the earth reliablly or it will cause electricity shock. c.
4-2 Test Run Procedure Before test run operation, please check all the connecting wires and pipes carefully to see if they are correctly connected and firm, the stop valve has been completely opened or not, and if the air conditioner has been connected to earth reliablly. 1. Connect the air conditioner system to the power source, a Du sound emitted by the indoor buzzer should be heard . 2. Turn on the air conditioner with the remote controller.
Main Specifications Data Model CSRA-09 Item Type Cooling & Heating CSRA-12 CSRA-18 Cooling & Heating Cooling & Heating Cooling Capacity 2500W 3500W 5200W Heating Capatity 2800W 3800W 5900W 220V-240V~ Rated Voltage 50Hz Rated Frequency Rated Cooling Power Input 770W 1090W 1620W Rated Heating Power Input 775W 1052W 1635W Mass:indoor unit/outdoor unit 8kg/35kg 11kg/37kg 15kg/49kg Air Flow:indoor unit 450m3/h 550m3/h 900m3/h Design pressure of High side 3.6MPa 3.6MPa 3.
Serial No.