EthIR LAN® User Guide
EthIR LAN® User Guide (for ESB101/301/3011b/1000 and ESB208/216/608) Clarinet Systems, Inc. 44040 Fremont Blvd. Fremont, CA 94538 info@clarinetsys.com www.clarinetsys.
Copyright Copyright© 2003 Clarinet Systems, Inc. All rights reserved. Information in this document is subject to change without notice. The software described in this manual is furnished under a license agreement.
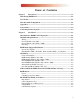
TABLE OF CONTENTS Chapter 1 Introduction ----------------------------------------------------------------- 1-1 Introducing EthIR LAN----------------------------------------------------------------- 1-1 User Profile -------------------------------------------------------------------------------- 1-1 How this Guide Is Organized----------------------------------------------------------- 1-1 Appendices --------------------------------------------------------------------------------- 1-2 Conventions-----------
Software Installation and Hardware Requirements --------------------------------- 2-8 Chapter 3 Configuring EthIR LAN--------------------------------------------------- 3-1 Introduction-------------------------------------------------------------------------------- 3-1 Configure EthIR Switch ----------------------------------------------------------------- 3-1 CSI Configuration Tool------------------------------------------------------------------ 3-1 CSI Configuration Tool Installation ------------------
APPENDIX F - -------------------------------------------------------------------------------F-1 Notebook and Handheld PC Configurations----------------------------------------F-1 Configuration Options------------------------------------------------------------------ F-1 Before You Begin — Needed Changes to Your System--------------------------- F-1 Using IrLAN with Windows 95 Notebooks ----------------------------------------- F-2 Using Direct Cable Connection with Windows 98 Notebooks -------------------F-
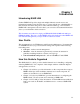
Chapter 1 Introduction Introducing EthIR LAN Clarinet EthIR LAN provides single and multiple infrared network access and information beaming points allowing users to connect cell phones or handheld PCs to their network and server using safe, cordless infrared technology. Once installed, EthIR LAN is transparent to the user; that is you can receive and transmit information just as you would with a wired connection. This document was written for single port ESB101/301/3011b/1000 and multi-port ESB208/216/608.
Note: Please visit Clarinet’s website to review the software products such as OBEX SDK (Software Development Kit), OBEX DP (Deployment Package), DM (Download Manager application program), RADIUS Security and iPAQ 4Mbs FIR driver. Appendices APPENDIX A - instructs users on the procedures for installing the infrared drivers on Windows 95 notebooks that did not originally ship with the drivers.
Contacting Clarinet Systems We welcome any comments you may have about our products or our documentation. Our goal is to provide functional and easy-to-use products that help you work more efficiently. Please Email or fax your comments to the following: Clarinet EthIR LAN Support Voice: 510.249.9660 Fax: 510.249.9661 Email: support@clarinetsys.com Web Site: http://www.clarinetsys.
Chapter 2 Installation Introduction to EthIR LAN Components Clarinet EthIR LAN includes EthIR Switch and EthIR Beam. Model number description follows. For description of “Pass Through” mode refer to page 2-6: ES208 - 8 port Pass Through ES216 - 16 port Pass Through ES608 - 4 port EthIR LAN with 4 PDA sockets ES101 - single port infrared only ES301 - single infrared port with additional Ethernet port and OBEX function ES3011b - single infrared port with 802.
EthIR Beam Supported Platforms Notebook Computer To connect to the EthIR Beam, a notebook computer requires the following: 1. Microsoft Windows 95 with infrared protocol stack and IrLAN. Microsoft Windows 98/2000 with infrared protocol stack and ClarinetIR or Direct Cable Connection (DCC). Check your notebook vendor’s documentation. Apple MacOS v. 8.5 or later with infrared protocol stack and IrLAN. 2. Framer (infrared device driver) 3. IrDA compatible infrared port enabled.
Figure 2-1 Note: The “OK” and “Fail” port indicator lights are only for infrared connections (where an EthIR Beam is connected to one of the lower ports via an RJ45 cable). If using a particular port for “Pass Through” mode (an Ethernet connection) the port indicator light for that port will not light up (see Pass Through Mode (ES208 / 216 only) on page 2-5). EthIR Switch (ES101/301/3011b/1000) The EthIR Switch single port version is able to support one EthIR Beam for infrared connectivity.
a. A steady green light beside the Console Port means the system has powered up correctly. b. A steady green light beside the uplink port indicates a 10Mbit or 100Mbit per second connection respectively. If both lights are unlit, the Uplink to your network failed. 3. Make the device connections. Each EthIR Switch is equipped with two rows of RJ 45 jacks. The top jack of each port is the Ethernet “pass through” port. The bottom jack of each port is the infrared connection port. a.
Uplink PC Connected Via Ethernet N/A Status N/A Power (101 only) N/A PC (301 only) ON Beam EB100 N/A Infrared Mode (ES208 / 216 only) If the EthIR Switch will only support infrared devices, do the following: 1. Connect one end of the UTP cables to the bottom infrared ports on the EthIR Switch and the other ends to an EthIR Beam. 2. Uplink the EthIR Switch to an existing network for network access. As each EthIR Beam is successfully connected, the Connect indicator is illuminated.
a. Connect the appropriate number of UTP cables from each adapter card on the desktop computers to the infrared port on the EthIR Switch (the bottom row of ports). b. Connect a second UTP cable from the Ethernet port (the top row of ports) to an Ethernet hub (Scenario 1) or patch panel (Scenario 2) 2. Notebooks and HPCs using Infrared: a. Connect one end of the UTP cables to the infrared ports on the EthIR Switch and the other ends to an EthIR Beam. 3.
EthIR Beam Power The EthIR Beam is powered by the EthIR Switch, which means that no power adapter or extra line is required to install it. Simply plug it into the infrared port (or mini-DIN connector) on the EthIR Switch. The Switch powers the EthIR Beam via the UTP or mini-DIN cable connected to the particular Switch model. Checking Connection Status The EthIR Beam displays a steady green light when it is successfully connected through the network to the EthIR Switch.
running a PC emulator. Infrared Support for Windows 95 A few notebooks manufactured during the initial release of Windows 95 were not configured with infrared drivers (despite having infrared hardware). This software utility installs and configures infrared drivers in such notebooks. See APPENDIX A for further information. ClarinetIR™ The ClarinetIR™ software was developed primarily for mobile notebook users running Windows 95/98/2000 and PocketPC or Palm handheld devices.
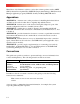
Chapter 3 Configuring EthIR LAN Introduction Please read through this section of the User Guide before performing any configurations. This section describes how to: 1. Configure the EthIR Switch. 2. Use the CSI Configuration Tool. Each step is described in the following sections.
Switch via infrared through an EthIR Beam to the Switch (see page 3-3, “Connectivity Choices for Using the CSI Configuration Tool”). CSI Configuration Tool Installation Your EthIR LAN system comes with a CSI Media Installer CD-ROM. On a PC, insert the CD-ROM into the drive and follow the on-screen prompts. This installs the Configuration Tool and icons onto your PC. CSI Configuration Tool Functions The Configuration Tool provides the following functions: 1. Sets the IP address of the Switch.
CSI Configuration Tool Window Description: The Configuration Tool is divided into three sections: 1. Operation section is for accessing the configuration of any Switch on the network via an infrared or Ethernet connection. This section allows reconfiguring and managing Switches over the network. a. b. c. d. Edit Configuration edits the Switch’s IP and its Pool of IP addresses for connecting devices as well as gateway, DNS, Proxy IPs and an option to obtain these from a DHCP server.
A proprietary infrared communication link is established enabling you to make IP configuration changes. However, this option does not provide a mean to update firmware nor allow the user to configure switches other then the one connecting to. For managing multiple network Switches or updating the firmware, follow the steps in Configure via IP address on the following section. Nevertheless, this option provides the mean to configure the switch without an Ethernet uplink or invalid IP address settings.
The following steps describe how to set the IP address of the EthIR Switch for the first time from a notebook running Windows with an enabled Infrared capability: Models ES208 / 216 / 608 DHCP off. Generic IPs entered DHCP option turned on 1. Launch the Infrared applet in the Control Panel to insure that “enable infrared” is enabled and the “plug and play” feature is disabled. 2. Install the CSI Configuration Tool software on the notebook. 3. Point and EthIR Beam to the notebook’s infrared port. 4.
6. Click the Edit Configuration. The IP Editor dialog appears showing the Switch’s current configuration settings. In the “General Info” tab, entries are available to setup your EthIR Switch with its own unique IP address according to your networking environment. Also, entries for Gateways, DNS Servers, and Proxy settings are made in this dialog. A unique feature is the Use DHCP option. Checking this option will disable the entries for Switch IP, Subnet Mask, Gateway IP, DNS IP 1 and DNS IP 2.
Starting IP address and Ending IP address specify the IP address range within which to search. Searches can also be performed across subnets. Timeout specifies the time period in milliseconds to wait for a reply from the Switch during a search. This value varies depending on the following: 1. If the Tool runs on a PC connecting to the network using Ethernet and the Switch is on the same subnet, a timeout of 50 ms is usually sufficient. 2.
The NVM Editor General Info Tab The General Info tab of NVM Editor contains configuration information required by the Switch. Select the appropriate Switches first using the Tool then click Edit Configuration. The NVM Editor dialog is displayed, as illustrated below: Settings include the Switch’s IP address, Subnet Mask, and optional Gateway IP.
SNMP Variables Tab This tab contains information about SNMP, as illustrated below. The Switch supports, up to, four SNMP managers. If SNMP is not used, do not modify the information in this tab section. If SNMP is used, these fields should be set by your system administrator.
Model ES101 / 301/ 1000 Models ES208 / 216 / 608 The IP Pool is preset to: 192.168.101.179 through 186 (on 8 port models ES208 and 608) and 192.168.101.179 through 194 (on 16 port models ES216). The one port ES101 / 301 IP Pool is initially empty since it is factory shipped with the DHCP option turned on. As a result, it requests an IP from the DHCP server for its IP Pool and will not be visible in the IP Pool list.
When editing configuration of an ESB3011b, which uses 802.11b wireless uplink, the RF Card Info tab will replace the IP Pool tab. As displayed on the right, there are several statistic fields alone with some configuration items. The ESSID field contains casesensitive string, which identify the wireless access point (AP) this switch is going to connect to. This field must match with the ESSID field in the AP’s configuration in order to establish a connection.
AP. In the case of 128-bit encryption, The Default Tx Key will always be 1 and AP must be configured to used 1 if multiple keys are allowed for 128-bit encryption. Note: 128-bit encryption will have performance decrease compare to 64-bit encryption. Updating The Firmware Periodically, Clarinet Systems engineers make improvements to the functionality of the EthIR Switch via firmware updates. These can be freely downloaded from Clarinet Systems web site. To update the firmware in the Configuration Tool: 1.
Chapter 4 ClarinetIR ClarinetIR™ is a freeware application, which provides network connectivity via infrared (IR) without the hassle and confusion of setting up and/or launching a dial-up network. With few simple clicks, the application can be installed onto your computer(s) and/or device(s) with ease. The uninstall feature also makes removal of application as simple as one, two, and three. ClarinetIR™ comes in three different formats for three different types of systems.
APPENDIX A Installing Infrared Support for Windows 95 This section applies ONLY if IrLAN was not originally installed in your Windows 95 notebook (no Infrared icon in the Control Panel). To install or update Windows 95 Infrared Drivers do the following: 1. Insert the CSI Media Installer CD. You will find the setup file in \Software\Infrared Support for Windows 95 notebooks without infrared ONLY\setup.exe. 2.
If your notebook is not on the Manufacturers list, select Standard Infrared Device, then select Builtin Infrared port on notebook or desktop in the Models list. 5. After making your manufacturer and model selections, click Next. 6. Select the COM port your notebook uses for Infrared. Example: • If your notebook is Fujitsu 735, select SMC IrCC (Fast Infrared) Hardware and Driver (COM4). • If your notebook is Toshiba 500 Serial, select Generic IR.
8. When the Add Infrared Device Wizard prompts you to select the virtual COM and LPT ports, accept the default values as illustrated below and click the Next button. 9. After the wizard copies the IR communications driver files to the hard disk, the wizard displays two New Hardware Found messages: - Infrared Serial Connection (COM) port Infrared printer (LPT) port. Note: If the New Hardware Found messages were not displayed, reboot your notebook and repeat steps 1 through step 9) 10.
Windows 95 CD-ROM to continue the installation process. Follow the prompts until the installation is complete. You will see the Infrared Monitor screen indicating successful IrLAN connection. Note: If the IrLAN connection only runs at 115Kbps, verify the IR port specifications of your notebook to see what the maximum speed it can support by consulting the documentation that came with your notebook or contacting the manufacturer.
3. You will see TCP/IP -> Microsoft IrDA LAN Driver is listed in the Network panel. 4. Once present, double click Microsoft IrDA LAN Driver in the Network panel. Select Bindings. Insure that TCP/IP --> Microsoft IrDA LAN Driver is checked on. Click OK. This returns you to the Network panel. Select TCP/IP --> Microsoft IrDA LAN Driver. Select Properties. An IP Address needs to be assigned. 5.
APPENDIX B Verifying that Dial-Up Adapter is in your Network Configuration In order to use ClarinetIR or Direct Cable Connection successfully, you must have Dial-Up Adapter in your network configuration. Go to Start\Settings\Control Panel and double-click the Network icon. If Dial-Up Adapter is not there you must click the Add button. In the Select Network Component Type dialog click Adapter and click Add… and choose Microsoft as the Manufacturer and Dial-Up Adapter from the Network Adapter list.
APPENDIX C Disabling Puma Technology’s IR Communication Software If your laptop is equipped with Puma Technology’s Tranxit communication software it must be disabled before continuing the configuration. If present, remove it from the Start\Program\Start Up folder and reboot. You can check this by clicking: Start\Settings\Taskbar & Start Menu. Click the Start Menu Programs tab. Click the Advanced button. Expand the Programs icon in the left frame by clicking once on the plus sign (+).
APPENDIX D Browsing the Network Neighborhood Windows 95/98 If you cannot find the Network Neighborhood icon on your desktop or in your Windows Explorer, you will need to install Client for Microsoft Net-works. 1. Double click the Network icon in the Control Panel. 2. Click Add button. In Network Component Type, select Client. Click the Add button. 3. In Manufacturer box, choose Microsoft. Then choose Client for Microsoft Networks. Click OK.
4. Now configure the network identification properties for the workgroup name. Note: If you wish to participate on a Windows NT network and use services such as network browsing and shared resources. 5. Click on the Identification tab in the Network Properties dialog. 6. Enter the name of the workgroup and click OK. 7. Click OK again. Windows will begin installing the client. You may be prompted to insert the Windows 98 CD-ROM. If none is available, enter \WINDOWS\OPTIONS\CABS in the dialog path name. 8.
APPENDIX E Upgrading from 115Kbps to 4Mbps Speeds The following procedures apply only to Windows 95 in general and the following manufacturers in particular: Compaq, Fujitsu, Hewlett Packard, Sharp, Sony, Toshiba. In order to upgrade you’ll need an updated framer for your Windows 95 notebook. Consult your hardware manufacturer for an updated driver. Download and copy the appropriate framer file onto your hard drive. Then follow the instructions as outlined: 1.
4. You will see the Wizard display a dialog box informing you that it will install infrared devices. Click Next and be sure the Infrared Driver for Windows 95 disk is inserted in the floppy drive. Click Have Disk in the Manufacturers/Model dialog box. Type the path a:\, and click OK. 5. Select the correct manufacturer and model for your notebook and click Next. Note: If it’s not printed on the notebook housing you can check the documentation, which came with it or the bottom of your notebook for the model.
CAUTION: if the wrong COM port is selected a reinstallation of the drivers will be necessary. Example: • If your notebook is Fujitsu 735, select SMC IrCC (Fast Infrared) Hardware and Driver (COM4). • If your notebook is Toshiba 500 Serial, select Generic Ir Serial Port (COM3). 7. When the Add Infrared Device Wizard prompts you to select the simulated COM and LPT ports, accept the default values as illustrated below and click the Next button. 8.
Fast-IR speed. If it still runs at 115Kbs it is likely that the wrong COM port had been select from step 6. Return to step 1 at the beginning of this section and repeat the process.
APPENDIX F Notebook and Handheld PC Configurations Configuration Options Please read through the application section of this chapter before performing any configurations. This section describes how to: 1. 2. 3. 4. Configure your notebook PC running IrLAN with Windows 95 or Direct Cable Connection (DCC) or ConnectIR with Windows 95/98/2000. Configure your Windows CE handheld PC or palm-size PC. Configure your Apple MacOS Powerbook. Configure your Palm Organizer (IIIx, IIIxe, V, Vx, or VII).
Using IrLAN with Windows 95 Notebooks In most cases, your portable computer is already configured for use with Clarinet Systems’ EthIR LAN. As mentioned on the previous page, only minor setup on your part is required to enable the Infrared Monitor as follows: 1. Open the Infrared Application Program in Windows 95—In the Start\Settings\Control Panel, double click the Infrared Icon as illustrated below (If you don’t see the Infrared Icon, skip this section and go to APPENDIX A) Double Click 2.
Click Options 3. Check the box Enable infrared communication on…. and Enable software install for Plug and Play devices in range. Check Enable infrared Communication and Enable software install for Plug and Play devices 4. Click Apply then return to the Status tab to see connectivity taking place. Your portable computer is now configured and ready for use with the Clarinet EthIR Beam. Point the EthIR Beam towards your notebook’s infrared port.
5. If the IrLAN connection is successful but only runs at 115Kbps verify your IR port specification for your notebook. If the port specification is 115Kbps then the notebook installation is complete. If the spec is 4Mbs and you are only able to connect at 115Kbps, you should request the IR 4Mbs Framer (device driver) from your notebook manufacturer and then update the Framer (see APPENDIX E) and repeat this section again. In the meantime, you can continue to use 115Kbps. The installation is complete.
Using Direct Cable Connection with Windows 98 Notebooks In lieu of the software the following directions can be followed and the same connectivity can be achieved. Please read through this entire section of the User Guide before configuring your system. Note: The ClarinetIR software, which ships with the EthIR LAN system automatically, configures your notebook to access the LAN and Internet.
2. If the Direct Cable Connection is already in this menu, skip the following steps and go to next section, Configure Infrared Monitor for Direct Cable Connection, on pageF-7. If there is no Direct Cable Connection in this menu, double-click on Add/Remove Program icon in Start\Settings\Control Panel.
3. Click on Windows Setup tab, choose Communications then click on Details button. 4. Check the item Direct Cable Connection, as illustrated above, and then click OK. Click OK again in the next window. Windows 98 may ask for the Windows 98 CD-ROM to be inserted into your CD-ROM drive. If the CD-ROM is not available enter \WINDOWS\OPTIONS\CABS in the path line of the dialog box. Configure Infrared Monitor for Direct Cable Connection 1.
2. Click OK Configure Direct Cable Connection for the First Time Configuration needs to be done only once. For successive connectivity using DCC you need only follow the steps under “Connecting to and Disconnecting From the Network” section. 1. Select Start\Programs\Accessories\Communication\Direct Cable Connection from the task bar. The Direct Cable Connection window will open as shown below. Choose Guest then click the Next button.
2. DCC will build a list of available ports for you to select from. Select Serial cable on COM4 and click Next button. COM4 is the virtual communications port which your notebook’s IR port is using. 3. Click Finish button. Make sure the EthIR Beam is pointed at your IR port. The system will connect and will ask for the host computer name as shown below. Do not enter a name. Instead, click on Cancel.
4. Your notebook is now configured for Direct Cable Connection. Do not click Close. Rather, MINIMIZE the dialog unless you wish to terminate the connection. Connecting to and Disconnecting from the Network The ClarinetIR software allows you a simple point and click solution to get connected with DCC. If this software is not available then the following instructions can help you achieve the same goal: To connect the notebook to the network using Direct Cable Connection: 1.
Note: Once a session starts successfully, the status window displays a Close button. Do not click the close button unless you wish to terminate your DCC network session. To disconnect a DCC network session, click Close. Note: In their network configuration, mobile users may have mapped drives from other networked sites or have settings to log on to a network other than the one they are trying to establish a connection with. Should error dialog boxes appear, simply click Cancel.
Using Direct Cable Connection with Windows 2000 Notebooks In lieu of the software the following directions can be followed and the same connectivity can be achieved. Please read through this entire section of the User Guide before configuring your system. This section describes: • • How to configure your Windows 2000 notebook to connect to the Clarinet EthIR Switch via Direct Cable Connection (DCC). How to start a connection once configuration is done. 1.
you from seeing this message in the future. Click accept to begin accessing your network.
Configuring Windows CE Handheld PCs This section describes • • • How to configure your HPC to connect to the Clarinet EthIR Switch. How to start and end a connection once configuration is done. How to specify the HTTP proxy server in Pocket Internet Explorer. Adding Direct Connection to Remote Networking Each Windows CE HPC is bundled with a Microsoft Windows CE communication package that enables you to add and configure a new connection to a remote networking system.
4. Click OK to return to Make New Direct Connection dialog and click on TCP/IP Settings…. Currently, Clarinet supports the specification in the General TCP/IP dialog box. Again, no change is required although it would be helpful to understand what is entailed in these dialogs. Note: Support of some of the items is negotiated as the connection session begins. The EthIR Switch from which the EthIR Beam is extended automatically assigns the IP address of your HPC. SLIP protocol is not supported.
7. Click OK to finish the configuration of the new connection. Hint: To make your tasks easier to accomplish, consider creating a Desktop Shortcut: Click on the Make New Connection icon and select File\Desktop Shortcut in the Remote Networking applet. Connecting to and Disconnecting from the Network To connect a Windows CE handheld device to the network through the Clarinet EthIR Switch: 1. Face your device’s infrared port directly toward any EthIR Beam connected to the Switch. 2.
4. Once a session starts successfully, the status window displays two buttons: Hide and Disconnect. Consider hiding the pop-up window. A connection indication icon resides on the task bar. Clicking on the icon displays the connection dialog once again. 5. To disconnect a network session, click Start\Programs\Communication\Remote Networking and click the IR icon and click Disconnect.
Using IrLAN with Apple MacOS Powerbooks In most cases, Apple Powerbooks running MacOS 8.5 or later (including models G3, 2400, and 3400 as well as early versions of the iMac) are already configured for use with Clarinet Systems’ EthIR LAN. Only minor changes on your part are required to enable the Infrared communication as follows: 1. From the Apple Menu\Control Panel pull down menu, launch AppleTalk. You have three connection options: Ethernet built-in, Infrared Port (IrDA), 2. and Remote Only.
Configuring Palm Organizers Supports Palm Organizers (Palm IIIx, IIIxe, V, Vx, and VII) with OS 3.3 or greater installed. Network synchronization to a partner computer via the network using the EthIR Switch, allows Palm users complete mobility without having to be physically cradled to the computer. To setup a Palm that has already been locally synchronized to a partner notebook for infrared network synchronization, perform the following: 1. In the Home menu click Prefs.