Owner’s manual Mode d’emploi Manual de instrucciones CX501 2-DIN Bluetooth® CD/USB/MP3/WMA RECEIVER LECTEUR CD/USB/MP3/WMA Bluetooth® 2 DIN ® RECEPTOR CD/USB/MP3/WMA Bluetooth 2-DIN
CLARION PRODUCT REGISTRATION INFORMATION For USA and Canada only www.clarion.com Dear Customer: Congratulations on your purchase of a Clarion mobile electronic products. We are confident that you’ll enjoy your Clarion experience. There are many benefits to registering your product. We invite you to visit our website at www.clarion.com to register your Clarion product. We have made product registration simple with our easy to use website. The registration form is short and easy to complete.
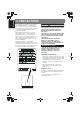
English Thank you for purchasing this Clarion product. ∗ Please read this owner’s manual in its entirety before operating this equipment. ∗ Check the contents of the enclosed warranty card and keep it carefully with this manual. Contents 1. FEATURES ...................................................................................................................................... 3 2. PRECAUTIONS ............................................................................................................
English 2. PRECAUTIONS This equipment has been tested and found to comply with the limits for a Class B digital device, pursuant to Part 15 of the FCC Rules. These limits are designed to provide reasonable protection against harmful interference in a residential installation. This equipment generates, uses, and can radiate radio frequency energy and, if not installed and used in accordance with the instructions, may cause harmful interference to radio communications.
English 3. CONTROLS Names of the Buttons and Their Main Functions [CD SLOT] LCD Display Screen [MICRO PHONE] [DIRECT] [ ] [DIRECT] [SCN] [RPT] [F-UP] [RDM] [IR RECEIVER] [F-DN] [SOURCE] [BAND] [x] [ [v] [RESET ] [AUX] ] [SOUND] [DISP] [ROTARY] [ISR ] [USB] [MICROPHONE] [SOUND] button r Built-in microphone for Bluetooth telephone. r Press to switch to the sound adjust mode. r Ending a call. [DIRECT] buttons r Store radio stations in memory or recall it directly while in radio mode.
English 4. REMOTE CONTROL Functions of Remote Control Unit Buttons ∗ Some buttons on the remote control unit have different functions from the corresponding buttons on the main unit. Radio/Satellite Radio modes Signal transmitter [BND] button r Switches reception band. [x], [v] buttons [SRC] [BND] [MUTE] [DISP] [ISR] [RDM] [SCN] [RPT] r Moves preset channels up and down. [SCN] button r Press to perform preset scan. r Press and hold the button (2 sec.) to perform auto store.
Functions of Remote Control Unit Buttons English iPod mode [x], [v] buttons r Press to move the tracks up and down. r Press and hold the button (1 sec.) to perform fast-forward/fast-reverse. [ ] button r Switches between playback and pause. [RPT] button r Press to perform repeat play. [RDM] button r Press to perform random play. r Press and hold the button (1 sec.) to perform all random play.
English 5. OPERATIONS Note: r Be sure to read this chapter referring to the front diagrams of chapter “3. CONTROLS” on page 5. Basic Operations CAUTION Be sure to lower the volume before switching off the unit power or the ignition key. The unit remembers its last volume setting. Turning on/off the power Note: 1. Press the [SOURCE] button to turn on the power. 2. Press and hold the [SOURCE] button (1 sec.) for to turn off the power. Selecting a mode 1.
Basic Operations ∗ The factory default setting is “0”. 3-4. Press the [ROTARY] knob to return to the previous mode. Adjusting the BASS/MID/TREBLE This adjustment can be performed only when the BEAT EQ is set to “CUSTOM”. Note: r While connected with the external aplifers, please do not set the “BASS”/“MID”/“TREBLE” in the maximum level. Otherwise the speakers may be damaged. 3-2. Press the [ROTARY] knob. 3-3. Press the [x] or [v] button to select as following order.
Basic Operations English Adjusting the subwoofer output volume You can adjust the volume output from the unit’s subwoofer output terminal. This adjustment can be performed only when the “REAR/S-W” is set to “S-WOOFER” 2-1. Select “S-W VOL”. 3-1. Turn the [ROTARY] knob to increases or decreases the subwoofer volume. ∗ The factory default setting is “0”. (Adjustment range: +6 to –6) Adjusting the HPF 2-1. Select “HPF”. 3-1. Turn the [ROTARY] knob to select as following order.
Radio Operations 1. Press the [SOURCE] button and select the radio mode. 2. Press the [BAND] button and select the radio band. Each time the button is pressed, the radio reception band changes in the following order: FM1... FM1 FM2 FM3 AM Tuning 2 types of tuning mode available, manual tuning and preset tuning. Manual tuning There are 2 ways available: Quick tuning and step tuning. Quick tuning Press and hold the [x] or [v] button (1 sec.) to tune in a station.
SIRIUS Satellite Radio Operations English This function is available when this unit is connected to the SC-C1 tuner (need sold seperately) with the Sirius SSP cable. Selecting a Satellite Radio mode 1. Press the [SOURCE] button. The system changes to the specified Satellite Radio mode. Selecting a band 1. Press the [BAND] button to select a band. This changes the reception band as follows: SR1 SR2 SR3...
SIRIUS Satellite Radio Operations Satellite Radio allows you to select broadcast channel category (contents). 1. Press and hold the [BAND] button (1 sec.) to select the category selection mode. ∗ It press and hold once again, return to the channel selection mode. 2. Turn the [ROTARY] knob to change the category item. 3. Press the [x] or [v] button to tune in a station. ∗ If press and hold the [x] or [v] button, it will quick tune a channel a channel in the current category.
SIRIUS Satellite Radio Operations English Note: r If you forget the password, you can do the following operations: ∗ Input the old and new password with “4356”, and it will return to the factory default setting “0000”. ∗ Input the old password with “4356”, and then operate step 5-6. Locking Channel 1. Select a desired channel. 2. Press and hold the [DISP] button. 3. Press the [x] or [v] button to select “LOCK CH”. 4. Press the [ROTARY] knob. 5. Input the right password. 5-1.
CD/MP3/WMA Operations Notes: r If you play a file with DRM (Digital Rights Management) for WMA remaining ON, no audio is output (The WMA indicator blinks). To disable DRM (Digital Rights Management) 1. When using Windows Media Player 9/10/11, click on TOOL OPTIONS MUSIC RECORD tab, then under Recording settings, unclick the Check box for RECORD PROTECTED MUSIC. Then, reconstruct files. Personally constructed WMA files are used at your own responsibility.
CD/MP3/WMA Operations English Disc-In-Play function As long as the ignition key is turned to the ON or ACC position, this function allows you to turn the power to the unit and start playing the disc automatically when the disc is inserted even if the power is not turned on. CAUTION r Do not try to put your hand or fingers in the disc insertion slot. Also never insert foreign objects into the slot.
CD/MP3/WMA Operations Track-up 1. Press the [v] button to move ahead to the beginning of the next track. 2. Each time you press the [v] button, the track advances ahead to the beginning of the next track. Track-down 1. Press the [x] button to move back to the beginning of the current track. 2. Press the [x] button twice to move back to the beginning of the previous track. Fast-forward/Fast-reverse Fast-forward 1. Press and hold the [v] button (1 sec.). Fast-reverse 1. Press and hold the [x] button (1 sec.
Bluetooth Operations English The Bluetooth allows you to utilize your car’s built-in audio system for wireless mobile phone or music handsfree communication. Some Bluetooth mobile phones have the audio features, and some portable audio players support Bluetooth feature. This system can play audio data stored in a Bluetooth audio device.
Bluetooth Operations ] button to call the mobile Redial a call You can call a redial phone No. 1. Press the [BAND] button to select “REDIAL”. 2. Press and hold the [ROTARY] knob (1 sec.) to call the redial phone No. ∗ Press the [SOUND] button to end the call. To change Bluetooth adjustment setting 1. Press and hold the [DISP] button (1 sec.) to switch to the Bluetooth adjustment selection display. 2. Press the [x] or [v] button to select the “item name”.
Bluetooth Operations English DISCONNECT This option is used to disconnect the currently connected device. 2-1. Select “DISCONNECT”. 3-1. Press and hold the [ROTARY] knob (1 sec.) to disconnect. ∗ Press and hold the [SOUND] button (2 sec.) to disconnect. ADD PHONE BOOK This option is used to add one of the phone No. 2-1. Select “ADD PHONE BOOK”. 3-1. Press the [ROTARY] knob (1 sec.), then the“RECEIVING” appears in the display. ∗ At the same time the phone No.
Bluetooth Operations NOISE This option is used to set noise volume in the car bluetooth system. 2-1. Press “NOISE”. 3-1. Turn the [ROTARY] knob to select “LOW” or “HIGH”. ∗ The factory default setting is “LOW”. AUTO ANS This is a setting to determine whether any incoming call will be automatically or manually answered. ∗ The factory default setting is “OFF”. 2-1. Select “AUTO ANS”. 3-1. Turn the [ROTARY] knob to select “ON” or “OFF”. ON: Any incoming call is automatically answered in 5 seconds.
Operations Common to Each Mode English To change adjustment setting 1. Press and hold the [DISP] button (1 sec.) to switch to the adjustment selection display. 2. Press the [x] or [v] button to select the “item name”. “COLOR” “CLOCK” “CONTRAST” “CODE” “SCRN SVR” “SCROLL” “BLINKLED” “DIMMER” “RESET ” “REAR/S-W” 3. Turn the [ROTARY] knob to select the “desired setting value”. ∗ In the case of display blinking “ENT”, you can press the [ROTARY] knob to adjust the setting value.
Operations Common to Each Mode the ENTER PERSONAL CODE screen appears The ENTER PERSONAL CODE screen will be displayed when turning the ACC power on after performing the following operations: r The car battery was replaced. r The backup power was cut off. r The [RESET] button was pressed. Note: r If you have lost your Personal Code, please contact Clarion customer service. 1. Enter your Personal Code currently set. 2.
English 6. ACCESSORIES USB Operations USB memory device operation Note: r The following operations are the same as for CD mode: ∗ Pause ∗ Track selection ∗ Fast-forward/reverse (Except DRM file) ∗ List search function ∗ Scan play ∗ Repeat play ∗ Random play ∗ Folder selection See “CD/MP3/WMA Operations” (page 15-17) for details. About USB memory r USB is an acronym for Universal Serial Bus, and refers to an external bus standard supporting data transfer rates of 12 Mbps.
USB Operations 1. Connect the USB memory device to the USB cable. Playback will begin from the first file recorded on the device. ∗ If the device is not recognized, press the [SOURCE] button to switch the source to the device. ∗ Always insert the device fully into the connector. Incomplete connections may cause the device not to be recognized. ∗ Depending on the number of tracks recorded, some amount of time may be required until all tracks are read into the unit.
iPod Operations English iPods can be connected by using the connector c able supplied with the iPod, but in this case, You can enjoy its audio sound only. To enjoy displaying movies stored in the iPod with video unit, it is required to use the special monitor and connector cable (CCA-723/CCA-748) separately sold. Time display will appear. At that time, select a music file once again. Notes: r See the iPod Owner’s Manual for details regarding operation conditions.
iPod Operations To cancel play 1. Press the same play button once again. Notes: r When the repeat play mode is canceled, after play all tracks within a selected category, playback will begin from the first track in the selected category. r When playing the last track within a selected category in Random mode, if ACC is switched off then on again, playback will begin from a different track. r Though the default setting of an iPod is “All Repeat”, the indication on the mode status is not displayed.
iPod Operations English Playback will begin from the first track in the selected category, and the iPod menu mode will be canceled. ∗ Use the [ROTARY ] knob to select a track within a category. Setting iPod Output Format The iPod output format can be changed. * The factory default setting is “Digital”. 1. Press and hold the [DISP] button. 2. Press [x] or [v] to select “iPod Output Format”. 3. Press the [ROTARY] knob to change the setting: “Digital” or “Analog”. s Digital: The iPod will be played normaly.
General Problem Cause Measure Power does not turn on. (No sound is produced.) Fuse is blown. Replace with a fuse of the same amperage. If the fuse blows again, consult your store of purchase. Incorrect wiring. Consult your store of purchase. No sound output when operating the unit with amplifiers or power antenna attached. Power antenna lead is 1. Turn the unit off. shorted to ground or 2. Remove all wires attached to the power antenna excessive current is required lead.
Problem English No sound heard CD/MP3/WMA Sound skips or is noisy. Cause Measure MP3/WMA files are absent in a disc. Write MP3/WMA files onto the disc properly. Files are not recognized as an MP3/WMA file. Use MP3/WMA files encoded properly. File system is not correct. Use ISO9660 level 1, 2 or JOLIET or Romeo or APPLE ISO file system. Compact disc is dirty. Clean the compact disc with a soft cloth. Compact disc is heavily scratched or warped. Replace with a compact disc with no scratches.
English 8. ERROR DISPLAYS If an error occurs, one of the following displays is displayed. Take the measures described below to eliminate the problem. USB/iPod CD/MP3/WMA Error Display Cause Measure ERROR 2 A CD is caught inside the CD This is a failure of CD deck’s mechanism and consult deck and is not ejected. your store of purchase. ERROR 3 A CD cannot be played due to scratches, etc. ERROR 6 A CD is loaded upside-down Eject the disc then reload it properly.
English 9. SPECIFICATIONS FM Tuner General Frequency Range: 87.9 MHz to 107.9 MHz Usable Sensitivity: 11 dBµV 50dB Quieting Sensitivity: 17 dBµV Alternate Channel Selectivity: 60 dB Stereo Separation (1 kHz): 30 dB Frequency Response (±3 dB): 30 Hz to 15 kHz Power Supply Voltage: 14.4 V DC (10.8 to 15.6 V allowable), negative ground Current Consumption: Less than 15 A Speaker Impedance: 4 Ω(4 Ω to 8 Ω allowable) Auto Antenna Rated Current: 500 mA or less Weight / Source unit: 3.50 lb. (1.
Clarion Co., Ltd. 2010/08 All Rights Reserved. Copyright © 2008: Clarion Co., Ltd.