
User Guide


22
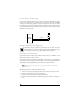
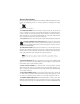
override switch, 2-pin BLUE plug
The Override switch should be accessible from the driver’s seat. It plugs into the BLUE port on the side
of the unit. Since the system features Override by using the remote, the button can be well hidden.
Consider how the button will be used before choosing a mounting location. Check for rear clearance
before drilling a 9/32-inch hole and mounting the button.The GRAY wire in the two-pin plug may also
be used as a (+) hidden switch input and can be connected to any (+) switch in the vehicle. (See Feature
Descriptions section of this guide.)
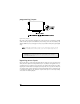
programmer interface, 3-pin BLACK plug
The BLACK three-pin port is provided for programming of the unit. When using the Pro
Security Programmer, it is possible to configure any and all of the programmable functions.
For more information please refer to the guide packaged with the programmer.
mounting the receiver/antenna
Receiver/antenna position should be discussed with the vehicle’s owner prior to installation, since the
antenna may be visible to the vehicle’s operator.
The best location for the receiver/antenna is centered high on either the front or rear windshield. For
optimal range, the antenna should be mounted vertically. It can be mounted horizontally in relation to
the windshield or under the dashboard away from metal, but range will be diminished.
NNOOTTEE::
Metallic window tint can also affect range, so this should be a consideration when determining
the mounting location.
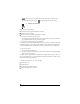
After determining the best mounting location, follow these steps:
1. Clean the mounting area with a quality glass cleaner or alcohol to remove any dirt or residue.
2. Plug the receiver/antenna cable into the receiver/antenna.
3. Mount the receiver/antenna using the supplied double-sided tape.
4. Route the receiver/antenna cable to the control module and plug it into the four-pin antenna con-
nector.
GRAY
BLACK
CONTROL
MODULE