Owner’s manual & Installation manual Mode d’emploi et manuel d’installation Manual de instrucciones y de instalación RADIO/DVD MULTIMEDIA CENTER WITH CeNET CONTROL CENTRE MULTIMÉDIA DVD/RADIO AVEC COMMANDE CeNET CENTRO DE MULTIMEDIA DE DVD/RADIO CON CONTROL CeNET Clarion Co., Ltd. All Rights Reserved.Copyright © 2006: Clarion Co., Ltd.
Eng.book 2 ページ 2005年12月27日 火曜日 午後11時36分 Thank you for purchasing the Clarion VRX765VD. English * * * * * Owner’s manual This owner’s manual is for the VRX765VD. Please read this manual thoroughly before operating this equipment. After reading this manual, be sure to keep it in a handy place (e.g., glove compartment). Check the contents of the enclosed warranty card and keep it carefully with this manual.
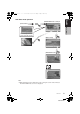
ori.fm Page 4 Tuesday, December 27, 2005 2:42 AM TUNER mode operation ∗4 EXPANDING SYSTEMS (Preset List screen) Expanding audio features ∗Enters desired frequency. 1 0 Satellite Radio 7 9 ENT ∗5 Expanding visual features TV Tuner CCD Camera CeNET CD Changer Note: The items listed outside of the frames are the commercial products generally sold. ∗1:The operation button is [ P ](OPEN) button in the description of operation per mode. Rear monitor touch [Back] key.
ori.fm Page 5 Tuesday, December 27, 2005 2:42 AM [CONT.] [MENU] Names of Buttons Note: • Be sure to read this chapter while referring to the front diagrams for chapter “3.CONTROLS” on page 5 (unfold). [E], [e] buttons Español • Use these buttons to increase/decrease the volume. [p] button • Press this button to enter the play pause mode in the DVD PLAYER/iPod/changer modes. Press the button again to resume playback.
ori.fm Page 5 Tuesday, December 27, 2005 2:42 AM [CONT.] [MENU] Names of Buttons Note: • Be sure to read this chapter while referring to the front diagrams for chapter “3.CONTROLS” on page 5 (unfold). [E], [e] buttons Español • Use these buttons to increase/decrease the volume. [p] button • Press this button to enter the play pause mode in the DVD PLAYER/iPod/changer modes. Press the button again to resume playback.
ori.fm Page 4 Tuesday, December 27, 2005 2:42 AM TUNER mode operation ∗4 EXPANDING SYSTEMS (Preset List screen) Expanding audio features ∗Enters desired frequency. 1 0 Satellite Radio 7 9 ENT ∗5 Expanding visual features TV Tuner CCD Camera CeNET CD Changer Note: The items listed outside of the frames are the commercial products generally sold. ∗1:The operation button is [ P ](OPEN) button in the description of operation per mode. Rear monitor touch [Back] key.
Eng.book 9 ページ 2005年12月27日 火曜日 午後11時36分 DVD Video mode operation English (DVD PLAYER mode screen)∗6 (Source menu) Owner’s manual ∗Screen during DVD mode when automobile moving. (Option menu) (DVD SETUP menu) Note: ∗6:When displaying movies in DVD video mode, touching the screen surface will cause the DVD PLAYER mode screen to be displayed.
Eng.book 10 ページ 2005年12月27日 火曜日 午後11時36分 Adjusting audio feature settings English (From any screen) Owner’s manual When a 5.1 ch Surround Decoder is connected (ADJUST mode menu) (AUDIO menu) (AUDIO EXT.
Eng.book 11 ページ 2005年12月27日 火曜日 午後11時36分 English Owner’s manual (AUDIO menu) (AUDIO EXT.
Eng.book 12 ページ 2005年12月27日 火曜日 午後11時36分 Adjusting the other system settings English (From any screen) Owner’s manual (ADJUST mode menu) (GENERAL menu) (MONITOR menu) (CLOCK) (CLOCK screen) (MONI ADJ) (Monitor Adjust screen) (Hour, Minute, am./pm.) Bright Color Hue Dimmer ∗Switched by touching this key repeatedly.
Eng.book 13 ページ 2005年12月27日 火曜日 午後11時36分 English 6. REMOTE CONTROL Remote control unit Owner’s manual Signal transmitter Operating range: 30˚ in all directions [BAND] [MUTE] [SRC] [VOLUME] [P.TIME] [0-9] [DISC SEL] [ ],[ ] [SEARCH MODE] [MENU] [RTN] [TOP MENU] [SET UP] [ENT] [ ],[ ] [ISR] [2-ZONE] [RPT] [SCN] [PBC] [RDM] [AUDIO] [SLOW] [ANGLE] [SUB TITLE] Inserting the Batteries 1. Slide the rear cover in the direction of the arrow, and remove it. 2.
Eng.book 14 ページ 2005年12月27日 火曜日 午後11時36分 English Functions of Remote Control Unit Buttons You can use the remote control unit to control the VRX765VD. When the 2-ZONE function is ON, the controls work upon the selected zone. Shared modes Owner’s manual [SRC] button • Press this button to turn on the power. Keep pressing this button more than 1 second to turn off the power. • Press this button to switch the modes such as TUNER mode, DVD PLAYER mode. [VOLUME] buttons • Increase and decrease volume.
Eng.book 15 ページ 2005年12月27日 火曜日 午後11時36分 Functions of Remote Control Unit Buttons • Press to play tracks at random in CD and MP3/ WMA modes. • Keep pressing more than 1 second to play folders at random in MP3/WMA mode. [RTN] button • Press to switch to the menu screen while a Video CD is being played back. Press to switch to the previous screen display while the Menu screen is being displayed. However, it may occur that this button operation dose not work on some discs.
Eng.book 16 ページ 2005年12月27日 火曜日 午後11時36分 Functions of Remote Control Unit Buttons English Owner’s manual [0 - 9] buttons [RPT] button • Press to enter track numbers in the Key Pad screen. • Press to select the disc number in the Disc List screen. • Press to perform track repeat. • Keep pressing more than 1 second to perform disc repeat. • Other button operations in this mode are the same as those in DVD PLAYER mode. [E], [e] buttons • Press to scroll the Disc/Track List screen.
Eng.book 17 ページ 2005年12月27日 火曜日 午後11時36分 Attaching the DCP 1. Hook the right side of the DCP to the right side of the main unit. 2. Settle the left side of the DCP to the main unit. We recommend taking the DCP with you when leaving the car. Removing the DCP 1. Keep pressing the [SRC] button more than 1 second to turn off the power. Magnet CAUTION CAUTION [SRC] button 2. Pull the left side of the DCP toward you, and remove it. • This unit uses a magnet to fix the DCP.
Eng.book 18 ページ 2005年12月27日 火曜日 午後11時36分 English 8. CAUTIONS ON HANDLING Liquid crystal panel/Generalities Owner’s manual For a longer service life, be sure to read the following cautions. • Be sure to house the liquid crystal panel inside the main unit when parking the car outdoors for long period of time. The liquid crystal panel will operate properly in a temperature range of 0 to 60°C. • Do not allow any liquids on the set from drinks, umbrellas etc. Doing so may damage the internal circuitry.
Eng.book 19 ページ 2005年12月27日 火曜日 午後11時36分 Storage • New discs may have some roughness around the edges. If such discs are used, the player may not work or the sound may skip. Use a ball-point pen or the like to remove any roughness from the edge of the disc. • Do not expose discs to direct sunlight or any heat source. • Do not expose discs to excess humidity or dust. • Do not expose discs to direct heat from heaters.
Eng.book 20 ページ 2005年12月27日 火曜日 午後11時36分 English 9. DVD VIDEO SYSTEM DVD video is a high-quality digital video source that provides crisp and clear images. One 12 cm disc contains either one film or four hours of music. Owner’s manual DVD Video Features This unit provides the following functions in addition to the high image quality and sound quality of DVD video. Note: • The functions described in the section, “Features”, for example, the recorded language, subtitles, angles, etc.
Eng.book 21 ページ 2005年12月27日 火曜日 午後11時36分 Discs that cannot be played back This DVD video player can play the following discs. This DVD video player cannot play back DVDAudio, DVD-RAM, Photo CDs, etc. Playable discs DVD video discs video CDs CD TEXT Audio CDs MP3 ID3 TAG WMA About CD Extra discs Note: • It may also not be possible to play back CDs recorded on a CD-R unit and CD-RW unit. (Cause: disc characteristics, cracks, dust/dirt, dust/dirt on player’s lens, etc.
Eng.book 22 ページ 2005年12月27日 火曜日 午後11時36分 English 10. OPERATIONS Basic Operations Owner’s manual Note: Be sure to read this chapter referring to the chapter “3. CONTROLS” on page 5. CAUTION CAUTION When the unit is turned on, starting and stopping the engine with its volume raised to the maximum level may harm your hearings. Be careful about adjusting the volume. Turning on and off the power Note: • Start the engine before using this unit.
Eng.book 23 ページ 2005年12月27日 火曜日 午後11時36分 Basic Operations English Mute 70˚ Owner’s manual 1. When in the TUNER, Satellite Radio, VISUAL or TV mode, press the [p] button to turn the mute on and off. When in the DVD PLAYER, iPod or changer mode, keep pressing the [p] button more than 1 second to turn the mute on and off. * When the mute is turned on, “MUTE” appears at the bottom left of the screen.
Eng.book 24 ページ 2005年12月27日 火曜日 午後11時36分 Basic Operations English Adjusting the angle of the liquid crystal panel Owner’s manual The angle of the liquid crystal panel can be adjusted depending on the mounting angle of the unit or light coming into the car. 1. Turn the power on. When the liquid crystal panel is closed, press the [P] (OPEN) button. 2.
Eng.book 25 ページ 2005年12月27日 火曜日 午後11時36分 Basic Operations 2-1. Touch the []] key of the BAL/FAD item. The MID gain, MID frequency (center frequency) and MID Q can be adjusted as follows. 3-1. Touch the [{] or [}] key to adjust to the fader level. 2-1. Touch the []] key of the MID item. * The factory default setting is “0”. (Adjustment range: front 12 to rear 12) [{] : Emphasized the sound from the front speakers. [}] : Emphasized the sound from the rear speakers. 3-2.
Eng.book 26 ページ 2005年12月27日 火曜日 午後11時36分 Basic Operations English Owner’s manual Turning on/off the MAGNA BASS EXTEND Adjusting the brightness, color, hue and dimmer level The Magna Bass Extend does not adjust the low sound area like the normal sound adjustment function, but emphasizes the deep bass sound area to provide you with a dynamic sound. Note: • This function is not available when the liquid crystal panel is closed.
Eng.book 27 ページ 2005年12月27日 火曜日 午後11時36分 Basic Operations 2-1. Touch the [ON] or [OFF] key of the CAMERA WARNING item to turn this function on or off (The factory default setting is “ON”). Switching the VTR system between NTSC and PAL Note: • This function is enabled only when the panel is open. • This setting is applied only to the VISUAL/VTR input mode. When an external device is connected to the Visual terminal, lock the front monitor to show the visual input source. 1.
Eng.book 28 ページ 2005年12月27日 火曜日 午後11時36分 Basic Operations English Owner’s manual Switching CONNECT (connect) Setting the Auto Panel Make the following settings when an external device is connected to the Visual terminal. When you remove or attach the DCP (Detachable Control Panel), you can set the liquid crystal panel automatically housing or opening. NAVI : when a navigation system is connected. * When the navigation system is connected, use the monitor lock function.
Eng.book 29 ページ 2005年12月27日 火曜日 午後11時36分 Basic Operations Setting the 2-ZONE function * The factory default setting is “OFF”. About the 2-ZONE function Note: • Radio stations cannot be selected when the SUB zone is selected. • The external different equipments connected via CeNET cannot simultaneously be used in the MAIN and SUB zones. Though the same equipment can be specified simultaneously. • If the 5.1 channel surround decoder (DVC940) is connected, this function is disabled.
Eng.book 30 ページ 2005年12月27日 火曜日 午後11時36分 Basic Operations English Monitor image and sound with 2-ZONE ON/OFF ●With 2-ZONE function OFF Front monitor lock ON Front monitor lock OFF Owner’s manual Visual connection [OTHER] (*1) Visual connection [NAVI] (*1) Visual connection [OTHER] (*1) Visual connection [NAVI] (*1) Front monitor (liquid crystal panel) Displays image of device connected to the Visual terminal. (*3) Displays image of device connected to the Visual terminal.
Eng.book 31 ページ 2005年12月27日 火曜日 午後11時36分 Listening to the radio 2. Press the [BAND] button or touch the [Band] key to select the radio band. Each time the button is pressed, the radio reception band changes in the following order: FM1 ➜ FM2 ➜ FM3 ➜ AM ➜ FM1... 3. Press the [R] or [F] button to tune in the previous or next preset station. Seek tuning 1. Press the [BAND] button or touch the [Band] key to select the desired band (FM or AM). 2.
Eng.book 32 ページ 2005年12月27日 火曜日 午後11時36分 Radio Operations English Owner’s manual Recalling a preset station Auto store There are total of 24 preset positions (6-FM1, 6FM2, 6-FM3, 6-AM) to store individual radio stations in memory. There are 2 ways available to recall the preset station. ●Using the [R] or [F] button 1. Press the [BAND] button to select the desired band (FM or AM). 2. Press the [R] or [F] button to recall the previous or next stored station. ●Using the Preset List screen 1.
Eng.book 33 ページ 2005年12月27日 火曜日 午後11時36分 Changing DVD System Settings Selecting the DVD SETUP menu 1. Press the [SRC] button, and touch the [DVD PLAYER] key. The DVD PLAYER mode screen is displayed. 2. Touch the [Option] key to display the Option menu. 3. Touch the [Setup] key to display the DVD SETUP menu. Set up the screen size according to the rear view monitor which is connected to this unit. 4-1.
Eng.book 34 ページ 2005年12月27日 火曜日 午後11時36分 DVD Video Player Operations English Setting up the disc menu language Owner’s manual 4-1. Touch the []] key of MENU LANGUAGE item. The MENU LANGUAGE menu is displayed. 4-2. Touch the key to select a desired language to set it. * The factory default setting is “ENGLISH”. Setting up the audio language Setting up the country code Set up the country number for setting up of the parental level. 4-1. Touch the []] key of PARENTAL LOCALE item.
Eng.book 35 ページ 2005年12月27日 火曜日 午後11時36分 DVD Video Player Operations NC-17 (NO ONE 17 AND UNDER ADMITTED) LEVEL6 R (RESTRICTED) LEVEL4 PG-13 (PARENTS STRONGLY CAUTIONED) LEVEL3 PG (PARENTAL GUIDANCE SUGGESTED) LEVEL1 G (GENERAL AUDIENCES) • The contents that the parental level restricts vary with the country code. Note: • For your safety, the VRX765VD has a safety function which turns off the picture when the car is moving, so only the audio can be heard.
Eng.book 36 ページ 2005年12月27日 火曜日 午後11時36分 DVD Video Player Operations English Owner’s manual DVD Video Operations Operating the DVD menu Watching a DVD-Video You can select the button items displayed in the DVD menu by directly touching it. If the button items are hard to select correctly, you can also operate them by displaying Key Pad on the screen. After disc loading, the play mode is automatically engaged. • When playback is not started, press the [p] button or touch the [p] key.
Eng.book 37 ページ 2005年12月27日 火曜日 午後11時36分 DVD Video Player Operations About chapter Chapter means a small segment to divide the data area of the disc. 1. Press the [R] or [F] button during playback. Chapters are skipped, as many as the times the button is pressed, and playback starts. Current location Pausing playback 1. Press the [p] button or touch the [p] key during playback. Playback pauses. 2. To resume playback, press the [p] button again. Playback resumes. Slow playback 1.
Eng.book 38 ページ 2005年12月27日 火曜日 午後11時36分 DVD Video Player Operations English Searching with a chapter/title number Owner’s manual You can locate the beginning of a scene using the chapter numbers or title numbers recorded on the DVD-Video disc. 1. Showing the DVD PLAYER mode screen, touch the [Search] key. The Key Pad screen appears with the chapter number input mode. Touching the [Title] key turns the Key Pad to the title number input mode.
Eng.book 39 ページ 2005年12月27日 火曜日 午後11時36分 DVD Video Player Operations On DVD discs in which video images have been recorded in two or more angles, you can switch among the angles during playback. This operation can be performed when the “Setting up the angle mark display” function (see page 33) is set to “ON”. 1. Touch the [ ] (Angle) key during playback. Each time you touch the key, you can switch among angles. • Depending on the disc, up to 9 angles may be recorded.
Eng.book 40 ページ 2005年12月27日 火曜日 午後11時36分 DVD Video Player Operations English Watching a video CD Owner’s manual After disc loading, the play mode is automatically engaged. • Button operation may differ depending on the story of the disc. After the menu screen is displayed For Video CD discs equipped with the PBC (Play Back Control) function, the menu screen appears. After the menu screen is displayed, select an item in the following operations and play it back.
Eng.book 41 ページ 2005年12月27日 火曜日 午後11時36分 DVD Video Player Operations * If you are playing a disc with PBC and the PBC function is engaged, this operation may not be performed. 5. Touch the [Back] key. Changing audio output You can change the audio output method. 1. Touch the screen to display the VIDEO CD mode screen. 2. Touch the [Audio] key during playback.
Eng.book 42 ページ 2005年12月27日 火曜日 午後11時36分 DVD Video Player Operations English Owner’s manual Skipping a track (searching) Other various play functions 1. Press the [R] or [F] button during playback. Tracks are skipped, as many as the times the button is pressed, and playback starts. • Pressing the [F] button starts playback from the beginning of the next track. • Pressing the [R] button starts playback from the beginning of the current track.
Eng.book 43 ページ 2005年12月27日 火曜日 午後11時36分 DVD Video Player Operations Listening to an MP3/WMA This unit is an ID3 Tag compatible model. This unit supports the title, artist and album display of the ID3 Tag versions 1 and 1.1. After disc loading, the play mode is automatically engaged. What is MP3/WMA? MP3 is an audio compression method and classified into audio layer 3 of MPEG standards. WMA is an audio compression method developed by Microsoft Corporation.
Eng.book 44 ページ 2005年12月27日 火曜日 午後11時36分 DVD Video Player Operations English Owner’s manual • In case of a track recorded at VBR (variable bit rate), the display for the play time of the track may be slightly different from the actual play time. Also, the recommended value of VBR ranges from 64 kbps to 320 kbps. • Depending on the damage conditions of a file, it may occur that the file is not played and the next file is played instead.
Eng.book 45 ページ 2005年12月27日 火曜日 午後11時36分 DVD Video Player Operations Playback by selecting a folder and track (Direct select mode) This operation allows searching using the folder and track numbers recorded on the MP3/WMA disc. 1. Touch the [Search] key. The Key Pad screen appears with the track number input mode. Touching the [Folder] key turns the Key Pad to the folder number input mode. 2. Input the number for the track or folder that you want to play back with [0] to [9] key. 3.
Eng.book 46 ページ 2005年12月27日 火曜日 午後11時36分 English Other Functions Owner’s manual Entering titles Title list play Titles up to 10 characters long can be stored in memory and displayed for Radio stations, CD, TV stations, and CDs in the CD changer. The numbers of titles that can be entered for each mode are as follows. You can display a list of titles, then select the CD track, disc or broadcast station to listen to from that list.
Eng.book 47 ページ 2005年12月27日 火曜日 午後11時36分 Other Functions This function is used to disable the internal amplifier when an external amplifier is connected. 1. Touch the screen to display the mode menu, then touch “Display size” key ([F.WIDE], etc.) at the top right of the screen. The screen changes to the SCREEN MODE menu. 2. Touch the [F.WIDE], [WIDE], [CINEMA], or [NORMAL] key to select the desired monitor display size. “F. WIDE” : (full wide mode) The whole image elongates horizontally.
Eng.book 48 ページ 2005年12月27日 火曜日 午後11時36分 English 11. OPERATIONS OF ACCESSORIES iPod Operations Owner’s manual This unit can be used to control a connected Apple iPod (third generation version 2.2 or higher, iPod Mini, fourth generation, iPod nano, iPod with video). Note: • Note that iPod versions higher than those noted above may not be playable. • The unit will not operate, or may operate improperly with unsupported versions. • First and second generation iPod and iPod shuffle cannot be used.
Eng.book 49 ページ 2005年12月27日 火曜日 午後11時36分 iPod Operations Play/Pause icon(p) display Track No. Clock time Play mode (*1) Song title/ Artist name/ Album title (*2) Progress/ Volume indicator Play time Remaining time Pausing playback Note: *1 Displays status of Repeat, Shuffle play. 1 : 1-track Repeat A : All Repeat S : Song Shuffle A : Album Shuffle *2 When a Podcast or Audio Book which has two or more chapters is played back, the chapter title and chapter number are displayed.
Eng.book 50 ページ 2005年12月27日 火曜日 午後11時36分 iPod Operations English Fast forward and fast backward Owner’s manual 1. Press and hold the [R] or [F] button during playback. The playback speed becomes 5-time faster first and then 20-time faster 3 seconds later. Releasing the button resumes to the normal speed playback. TOP function The TOP function resets the player to the first track of the tracks to play. 1. Press the [BAND] button to playback the first track of the current list.
Eng.book 51 ページ 2005年12月27日 火曜日 午後11時36分 English VISUAL Operations This function is available when a VTR, etc. is connected to the visual terminal. WARNING Switching to the VISUAL mode Note: • For your safety, the VRX765VD has a safety function which turns off the picture when the car is moving, so only the audio can be heard. The picture can only be watched when the car is stopped and the parking brake is applied. The visual terminal can be used to change the input audio level.
Eng.book 52 ページ 2005年12月27日 火曜日 午後11時36分 CD Changer Operations English Switching to a next disc. (Disc Up function) Other various play functions 1. Touch the [Option] key. Owner’s manual The disc up function plays from the first track (track No.1) of the next disc. 1. Press the [BAND] button. The disc changes to the next disc. Searching with a track number * This function is available only for the current disc. 1. Touch the [Search] key. 2.
Eng.book 53 ページ 2005年12月27日 火曜日 午後11時36分 Note: • When the DVD changer (VCZ625) is connected via optical cable, no sound will be output if AUDIO OUT is switched to ANALOG on the changer’s “GENERAL SETUP” menu. Selecting a disc from the list 1. Touch the [List] key. 2. Touch the corresponding Disc key (1 to 6) to select the desired disc. The disc changes to the specified disc. Switching to a next disc (Disc Up function) 1. The disc up function plays from the first track (track No.1) of the next disc.
Eng.book 54 ページ 2005年12月27日 火曜日 午後11時36分 TV Operations English Owner’s manual Selecting with a channel number Recalling a preset station 1. Touch the screen to display the TV/VTR mode menu, then touch the [Search] key. 2. Enter the channel number corresponding with the station you desired by touching the [0] to [9] key. • If you touch the wrong number ([0] to [9] key), you can delete it to touch the [CLR] key. 3. Touch [ENT] key. The TV station you required would be tuned. 4. Touch the [Back] key.
Eng.book 55 ページ 2005年12月27日 火曜日 午後11時36分 TV Operations English Preset scan Owner’s manual Preset scan shows each preset channel before it automatically advances to the next preset. This function is useful for searching for desired TV station in memory. 1. Touch the screen to display the TV/VTR menu, then touch [List] key. 2. Touch the [PS] key to start preset scan. The unit starts scanning each station for 7 seconds sequentially. 3. When the desired channel is received, touch the [PS] key again.
Eng.book 56 ページ 2005年12月27日 火曜日 午後11時36分 English Satellite Radio Operations Owner’s manual This function is available when a Satellite Radio Receiver is connected through the CeNET cable.
Eng.book 57 ページ 2005年12月27日 火曜日 午後11時36分 Satellite Radio Operations A total of 18 satellite radio stations can be stored (6-XM1, 6-XM2 and 6-XM3 for XM; or 6-SR1, 6SR2 and 6-SR3 for SIRIUS). This allows you to store your favorite satellite radio stations in memory for later recall. 1. Touch the [List] key. 2. Press the [BAND] button or touch the [Band] key to select the desired band. 3. Touch the corresponding Preset key (1 to 6) to recall the desired preset station.
Eng.book 58 ページ 2005年12月27日 火曜日 午後11時36分 Satellite Radio Operations English Presetting a category Owner’s manual A category can be preset by registering specific categories in Category Preset keys 1 to 6. Then the desired category can be recalled by pressing the corresponding Category Preset keys. 1. Touch the [CAT] key. 2. Touch the [v] or [V] key to scroll the category list. 3. Touch the Category item key you wish to store in memory. 4. Touch the [List] key to display the Preset Category screen.
Eng.book 59 ページ 2005年12月27日 火曜日 午後11時36分 5.1 ch Surround Decoder control function This section describes operation procedures of setting functions. For details on each functions, refer to the owner’s manual supplied with the 5.1 ch Surround Decoder. * Requires an optional amplifier. Note: • The 2-ZONE mode is disabled when the DVH940 is connected. 1. Press the [ADJ] button to display the ADJUST menu.
Eng.book 60 ページ 2005年12月27日 火曜日 午後11時36分 5.1 ch Surround Decoder Operations English ●FILTER This function is used to select filter frequencies that suit the speakers that are used. Owner’s manual * This function is not available for speakers whose SPEAKER SEL setting is set to “OFF”. 3-1. Touch the []] key of the FILTER item to show the submenu. 3-2. Touch the [[] or []] key of the FRONT HPF, CENTER HPF, SURROUND HPF or SUB WOOFER LPF item to adjust.
Eng.book 61 ページ 2005年12月27日 火曜日 午後11時36分 5.1 ch Surround Decoder Operations DSF effect ON/OFF 1. Press the [ADJ] button, and touch the [AUDIO] key. 1. Press the [ADJ] button, and touch the [AUDIO] key. 2. Touch the []] key of the P.EQ item to display the submenu. 3. Touch the key for the desirable type to select. The P.EQ adjustment contents are as follows: [SIGNAL]: This function selects “MUSIC” or “P. NOISE”. * The factory default setting is “P.NOISE”.
Eng.book 62 ページ 2005年12月27日 火曜日 午後11時36分 5.1 ch Surround Decoder Operations English Selecting the Dolby PL II (Dolby Pro Logic II ) type Owner’s manual * The factory default setting is “OFF”. * This setting is disabled when both the CENTER SP and SURROUND SP items of the SPEAKER SEL setting are set to “OFF”. 1. Press the [ADJ] button, and touch the [AUDIO] key. 2. Touch the []] key of the Dolby PL II item. 3. Touch the key for the desirable type to select. 4.
Eng.book 63 ページ 2005年12月27日 火曜日 午後11時36分 English 12.IN CASE OF DIFFICULTY GENERAL Cause Measure Fuse is blown. Incorrect wiring. Consult your store of purchase. Nothing happens when buttons are pressed. The microprocessor has malfunctioned due to noise, etc. Turn off the power and remove the DCP. Press the reset button for about 2 seconds with a thin rod. Display is not accurate. Replace with a fuse of the same amperage. If the fuse blows again, consult your store of purchase.
Eng.book 64 ページ 2005年12月27日 火曜日 午後11時36分 TV/VTR(When connecting an optional TV tuner, etc.) English Problem Cause Measure The parking brake is not engaged. Check that the parking brake is engaged. The display is dark. The brightness control is too low. Adjust the brightness properly. The operating condition is not good. The temperature inside the vehicle may be 0°C or lower. Set to an appropriate temperature (25°C or so) and check it again. Owner’s manual The image is not displayed.
Eng.book 65 ページ 2005年12月27日 火曜日 午後11時36分 English 13.ERROR DISPLAYS If an error occurs, one of the following displays is displayed. Take the measures described below to solve the problem. Owner’s manual DVD PLAYER Problem Cause Measure ERROR 2 A CD is caught inside the This is a failure of CD deck’s mechanism and CD deck and is not ejected. consult your store of purchase. ERROR 3 A CD cannot be played due Replace with a non-scratched, non-warped disc. to scratches, etc.
Eng.book 66 ページ 2005年12月27日 火曜日 午後11時36分 Owner’s manual FM Tuner LCD Monitor Frequency Range: 87.9 MHz to 107.
Eng.book 67 ページ 2005年12月27日 火曜日 午後11時36分 English INSTALLATION AND WIRE CONNECTION MANUAL INSTALLATION AND WIRE CONNECTION MANUAL 1. BEFORE STARTING 1. This set is exclusively for use in cars with a negative ground 12 V power supply. 2. Read these instructions carefully. 3. Be sure to disconnect the battery “-” terminal before starting. This is to prevent short circuits during installation. (Figure 1) Car battery Figure 1 2.
Eng.book 68 ページ 2005年12月27日 火曜日 午後11時36分 English 4. CAUTIONS ON INSTALLATION INSTALLATION AND WIRE CONNECTION MANUAL 1. Prepare all articles necessary for installing the main unit before starting. 2. This model features a liquid crystal panel that slides forward (shell loading system). On some types of cars, the liquid crystal panel may make contact with the dashboard or shift lever, in which cause it cannot be installed.
Eng.book 69 ページ 2005年12月27日 火曜日 午後11時36分 Universal Mount Strap * This part is not provided. 7-3/16" (182 mm) Hole 2-1/16" (53 mm) • Console opening dimensions Instrument panel Hole Stoppers Hexagonal bolt Screwdriver Main unit Universal mounting bracket Stoppers 2-Spring Outer escutcheon Note: Set the outer escutcheon so that its metallic part on the back side fits the upper edge of the main unit.
Eng.book 70 ページ 2005年12月27日 火曜日 午後11時36分 Fixed Mount (TOYOTA, NISSAN and other ISO/DIN equipped vehicles) English INSTALLATION AND WIRE CONNECTION MANUAL This unit is designed for fixed installation in the dashboard. If the vehicle is equipped with a factory-installed radio, install the main unit with the parts and screws marked (*). (Figure 8) If the vehicle is not equipped with a factoryinstalled radio, obtain an installation kit to install the main unit in the following procedure. 1.
Eng.book 71 ページ 2005年12月27日 火曜日 午後11時36分 Note: • Keep the hook plate. You cannot remove the main unit without disengaging the hook plate. INSTALLATION AND WIRE CONNECTION MANUAL 1. When the rear of the main unit has been secured with the method shown in Figure 6 unfasten the special screw. 2. Remove the outer escutcheon. 3. Insert the hook plate between the spring and the universal mounting bracket, fit tab B of the spring into hole A of the hook plate, then pull the main unit out by the hook plate.
Eng.book 72 ページ 2005年12月27日 火曜日 午後11時36分 English 8. WIRE CONNECTION Note: • Before installing, be sure to disconnect the negative cable of the car battery. • In the optional devices, the RCA Pin and the Connector cable are separately-sold items.
Eng.
Eng.book 74 ページ 2005年12月27日 火曜日 午後11時36分 Connecting the Accessories English ●Connection to the external amplifier The external amplifier can be connected unless the 5.1ch Surround Decoder is connected. For detailed information, refer to the instruction manual of the 5.1ch Surround Decoder. INSTALLATION AND WIRE CONNECTION MANUAL ●Connection to the CCD camera for vehicle The CCD camera for vehicle can be connected to CCD terminal on the TV tuner.
Eng.book 75 ページ 2005年12月27日 火曜日 午後11時36分 English 9.
Eng.
Owner’s manual & Installation manual Mode d’emploi et manuel d’installation Manual de instrucciones y de instalación RADIO/DVD MULTIMEDIA CENTER WITH CeNET CONTROL CENTRE MULTIMÉDIA DVD/RADIO AVEC COMMANDE CeNET CENTRO DE MULTIMEDIA DE DVD/RADIO CON CONTROL CeNET Clarion Co., Ltd. All Rights Reserved.Copyright © 2006: Clarion Co., Ltd.