
Product Manual

24
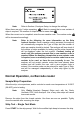
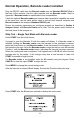
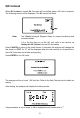
Normal Operation, Barcode reader installed
Plug the RS232C cable from the Barcode reader into the Standard RS232C Port in
the back of the analyzer. Use the cable supplied with the Barcode reader. Refer to
Appendix 5 Barcode reader for specifications and compatibilities.
If both the optional Barcode reader and external data transmission capability are used
at the same time, use the serial splitter cable to connect both external computer and
Barcode reader to the analyzer Standard RS232C port.
Ensure the analyzer parameters are configured properly as described in Section 4
Analyzer Setup, with Barcode Reader set to Yes. Turn the power switch located at
the back panel of the analyzer on.
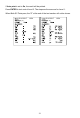
Strip Test – Single Test Mode with Barcode reader
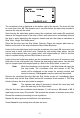
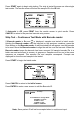
Press START from the Initial Screen.
A prompt to scan the Barcode ID with the reader will display. If a Barcode reader is
installed, holding the Barcode reader over the barcode on the specimen container,
press the Scan button on the Barcode reader. A red illuminated line will appear over
the barcode to be read. Move the Barcode reader to align the red line over the barcode.
Position it until the Barcode reader beeps, indicating the barcode has been scanned.
When the reading has been completed, it will appear next to ID. ID will reflect the last
barcode read by the reader. It will change every time a new barcode is read until
START is pressed to begin the test.
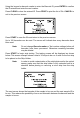
If a Barcode reader is not installed, enter the ID manually using the keypad. Press
CANCEL to clear the input, START to begin the test.
Press MENU to change the current testing mode.
After the barcode is entered, ID will display. Review the ID before testing the strip.
Press START after the ID has been entered to display the next screen.