® RC100 Rim Clamp® Tire Changer For servicing motorcycle and ATV tire/wheel assemblies as well as automotive and most light truck tire/wheel assemblies Safety Instructions Operating Instructions Installation Instructions Maintenance Instructions READ these instructions before placing unit in service. KEEP these and other materials delivered with the unit in a binder near the machine for ease of reference by supervisors and operators. 1601 J. P.
Table of Contents Operator Protective Equipment Definitions of Hazard Levels ................................1 Owner's Responsibility ........................................1 Principal Operating Parts .....................................2 Operating Instructions .........................................3 Bead Loosening and Demounting ................3 Mounting .........................................................6 Inflation ..................................................................
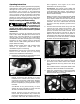
Definitions of Hazard Levels Identify the hazard levels used in this manual with the following definitions and signal words: DANGER Watch for this symbol: Owner's Responsibility To maintain machine and user safety, the responsibility of the owner is to read and follow these instructions: • Follow all installation instructions. ! DANGER It Means: Immediate hazards which will result in severe personal injury or death.
Principal Operating Parts Know Your Unit Compare this illustration with the unit before placing it into service. Maximum performance and safety will be obtained only when all persons using the unit are fully trained in its parts and operation. Each user should learn the function and location of all controls. Prevent accidents and injuries by ensuring the unit is properly installed, operated, and maintained. 11 2 ✓ Do It Now Now is a good time to fill out the warranty registration card.
Operating Instructions The unit must be properly operated and properly maintained to help avoid accidents that could damage the unit and injure the operator or bystanders. This section of the Operating Instructions manual review basic operations and use of controls. These instructions should be reviewed with all employees before they are allowed to work with the machine. Keep these instructions near the machine for easy reference.
5. Determine the mounting side of the wheel. The mounting side is the narrow side of the drop center. (Tire removed in Figure 4 for clarity.) 8. The mount/demount head roller should be in contact with the rim edge. Turn the swing arm adjusting knob to move the head away from the rim 1/8 to 1/4 inch. Narrow Side Drop Center Long Side Motorcycle ATV Figure 4 - Determining Mounting Side of Wheel 6. Place tire/wheel assembly on table top with mounting side up (Figure 5).
14. Depress the table top pedal to rotate the wheel. The demount head will guide the bead up and over the edge of the wheel. Continue rotation until lower bead is demounted. NOTE: With tube-type tires, demount the upper bead and remove the tube before demounting the lower bead. Motorcycle ATV Figure 9 - Insert Bead Lifting Tool 11. Push the bead lifting tool down towards the wheel to lift the tire bead up and over the knob portion of the demount head. The tool may be removed if desired (Figure 10).
Mounting This information must be read and followed carefully to prevent accidents and injuries during mounting. 4. Place tire over wheel and move swing arm into position. Position the tire so that the lower bead is above the rear extension of the mount/demount head and below the front knob (Figure 14). Check tire and wheel carefully before mounting. Make sure the tire bead diameter and wheel diameter match exactly. Consult the Rubber Manufacturer's Association for approved rim widths for tire sizes.
Inflation Bead Seating On the RC100, tire inflation is performed in two steps: Bead Seat and Inflation. These steps are explained in detail on page 13. Read the explanation of each step and understand them thoroughly before proceeding. Operator should keep hands, arms, and entire body away from the tire during the remaining bead seat and inflation procedures. Do not stand over tire, as personal injury could result. Check for proper inflation gauge operation.
Inflation NEVER exceed tire manufacturer's recommended air pressure. Tires can explode, especially if inflated beyond these limits. Keep hands, arms, and entire body back from inflating tire. Avoid distraction during inflation. Check tire pressure frequently to avoid over inflation. Excessive pressure can cause tires to explode, causing serious injury or death to operator or bystander. ! DANGER Manual Release Valve Figure 15 - Stand Back During Beat Seat and Inflation 1. Make sure both beads are seated.
Automobile Performance, Custom, and Aluminum Wheels Only tire technicians with experience and training on custom wheels should attempt to service expensive custom alloy or aluminum wheels and highperformance low-profile tires. ! CAUTION 2. Pull the bead loosener shoe away from the machine and roll the tire into position against the bumper pad. Position the tire with the valve stem in the 3 o'clock position (in direct line with the bead loosener shoe).
3. Loosen bottom bead, starting with valve stem positioned directly next to the loosener shoe (Figure 20). Figure 23 - Position Valve Stem Under Demount Head Figure 20 - Loosen Bottom Bead 4. Liberally lubricate the bottom bead of the tire (Figure 21). 8. Insert bead lifting tool between knob on demount tool and tire bead. Pull lifting tool down over wheel to lift bead up and over the knob.
NOTE: Mounting the top bead can be very difficult when mounting new tires on many performance and custom wheels. Figure 26 - Remove Drop Center Tools 11. Demount lower bead. In most cases when demounting performance tires, the lower bead will be less difficult. Use help to lift, position, and hold tire. Pay close attention to sensor/transmitter location, and position it directly below the demount tool when starting the lower bead demount procedure.
Custom and Special Wheels Tube-Type Tires Alloy Wheels Some manufacturers offer wheels with little or no drop center. These are not DOT approved. The tire or wheel - or both - can be damaged and the tire could explode under pressure, resulting in serious in jury or death. If you attempt to mount/demount this type of wheel, use extreme caution. Mounting 1. Avoid pinching or forcing the tube. 2. Apply rubber lubricant to the beads of the tire. 3. Mount the bottom bead. 4.
Stages of Inflation Review these descriptions and diagrams carefully. Refer to them as necessary during bead sealing, bead seating, and inflation to verify that you are proceeding properly and safely. Bead Sealing (machines equipped with Air Blast) A 140 PSI air blast from the table top jets creates an air curtain to aid in bead sealing. Never exceed 10 PSI in the tire during bead sealing. The tire will contain about 1/2 to 2 PSI when bead seal is obtained.
Maintenance Instructions Read and follow all the maintenance instructions provided in this manual to keep the machine in good operating condition. Refer to the other materials received with the unit and to the service bulletins from the manufacturer for additional instructions on proper maintenance and service. Regular inspections and proper maintenance are essential to preventing accidents and injuries.
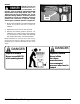
Installation Instructions Proper unit installation is necessary for safe use and efficient operation. Proper installation also helps protect the unit from damage and makes service easier. Always place safety poster and instructions near the unit. ! CAUTION Location Select a location using the drawings below. The area should provide the operator with enough space to use the equipment in a safe manner.
Notes 16 • RC100 Rim Clamp Tire Changer
Notes RC100 Rim Clamp Tire Changer • 17
ONE WORD FOR SAFETY R.I.M. READ INSPECT MOUNT READ… INSPECT… MOUNT… Mounting and inflating the wrong size tire can get you hurt. Read the size on the tire and make sure it matches the rim. Be especially careful about putting a smaller tire on a larger rim, such as a 16-inch tire on a 16.5-inch rim. Before you put any tire on a rim, inspect the rim for rust, tough spots, bent edges, or cracks that could prevent the tire from seating right.