
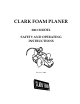
Operating instructions

WD-40, light oils, Triflow, Teflon, and hard waxes have been successfully used.
BASE PLATE MODIFICATION
The edges of the rear base plate are left square and sharp on new planers. They were left this
way as many shapers want foam dust and wood dust to be pushed ahead of the planer. If the
edges are rounded the planer will lift over the dust.
The edges can be easily rounded. Caution is advised as aggressive rounding makes the planer
tipsy.
When the planer comes from the factory the rear base plates vary in thickness and some are
warped. Therefore, we strongly suggest that you do not use the rear base plates from older
planers on the 2003 Model. The base plates on the 2003 Model are milled to a uniform thick-
ness and then a custom made plastic gasket is inserted between the rear base plate and the
plastic housing. This makes the indexing of the blades exactly the same on all 2003 Model
planers.
POWER CORD ADJUSTMENT
When using a vacuum system, simply attach the cord to the vacuum hose.
Without a vacuum system it is important to loop the cord forward, then back around and
then cable tie or tape the cord to the top of the handle. When using the planer wrap the cord
around your arm.
Never let the cord simply drag on the blank. This will cause premature cord failure.
Note that some shapers drape the cord over their shoulder.
KNOB SELECTION
The large depth adjustment knob on the 2003 Model is a 1/2" - 13 pitch Standard Thread.
There are quite a few stock knob designs available with this thread and will fit directly on the
planer. We normally stock several types of knobs at our factory.
The knob that comes with the planer can be modified to suit the individual shaper using tape
or other materials.