CON18LI.
CON18LI.fm Page 2 Monday, September 3, 2012 4:29 PM INTRODUCTION Thank you for purchasing this CLARKE 18V Cordless Combi Drill. Before attempting to use this product, please read this manual thoroughly and follow the instructions carefully. In doing so you will ensure the safety of yourself and that of others around you, and you can look forward to your purchase giving you long and satisfactory service.
CON18LI.fm Page 3 Monday, September 3, 2012 4:29 PM SAFETY PRECAUTIONS WARNING: READ ALL INSTRUCTIONS. FAILURE TO FOLLOW ALL INSTRUCTIONS LISTED BELOW MAY RESULT IN ELECTRIC SHOCK, FIRE AND/ OR SERIOUS INJURY. THE TERM “POWER TOOL” IN ALL WARNINGS LISTED BELOW REFERS TO YOUR 18V CORDLESS COMBI DRILL. 1. WORK AREA a. Keep work area clean and well lit. Cluttered and dark areas invite accidents. b.
CON18LI.fm Page 4 Monday, September 3, 2012 4:29 PM 4. POWER TOOL USE AND CARE a. Do not force the power tool. Use the correct power tool for your application. The correct power tool will do the job better and safer at the rate which it was designed. b. Do not use the power tool if the switch does not turn it on and off. Any power tool that cannot be controlled with the switch is dangerous and must be repaired. c.
CON18LI.fm Page 5 Monday, September 3, 2012 4:29 PM 6. SERVICE a. Have your power tool serviced by a qualified repair person using only identical replacement parts. This will ensure that the safety of the power tool is maintained. ENVIRONMENTAL PROTECTION Recycle unwanted materials instead of disposing of them as waste. All tools, accessories and packaging should be sorted, taken to a recycling centre and disposed of in a manner which is compatible with the environment.
CON18LI.fm Page 6 Monday, September 3, 2012 4:29 PM ELECTRICAL CONNECTIONS WARNING! Read these electrical safety instructions thoroughly before connecting the product to the mains supply. This product battery charger is provided with a standard 13 amp, 230 volt (50Hz), BS 1363 plug, for connection to a standard, domestic electrical supply. Should the plug need changing at any time, ensure that a plug of identical specification is used.
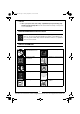
CON18LI.fm Page 7 Monday, September 3, 2012 4:29 PM BATTERY CHARGING WARNING: WHEN THE BATTERY IS REMOVED FROM THE TOOL AFTER USE, IT MAY BE HOT. ALWAYS ALLOW TO COOL BEFORE RECHARGING. DO NOT RECHARGE A HOT BATTERY. • The battery pack must be charged before operating the drill. • The battery should be charged at ambient air temperatures of between -10oC and 40oC. TO CHARGE THE BATTERY PACK, PROCEED AS FOLLOWS. 1. Connect the charger to the mains supply. • The green power indicator will light up. 2.
CON18LI.fm Page 8 Monday, September 3, 2012 4:29 PM BEFORE USE FITTING THE BATTERY FIT THE BATTERY 1. Slide the battery pack onto the base of the handle. REMOVE THE BATTERY 1. Press and hold the release button on top of the battery. 2. Slide the battery away from the base of the handle. INSERTING DRILL BITS, OR SCREWDRIVER BITS WARNING: BEFORE REMOVING ANY BITS, MAKE SURE THAT THE FORWARD/REVERSE SWITCH IS IN THE CENTRAL LOCKED OFF POSITION. 1.
CON18LI.fm Page 9 Monday, September 3, 2012 4:29 PM ADJUSTMENTS FORWARD/REVERSE The forward/reverse switch is used to select the direction of rotation. 1. Use the forward/reverse switch to select the direction of rotation. 2. Reverse should only be selected when removing screws. SAFETY LOCK OFF The forward/reverse switch can be used as the safety lock off button by pushing it half way through the drill body.
CON18LI.fm Page 10 Monday, September 3, 2012 4:29 PM SELECTING THE DRILLING MODE WARNING: DO NOT CHANGE THE DRILLING MODE WHILE THE CHUCK IS ROTATING. The drill is equipped with two drilling modes. Hammer drilling mode Rotary drill mode CAUTION: WHEN IN THE HAMMER DRILLING MODE YOU SHOULD ONLY USE MASONRY DRILL BITS (NOT SUPPLIED). 1. To select hammer action mode, rotate the mode selector until the hammer symbol is aligned with the arrow on the drill. 2.
CON18LI.fm Page 11 Monday, September 3, 2012 4:29 PM TORQUE ADJUSTMENT To select the correct torque setting for screwdriving: 1. Set the mode selector to 1. 2. Fit and tighten the first screw, 3. if the clutch starts to ratchet before the screw is correctly seated, rotate the mode selector to a higher number until the clutch ratchets only when the head of the screw is flush with the surface of the material. CAUTION: DO NOT ADJUST THE MODE SELECTOR WHILE THE CHUCK IS ROTATING. OPERATING THE DRILL 1.
CON18LI.fm Page 12 Monday, September 3, 2012 4:29 PM DRILLING TIPS • Always use sharp, good quality drill bits. The performance of your drill is dependant on the quality of the bits used. • After drilling material to the full depth, do not simply pull out the drill but maintain chuck rotation to ease withdrawal. • Reduce the pressure on the drill bit when it is about to break through. This will prevent the drill from jamming. • If drilling a large hole, first drill a pilot hole using a smaller drill bit.
CON18LI.fm Page 13 Monday, September 3, 2012 4:29 PM SCREWDRIVING TIPS • Place the screwdriver bit in the head of the screw and apply light pressure to the drill. • If the screw head is not flush with the material, increase the torque and start again. • Make sure that the screwdriver bit is inserted straight and upright in the screw head, or the screw may be damaged. • When driving wood screws, pre-drill pilot holes to make driving easier and to prevent splitting the material.
CON18LI.fm Page 14 Monday, September 3, 2012 4:29 PM SPECIFICATIONS Model Number CON18LI Part Number 6479512 Charger voltage 230V~50Hz Battery voltage 18 volts (1500 mAh) Charging time 1 hour Keyless chuck capacity 0.8 mm -10 mm Torque settings 22 No load speed Setting 1 - 0 - 350 RPM Setting 2 - 0 - 1250 RPM Maximum Drilling Capacity: Wood - 16 mm Steel - 8 mm Masonry - 10 mm Sound Pressure Level 88dB LpA Sound Power Level 99 dB LWA Vibration Level 16.41 m/s2 Weight 3.
CON18LI.fm Page 15 Monday, September 3, 2012 4:29 PM DECLARATION OF CONFORMITY 15 Parts & Service: 020 8988 7400 / E-mail: Parts@clarkeinternational.com or Service@clarkeinternational.
CON18LI.