
Service manual


CLARKE TECHNOLOGY Operator's Manual - Encore S20/L20 Page -23-
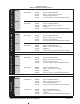
Maintenance For The Squeegee
To remove the squeegee, follow this procedure:
1. Remove the squeegee assembly by loosening the two
knobs that attach the squeegee to the machine. Pull
the squeegee assembly off. See figure 9.
2. Inspect the squeegee blade.
3. If the blade is worn, turn the blade so that a new edge
is in the wiping position.
4. Reinstall squeegee assembly on the machine.
How To Adjust The Squeegee
The following adjustments are set at the factory, however
they may require slight adjustment.
Adjusting Squeegee Pressure:
To adjust the pressure, refer to Figure 10. Proper
adjustment will produce a uniform flare along the rear
blade when the machine is moved forward. To increase
pressure, loosen bolt and slide squeegee mount down.
To decrease the pressure, loosen the bolt and slide
squeegee mount up.
Adjusting Squeegee Tilt:
The tilt of the squeegee causes the rear blade to raise up
in the center or on the ends, depending on which
direction the tilt is changed. For tilt adjustment, refer to
figure 11. Loosen left and right screw "X". In order to
bring the rear blade down in the center, tip "Y" down. To
bring both ends down, tip "Y" up. Make very small
adjustments and try it until a uniform flare is achieved.
Changing the tilt may also require readjusting the squee-
gee pressure.
Adjusting Squeegee Swing:
The factory sets the squeegee swing for using the 33"
squeegee. If you are using the optional 29" squeegee, the
stop screws (page 35, ref. # 20) must be adjusted in. This
is done by loosening the jam nut (page 35, ref. #10); turning
the screw in; and then retightening the nut. The squeegee
(29" or 33") is properly adjusted when it will swing all the
way left or right to within 3/4" of the drive wheels without
hitting them.
MAINTENANCE
Figure 9
Figure 10
Figure 11
X
Y