
Instruction manual


JUPITER CM-4400 Control Module Installation and Operating Manual 183
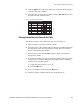
The Control Panel Override Set
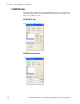
4. Click the Apply button. The name of the new output set will then appear
in the Override Sets: window.
5. Select the new Override table and then click the Open Table button. The
Override Set table will then open.
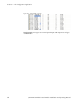
Figure 130. The Override Set Table
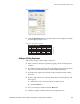
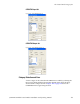
Entering Information in the Override Set Table
Follow these steps to enter information into a CP Override set:
1. Enter a unique name in the Override column.
2. Select the name of the switcher input for the first override button from
the drop-down list in the Logical Input column. The source of these
names is the Switcher Input table
3. Select (or place a check in) the Edit check box if you want panels to
change the override.
4. Select the Levels that you want to switch by clicking in the appropriate
Levels field. A secondary dialog box showing the names of existing
switcher levels will then appear.
a. Toggle the preferred levels on or off.
b. Click the OK button.
5. Save your changes and then click the OK button.
6. Validate, compile, and then activate the configuration set.
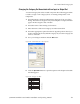
1
CP Override Set — KXYZ−OVE
Override
BLK
Input
BLK
Edit Levels
YYYY
2
3
4
5
6
BARS BARS YYYY
TONE TONE YYYY
SLNC SLNC YYYY
Usr1 BLK YYYY
Usr2 BLK YYYY
...
...
...
...
...
...
Logical
071876600_Overidetable