
Owner`s manual
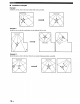
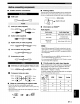

• Cables used for connections
O HDMI cable
Audio pin cable (supplied)
(Red) (Red)
Optical cable (supplied)
II S"
Digital audio pin cable (supplied)
(Orange) (Orange)
3.5 mm stereo mini plug cable
5 Subwoofer pin cable
0SD video pin cable (supplied) / Video pin cable
(Yellow) (Yellow)
0 Component video pin cable
)l (Blue)
(Blue) [[
(Red) (Red)
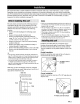
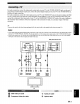
• Notes on connecting the optical cable
• Pull out the cap before connecting the optical cable.
When you are not using the optical cable, be sure to put the cap
back in place.
• When inserting the cable into the optical digital jack, make sure
the direction is correct.
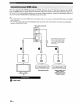
• Affixing cables
To prevent cables from becoming unplugged, place the supplied cable
clamp with the open side facing upward, attach it to the rear panel of
this unit in a suitable position, and then affix cables in the cable clamp.
Optical cable
_€=_==:_ 4V' Attach to this unit
• Information on HDMF M
Audio signals
DVD video Dolby Digital, DTS, PCM
2-channel stereo
DVD audio
(up to 96 kHz/24 bit)
Blu-ray Disc
HD DVD Dolby Digital, DTS, PCM
• When CPPM copy-protected DVD audio is played back, video and
audio signals may not be output depending on the type of DVD player.
• This unit is not compatible with HDCP-incompatible HDMI or
DVI components.
_.,+,..
• We recommend that you use an HDMI cable shorter than 5 m
(16 ft) with the HDMI logo printed on it.
• Use a conversion cable (HDMI jack _ DVI-D jack) to connect
this unit to other DVI components.
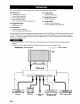
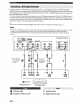
• Priority order for audio input signals
When multiple types of audio signals are simultaneously
being input from a single source component, this unit
plays back the audio signals in the following priority
order: HDMI _ Digital --->Analog
As default settings, the following input jacks are assigned
to the corresponding input sources:
TV/STB I/ I/
DVD €' i/
AUX 1 i¢' € V'
AUX 2 Ig
AUX 3 I/
Cap
21 En