Layout Clatronic.book Seite 1 Donnerstag, 9.
Layout Clatronic.book Seite 2 Donnerstag, 9. Februar 2006 9:35 09 Operating Manual ....................................................................................................... 48 - 87 GB D Bedienungsanleitung ................................................................................................. 4 - 47 I Istruzioni per l’uso....................................................................................................... 88 - 129 NL Gebruiksaanwijzing ......................
Layout Clatronic.book Seite 3 Donnerstag, 9. Februar 2006 9:35 09 1 4 5 6 7 2 3 15 21 20 16 17 Abb./Fig./afb./Rys./Obr.
Layout Clatronic.book Seite 4 Donnerstag, 9. Februar 2006 9:35 09 STANDBY OPEN/CLOSE 1 2 3 4 5 6 7 8 9 10 11 12 13 19 REPEAT A-B PROGRAM MUTE YPbPr PLII DISPLAY REV FWD PREV. NEXT STEP/PAUSE STOP VOLUME C .PB 18 Abb.
Layout Clatronic.book Seite 5 Donnerstag, 9. Februar 2006 9:35 09 Geräteteile/Lieferumfang 1 Ein-/Ausschalter 18 Zeit-Anzeige 2 Display 19 Dolby-Indikator 3 CD/DVD-Fach 20 DTS-Indikator 4 Taste „Öffnen/Schließen“ 21 VCD-Indikator 5 Taste „Wiedergabe“ 6 Taste „Pause“ 7 Taste „Stopp“ 8 5.
Layout Clatronic.book Seite 6 Donnerstag, 9. Februar 2006 9:35 09 Geräteteile/Lieferumfang Technische Daten Geräteart Modell Spannung Leistung Abmessungen (B x H x T) Gewicht Laser Signalformat Frequenzgang DVD-Player DVD 709 100 - 250 V ~ 50/60 Hz 15 W 430 x 38 x 265 mm ca.
Layout Clatronic.book Seite 7 Donnerstag, 9. Februar 2006 9:35 09 D Inhaltsverzeichnis Geräteteile/Lieferumfang.......................................... 5 Technische Daten...................................................................... 6 Sicherheitshinweise.................................................. 10 Bedienungsanleitung ................................................................. Kinder ........................................................................................
Layout Clatronic.book Seite 8 Donnerstag, 9. Februar 2006 9:35 09 Voreinstellungen ändern ..........................................25 Menü-Aufbau verstehen ............................................................ Menü verwenden ....................................................................... Überblick über das Hauptmenü ................................................. Allgemeines Setup-Menü........................................................... Audio Setup Menü ............................
Vielen Dank! Es freut uns, dass Sie sich für den DVD-Spieler DVD 709 entschieden haben! Wir wünschen Ihnen viel Freude mit dem Gerät und danken Ihnen für den Kauf! Symbole in dieser Bedienungsanleitung Wichtige Hinweise für Ihre Sicherheit sind besonders gekennzeichnet. Beachten Sie diese Hinweise unbedingt, um Unfälle und Schäden am Gerät zu vermeiden: WARNUNG: Warnt vor Gefahren für Ihre Gesundheit und zeigt mögliche Verletzungsrisiken auf.
Layout Clatronic.book Seite 10 Donnerstag, 9. Februar 2006 9:35 09 Sicherheitshinweise Sicherheitshinweise Bedienungsanleitung Lesen Sie diese Bedienungsanleitung vollständig durch, bevor Sie das Gerät verwenden. Bewahren Sie die Anleitung gut auf. Falls Sie das Gerät an Dritte weitergeben, geben Sie auch die Bedienungsanleitung mit. Die Nichtbeachtung dieser Anleitung kann zu schweren Verletzungen oder Schäden am Gerät führen.
Layout Clatronic.book Seite 11 Donnerstag, 9. Februar 2006 9:35 09 Sicherheitshinweise Dieses Gerät ist als Laser-Gerät der Klasse 1 (CLASS 1 LASER) klassifiziert. Das zugehörige Etikett befindet sich außen auf dem Gerät. Laser-Strahlen können die Augen schädigen. Beachten Sie daher Folgendes: Öffnen Sie auf keinen Fall das Gerät. Versuchen Sie nicht, das Gerät zu zerlegen. Um Gefährdungen zu vermeiden: Lassen Sie Wartungsarbeiten nur durch den Hersteller oder seinen Kundendienst durchführen.
Layout Clatronic.book Seite 12 Donnerstag, 9. Februar 2006 9:35 09 Aufstellen und Anschließen Bestimmungsgemäße Verwendung Der DVD-Player ist ausschließlich für die folgenden Aufgaben bestimmt: Abspielen von Video-DVDs/Video CDs. Abspielen von Audio-CDs. Jede weitere Verwendung gilt als nicht bestimmungsgemäß und ist untersagt.
Layout Clatronic.book Seite 13 Donnerstag, 9. Februar 2006 9:35 09 Inbetriebnahme D Inbetriebnahme Batterien in Fernbedienung einsetzen WARNUNG: Austretende Batteriesäure kann zu gesundheitlichen Schäden führen. Entnehmen Sie die Batterien aus dem Batteriefach, sobald sie verbraucht sind oder die Fernbedienung voraussichtlich längere Zeit nicht benutzt wird. Austretende Batteriesäure sofort mit einem Tuch entfernen. Bei Hautkontakt betroffene Stelle sofort waschen.
Layout Clatronic.book Seite 14 Donnerstag, 9. Februar 2006 9:35 09 Inbetriebnahme Videokabel anschließen Mit dem Videokabel werden die Bilddaten von Ihrem DVD-Player zu ihrem Fernsehgerät oder Video-Projektor übertragen. Sie haben vier verschiedene Möglichkeiten, den DVD-Player mit ihrem Fernseher/Video-Projektor zu verbinden. Wählen Sie in Abhängigkeit von Ihrem Wiedergabegerät eine Möglichkeit aus.
Layout Clatronic.book Seite 15 Donnerstag, 9. Februar 2006 9:35 09 Audio-Kabel anschließen Sie können zwischen drei Übertragungsverfahren für die Ton-Signale wählen. Grundsätzlich müssen Sie zunächst wählen, ob der Ton über Ihr Fernsehgerät oder über einen Stereo- bzw. 5.1-Verstärker ausgegeben werden soll. Entsprechend schließen Sie dann das Audio-Kabel an den Fernseher oder an einen Verstärker an. HINWEIS: Sofern Ihr Verstärker über einen digitalen Eingang verfügt, sollten Sie diesen verwenden.
Layout Clatronic.book Seite 16 Donnerstag, 9. Februar 2006 9:35 09 Inbetriebnahme Digital Verbinden Sie das Koaxial-Kabel zur Übertragung des digitalen Audiosignals mit Ihrem Wiedergabegerät oder Ihrem Verstärker. 1. Stecken Sie den Audio-Stecker in die Buchse auf der Rückseite des Gerätes. 2. Stecken Sie den Audio-Stecker in die entsprechende Buchse Ihres Wiedergabegerätes oder Ihres Verstärkers. Abb.
Layout Clatronic.book Seite 17 Donnerstag, 9. Februar 2006 9:35 09 Über den DVD-Player Sie können mit dem DVD 709 eine Vielzahl von DVD-Formaten abspielen Seite 6, „Technische Daten“. Beachten sollten Sie jedoch, dass DVDs in vielen Fällen mit einem sogenannten „Regionalcode“ versehen sind. Dieser gibt an, für welche Weltregion die DVD bestimmt ist. So kennzeichnet der Regionalcode „1“ beispielsweise DVDs, die für die USA und Kanada bestimmt sind.
Layout Clatronic.book Seite 18 Donnerstag, 9. Februar 2006 9:35 09 Medien wiedergeben Medien wiedergeben Fernbedienung verwenden Sie übermitteln dem DVD-Player Befehle mit der Fernbedienung. Es ist dabei wichtig, dass das obere Ende der Fernbedienung in Richtung des DVD-Players zeigt. CD/DVD laden 1. Drücken Sie auf der Fernbedienung oder am Gerät die Taste Open/Close (Abb. 2/19). Das CD/DVD-Fach öffnet sich. 2. Legen Sie die CD/DVD in das Fach (Abb. 12). 3.
Layout Clatronic.book Seite 19 Donnerstag, 9. Februar 2006 9:35 09 Folgende Informationen/Befehle stehen Ihnen im Menü zur Verfügung: HINWEIS: Die Menü-Optionen sind größtenteils abhängig von der DVD. Beispiel: Sie bekommen nur die Audio-Sprachen zur Auswahl angeboten, die auch auf der DVD zu finden sind. Zeitangaben können Sie nur entsprechend der DVD/VCD-Länge vornehmen. Versuchen Sie Werte einzugeben, die größer sind als die Länge des Titels/Kapitels, dann wird die Eingabe ignoriert.
Layout Clatronic.book Seite 20 Donnerstag, 9. Februar 2006 9:35 09 Medien wiedergeben Wiedergabe starten 1. Legen Sie eine CD/DVD in das CD/DVD-Fach Seite 18, „CD/DVD laden“. 2. Drücken Sie auf die Taste Play (Abb. 2/27) der Fernbedienung. Der Wiedergabe-Indikator (Abb. /16) leuchtet auf. HINWEIS: Startet die Wiedergabe nicht oder ist die Qualität der Wiedergabe unbefriedigend, dann sollten Sie die Voreinstellungen des DVDPlayers überprüfen Seite 44, „Fehlerbehebung“. Wiedergabe unterbrechen 1.
Layout Clatronic.book Seite 21 Donnerstag, 9. Februar 2006 9:35 09 Medien wiedergeben Drücken Sie während der Wiedergabe auf die Taste Stop (Abb. 2/24). D Wiedergabe stoppen Die Wiedergabe wird angehalten. Drücken Sie noch einmal auf die Taste Play (Abb. 2/27), um die Wiedergabe von der letzten Position fortzusetzen. HINWEIS: Die Wiedergabe wird nur dann von der letzten Position fortgesetzt, wenn diese Option in den Voreinstellungen des DVD-Players nicht unterbunden wurde.
Layout Clatronic.book Seite 22 Donnerstag, 9. Februar 2006 9:35 09 Medien wiedergeben Titel/Kapitel wiederholen 1. Wählen Sie das Kapitel oder den Titel aus, der wiederholt werden soll Seite 21, „Kapitel/Track direkt auswählen“. 2. Drücken Sie auf die Taste REPEAT (Abb. 2/2). Auf dem Bildschirm erscheint eine Meldung, die angibt, was wiederholt wird, z.B. „Kapitel“. Drücken Sie ggf. mehrfach auf die Taste REPEAT (Abb.
Layout Clatronic.book Seite 23 Donnerstag, 9. Februar 2006 9:35 09 Schnell-Vor- oder Zurücklauf durchführen Der DVD-Player verfügt über die Möglichkeit, einen Schnell-Voroder Zurücklauf durchzuführen. 1. Drücken Sie auf die Taste FWD (Abb. 2/22) bzw. REV (Abb. 2/7), um einen Schnellvorlauf bzw. Schnellrücklauf zu starten. Auf dem Bildschirm wird nun die aktuelle Wiedergaberichtung und Geschwindigkeit angezeigt, z.B. „2x“. 2. Drücken Sie mehrfach auf die Taste FWD bzw.
Layout Clatronic.book Seite 24 Donnerstag, 9. Februar 2006 9:35 09 Medien wiedergeben Playlist erstellen Unter Umständen möchten Sie die Titel z.B. einer CD nicht in der vom Hersteller vorgegebenen Reihenfolge hören. Mit der Funktion „Playlist erstellen“ können Sie sich eine eigene Wiedergabereihenfolge erstellen. Gehen Sie hierzu folgendermaßen vor: 1. Drücken Sie auf die Taste PROGRAM (Abb. 2/20). Sie sehen nun eine Tabelle. Hier geben Sie die gewünschte Reihenfolge der Tracks (bei CDs) bzw.
Layout Clatronic.book Seite 25 Donnerstag, 9. Februar 2006 9:35 09 Voreinstellungen ändern Zahlreiche Voreinstellungen können Sie komfortabel über das Bildschirm-Menü verändern. Sie starten das Menü zum Ändern der Voreinstellungen, indem Sie auf die Taste Setup (Abb. 2/25) der Fernbedienung drücken. HINWEIS: Viele der Voreinstellungen können Sie sowohl über die Fernbedienung als auch über das Menü „Voreinstellungen“ ändern.
Layout Clatronic.book Seite 26 Donnerstag, 9. Februar 2006 9:35 09 Voreinstellungen ändern Überblick über das Hauptmenü Allgemeines Setup-Menü (1) Audio Setup Menü (2) Video Setup (3) 1 2 3 4 5 6 Abb.
Layout Clatronic.book Seite 27 Donnerstag, 9. Februar 2006 9:35 09 Voreinstellungen ändern A L LG E M E I N E S S ET U P - M E N Ü T V B I LD S C HI R M W I N K EL Z E I CH E N O S D S P R AC H E E N GL I S C H U N T ER T I T EL F R AN Z Ö SI S C H B I L D SC H I R MS C H . DEUTSCH L E T ZT E R SP E I C H . I T AL I E N I S CH S P AN I S C H Wählen Sie die gewünschte Sprache für die Bildschirm-Anzeigen aus. Abb.
Layout Clatronic.book Seite 28 Donnerstag, 9. Februar 2006 9:35 09 Voreinstellungen ändern Audio Setup Menü A U D I O S E T UP M E N Ü A N A LO G A UD I O E I NS T E L L D I G I T AL A U DI O E I N ST E L L S E T UP D O LB Y D I GIT A L K A N AL V E RZ Ö G . K A N AL - E Q UA L I Z ER 3 D - V ER A R BE I T U NG HDCD In dem Audio Setup Menü haben Sie die Möglichkeit eine Vielzahl von Einstellungen vorzunehmen, die die Tonausgabe beeinflussen. Abb.
Layout Clatronic.book Seite 29 Donnerstag, 9. Februar 2006 9:35 09 Voreinstellungen ändern D Center-Lautsprecher HINWEIS: Das Menü „Center-Lspr.“ ist nur anwählbar, wenn im Menü „Downmix“ die Option „5.1 Kanal“ aktiviert ist. GROSS: Der Lautsprecher gibt Bass und Höhen aus. A N AL O G A U S G . S ET U P M E N Ü D O W NM I X F O N TL A U SP R . C E N T E R - LS P R . GROSS E F F EK T -L AU T S PR .
Layout Clatronic.book Seite 30 Donnerstag, 9. Februar 2006 9:35 09 Voreinstellungen ändern Dialog HINWEIS: Das Menü „Dialog“ ist nur anwählbar, wenn im Menü „Downmix“ die Option „L/T“ oder die Option „Stereo“ aktiviert ist. A N AL O G A U S G . S ET U P M E N Ü D O W NM I X F O N TL A U SP R. C E N TE R - L SP R . E F F EK T -L AU T S PR . S U B WO O F ER L A U TS P R EC H E R -T E S T DIALOG 00 D.K. Im Menü „Dialog“ besteht die Möglichkeit, die Lautstärke der Dialoge einzustellen.
Layout Clatronic.book Seite 31 Donnerstag, 9. Februar 2006 9:35 09 Voreinstellungen ändern D I G . A U SG . S E T U P M E NU D I G I T AL A U SG A N G CD D O L BY D I G I TA L DTS MPEG L P C M - A U SG A N G Hier können Sie die Abtastrate des Audiosignals festlegen. Im Allgemeinen führt eine höhere Abtastfrequenz zu einem besseren Audiosignal. 48K 96K Abb. 34 Dolby Digital Einstellung Doppeltes Mono Normalerweise erfolgt die Tonausgabe als Stereo-Ausgabe.
Layout Clatronic.book Seite 32 Donnerstag, 9. Februar 2006 9:35 09 Voreinstellungen ändern Kanalverzögerung A U DI O S E T U P M E N Ü A N A LO G A UD I O E I NS T E L L D I G I T AL A U DI O E I N ST E L L S E T UP D O LB Y D I GIT A L K A N A L V ER Z Ö G . K A N AL - E Q UA L I Z ER 3 D - V ER A R BE I T U NG HDCD Verwenden Sie eine 5.1-Audioanlage, so können Verzerrungen des Klangeindrucks aufgrund der unterschiedlichen Entfernung der Lautsprechergruppen vom Hörer entstehen.
Layout Clatronic.book Seite 33 Donnerstag, 9. Februar 2006 9:35 09 Voreinstellungen ändern K A N A L - E QU A L I Z E R K L A N G M OD U S B A S SV E R ST Ä R K . S U P E R - B AS S V E R ST Ä R K. L Ö S C . Durch die Aktivierung der Funktion „Super-Bass“ wird die Intensität der Bässe nochmals verstärkt. EIN AUS Abb. 40 Verstärkung Löschen/Höhenverstärkung EIN/AUS K A N A L - E QU A L I Z E R K L A N G M OD U S B A S SV E R ST Ä R K UN G S U P ER - B A SS V E R S T Ä TK . L Ö S C .
Layout Clatronic.book Seite 34 Donnerstag, 9. Februar 2006 9:35 09 Voreinstellungen ändern HINWEIS: Die Menüpunkte „Panorama“, „Dimension“ und „Center Width“ sind nur anwählbar, wenn im Menü „Mode“ die Option „Music“ aktiviert ist. Panorama Der Panorama-Modus sorgt für einen weiträumigen SurroundEffekt. Sie haben die Möglichkeit, den Panorama-Modus einoder auszuschalten. Dimension Mit „Dimension“ können Sie die Tiefe des Surround-Klangbilds einstellen.
Layout Clatronic.book Seite 35 Donnerstag, 9. Februar 2006 9:35 09 Voreinstellungen ändern Video-Ausgang Wählen Sie die Videoausgangsoptionen für das angeschlossene und zu verwendende Wiedergabegerät aus. AUS YUV RGB D V I D E O S E T UP V I D E O - A U SG A N G F E R NS E H MO D U S F A R BE I N S TE L L U NG AUS: Wählen Sie diese Option, wenn Ihr Wiedergabegerät, über den Composite-Video- und/oder S-Video-Anschluss mit dem DVD-Player verbunden ist.
Layout Clatronic.book Seite 36 Donnerstag, 9. Februar 2006 9:35 09 Voreinstellungen ändern Video Qualität Setup V I D E O Q U A LI TÄ T S E T U P S C H ÄR F E H E L LI G K E I T K O N TR A S T G A M MA F A R BT O N F A R BS Ä T TI G U N G L U M A- V E R ZÖ G E RU N G In diesem Menü haben Sie die Möglichkeit, diverse Einstellungen vorzunehmen, um das Videosignal anzupassen. SCHÄRFE HELLIGKEIT KONTRAST GAMMA (Schwarz/Weiß Abgleich) FARBTON Abb.
Layout Clatronic.book Seite 37 Donnerstag, 9. Februar 2006 9:35 09 Voreinstellungen ändern V O R Z U G SE I N S T E L L UN G E N T V T YP PBC EIN AUDIO AUS U N T ER T I T EL D I S K -M E N Ü K I . S I C HE R U NG G R U ND E I N ST . Abb. 51 Durch PBC (Playback-Control), werden die auf den DVD's bzw. VCD's befindlichen, vom Hersteller vorgegebenen interaktiven Menüs automatisch gestartet. Wenn Sie die Option PBC auf „Aus“ schalten, werden die Tracks automatisch der Reihe nach von der DVD bzw.
Layout Clatronic.book Seite 38 Donnerstag, 9. Februar 2006 9:35 09 Voreinstellungen ändern Kindersicherung V O R Z U G SE I N S T E L L UN G E N T V T YP 1 PBC 2 AUDIO 3 U N T ER T I T EL 4 D I S K -M E N Ü 5 KI.SICHERUNG 6 G R U ND E I N ST . 7 8 KI N D . S I C HE R G PG PG 1 3 PG R R NC 1 7 ER W A C HS E N ER Abb. 55 Manche DVDs weisen Informationen zur Zielgruppe auf. Das Vorgehen gleicht hierbei der Freigabe für Kinofilme („Freigegeben ab 12 Jahren“ z.B.).
Layout Clatronic.book Seite 39 Donnerstag, 9. Februar 2006 9:35 09 Voreinstellungen ändern P A S S W O RT S E T U P M E NÜ K E N N W O RT M O D U S EIN P A S SW O R T AUS EIN: Bei jedem Änderungswunsch der Kindersicherungfunktion wird die Eingabe des Kennwortes verlangt. AUS: Die Kindersicherungfunktion kann ohne die Eingabe eines Kennwortes geändert werden Abb. 58 Passwort In diesem Menü haben Sie die Möglichkeit, das Passwort für die Kindersicherungfunktion zu ändern.
Layout Clatronic.book Seite 40 Donnerstag, 9. Februar 2006 9:35 09 Im Dateimodus arbeiten Im Dateimodus arbeiten Neben der Möglichkeit, „normale“ Filme oder Musik von CDs/DVDs wiederzugeben, haben Sie bei diesem DVD-Player zudem die Möglichkeit Video- oder Audio-Dateien von CDs und DVDs die in Dateisystemen gespeichert sind. Solche Medien liegen häufig dann vor, wenn Sie CDs mit Digitalfotos oder MP3-Musik auf ihrem Computer erstellen. Die Medien können zahlreiche Daten/Dateien enthalten.
Layout Clatronic.book Seite 41 Donnerstag, 9. Februar 2006 9:35 09 Im Dateimodus arbeiten Manuell: Drücken Sie auf die Taste PREV (Abb. 2/9) oder NEXT (Abb. 2/23) der Fernbedienung, um vor oder zurück zu blättern. Automatisch: Drücken Sie nach Beginn der Wiedergabe ein zweites Mal auf die Taste Play (Abb. 2/27). Der Bildwechsel erfolgt nun automatisch. HINWEIS: Um die Automatische Bildfolge zu verlassen, und in den Dateiauswahl-Dialog zu wechseln, drücken Sie die Taste Menu auf Ihrer Fernbedienung.
Layout Clatronic.book Seite 42 Donnerstag, 9. Februar 2006 9:35 09 Im Dateimodus arbeiten Einblenden vom Bildzentrum, horizontal oder vertikal Einblenden vom Bildrand, horizontal oder vertikal Einblenden vom Bildzentrum horizontal und vertikal Streifenweise einblenden, horizontal oder vertikal Kein Bildübergang MP3-Dateien auswählen und Wiedergabe starten 1 2 3 4 5 01:23 04:21 8 9 10 11 128 6 7 A 001/005 \0001\ ... 01- DSG 02- DSG 1117 1100 03- DSG 04- DSG 0000 0150 12 Abb. 62 1.
Layout Clatronic.book Seite 43 Donnerstag, 9. Februar 2006 9:35 09 Im Dateimodus arbeiten Sie haben die Möglichkeit, während der Wiedergabe einer Datei zu einer anderen Datei zu wechseln. 1. Drücken Sie die Taste A-Time auf der Fernbedienung. Auf dem Bildschirm erscheint ein Eingabefenster. 2. Geben Sie die Nummer der gewünschten Datei mit Hilfe der Zifferntasten auf der Fernbedienung ein. 3. Starten Sie die Wiedergabe mit der Taste Play.
Layout Clatronic.book Seite 44 Donnerstag, 9. Februar 2006 9:35 09 Fehlerbehebung Fehlerbehebung Bevor Sie das Gerät an den Kundendienst einschicken, überprüfen Sie anhand der folgenden Tabelle, ob Sie den Fehler selbst beseitigen können. WARNUNG: Bevor Sie sich auf Fehlersuche begeben, schalten Sie das Gerät aus, ziehen Sie den Netzstecker. Warten Sie bis Gerät und Zubehör abgekühlt sind. Verwenden Sie niemals ein defektes Gerät.
Layout Clatronic.book Seite 45 Donnerstag, 9. Februar 2006 9:35 09 Entsorgung mögliche Ursache Titel werden in fal- Playlist wird verwendet scher Reihenfolge gespielt DVD kann nicht ab- DVD nicht finalisiert gespielt werden Lösung D Fehler Löschen Sie die Playlist Seite 24, „Playlisteintrag löschen“. Verwenden Sie eine finalisierte DVD.
Layout Clatronic.book Seite 46 Donnerstag, 9. Februar 2006 9:35 09 Konformitätserklärung Hotline Ein Großteil aller Reklamationen ist auf Bedienungsfehler zurückzuführen. Im Falle einer vermuteten Betriebsstörung Ihres ClatronicGerätes setzen Sie sich mit unserer Service-Hotline für in Verbindung. Clatronic International GmbH Service Center Industriering Ost 40 47906 Kempen Tel.: 0 21 52 - 20 06 666 Mail: hotline@clatronic.de www.clatronic.
D Layout Clatronic.book Seite 47 Donnerstag, 9.
Layout Clatronic.book Seite 48 Donnerstag, 9. Februar 2006 9:41 09 STANDBY OPEN/CLOSE 1 2 3 4 5 6 7 8 9 10 11 12 13 19 REPEAT A-B PROGRAM MUTE YPbPr PLII DISPLAY REV FWD PREV. NEXT STEP/PAUSE STOP VOLUME C .PB E TIT PLAY 14 AU DI O 15 16 17 18 Fig.
Layout Clatronic.book Seite 49 Donnerstag, 9. Februar 2006 9:41 09 Device parts/Scope of delivery On/Off switch 18 Time display 2 Display 19 Dolby indicator 3 CD/DVD tray 20 DTS indicator 4 "Open/Close" button 21 VCD indicator 5 "Play" button 6 "Pause" button 7 "Stop" button 8 5.
Layout Clatronic.book Seite 50 Donnerstag, 9. Februar 2006 9:41 09 Device parts/Scope of delivery Technical data Type of equipment Model Voltage Output Dimensions (W x H x D) Weight Laser Signal format Frequency response DVD-Player DVD 709 100 - 250 V ~ 50/60 Hz 15 W 430 x 38 x 265 mm approx.
D Table of Contents Device parts/Scope of delivery ................................ 49 Safety instructions.................................................... 54 Operating Manual ...................................................................... Children ..................................................................................... Power supply ............................................................................. Laser......................................................................
Changing the default settings ..................................68 Understanding the menu structure ............................................ Using the menu.......................................................................... Overview of the main menu ....................................................... General setup page ................................................................... Audio setup page....................................................................... Video Setup Page ....
We are glad that you have made a decision in favour of the DVDPlayer DVD 709! We would like to wish you much joy with your machine and thank you for your purchase! Symbols in this operating manual Important instructions for your safety are especially marked. You must follow these instructions to avoid accidents and damage to the machine: GB Many thanks! D Layout Clatronic.book Seite 53 Donnerstag, 9.
Layout Clatronic.book Seite 54 Donnerstag, 9. Februar 2006 9:41 09 Safety instructions Safety instructions Operating Manual Read the complete operating manual before using the player. Keep the manual in a safe place. If you pass the player on to a third party, pass on the operating manual as well. Non-compliance with this manual can lead to severe injuries or damage to the machine. We assume no liability for damage caused as a result of noncompliance with this operating manual.
Layout Clatronic.book Seite 55 Donnerstag, 9. Februar 2006 9:41 09 Safety instructions Laser D This appliance is classified as laser appliance of class 1 (CLASS 1 LASER). The associated label is attached to the outside of the appliance. GB Laser beams can damage the eyes. Therefore observe the following: Do not open the appliance. Do not attempt to dismantle the appliance. In order to avoid any danger: Have service work only carried out by the manufacturer or an authorized service workshop.
Layout Clatronic.book Seite 56 Donnerstag, 9. Februar 2006 9:41 09 Setting up and connecting Intended use The DVD-Player is solely intended for the following tasks: Playing of Video DVD/Video CD. Playing of Audio-CD. Any other use is considered non-intended use and is prohibited. Defect If the machine should become defective at some point: If the power supply cable for this appliance is damaged, it must be replaced by the manufacturer or his customer services, in order to avoid hazards.
Layout Clatronic.book Seite 57 Donnerstag, 9. Februar 2006 9:41 09 Starting up D Starting up WARNING: Leaking out battery acid can damage your health. Remove the battery from the battery compartment as soon as it is exhausted or if the remote control is not going to be used for a longer period of time. Wipe up leaked out battery acid with a cloth. In case of skin contact immediately wash the affected area. Seek medical advice if battery acid has been swallowed.
Layout Clatronic.book Seite 58 Donnerstag, 9. Februar 2006 9:41 09 Starting up Connecting the Video cable The video cable transmits the video data from your DVD-Player to the TV or the Video-Projector. There are four different ways of connecting the DVD-Player with your TV/Video-Projector. Select one of these possibilities to suit your replay unit. NOTE: If you do not use a SCART-Connection, you must set up an additional Audio-Connection to transmit Audio data (i.e. from the audio track).
Layout Clatronic.book Seite 59 Donnerstag, 9. Februar 2006 9:41 09 Starting up You must generally choose first whether you would like to have the sound coming from your TV, or through a Stereo or 5.1-Amplifier. The Audio cable must then be connected to the TV or an amplifier accordingly. NOTE: If your amplifier is equipped with a digital output, you should use the amplifier. You will experience a much better audio quality, and the installation is much easier.
Layout Clatronic.book Seite 60 Donnerstag, 9. Februar 2006 9:41 09 Starting up Switching on the player Switch on the DVD-Player by the mains On/Off switch on the back of the player (Fig. 11). 2 -100-250V 50/60Hz POWER SOURCE AC 100-250V 50/60 Hz POWER CONSUMPTION 25W Fig.
Layout Clatronic.book Seite 61 Donnerstag, 9. Februar 2006 9:41 09 About the DVD-Player With this DVD 709 you can play a vast variety of DVD-formats Page 50, "Technical data". However, you must be aware that in many cases DVDs are encrypted with a so-called "Regional Code". This specifies for which region in the world the DVD is intended. As an example, the DVDs marked with regional code "1" are intended for the USA and Canada. DVDs with regional code "2" are for use in Europe.
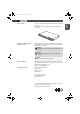
Layout Clatronic.book Seite 62 Donnerstag, 9. Februar 2006 9:41 09 Playing media Playing media Using the remote control You transmit commands to the DVD-Player via remote control. It is thus important to point the upper end of the remote control towards the DVD-Player. Loading a CD/DVD 1. Press the button Open/Close (Fig. 2/19) on the remote control or on the player. The CD/DVD tray opens. 2. Place the CD/DVD on the tray (Fig. 12). 3. Press the remote control button Open/Close (Fig. 2/19) again.
Layout Clatronic.book Seite 63 Donnerstag, 9. Februar 2006 9:41 09 Title: Display/selection of the current title and total number of titles. Just enter a number to select another title. Chapter: Display/selection of the current chapter and total number of chapters. Just enter a number to select another chapter. Audio: Display/selection of Audio language or output type, see also Page 64, "Changing Audio-Language/Audio-Mode". Select the Audio output from a list of possible languages.
Layout Clatronic.book Seite 64 Donnerstag, 9. Februar 2006 9:41 09 Playing media Starting the replay 1. Place the CD/DVD on the CD/DVD-tray Page 62, "Loading a CD/DVD"). 2. Press the Play-button (Fig. 2/27) on the remote control. The play indicator (Fig. 1/18) lights up. NOTE: If the replay does not start or the replay is of poor quality, you should check the default settings of the DVD-Player Page 86, "Troubleshooting". Interrupting the replay 1. Press the Step/Pause-button (Fig.
Layout Clatronic.book Seite 65 Donnerstag, 9. Februar 2006 9:41 09 Press the PREV-button (Fig. 2/9) to jump to the start of the previous chapter or track. Selecting next chapter/track Press the Next-button (Fig. 2/23) to jump to the start of the next chapter or track. Selecting chapter/track directly 1. Enter the number of the desired chapter/track with the Numerical buttons on the remote control (Fig. 2/17). 2. Press the Play-button (Fig. 2/27) to confirm your input.
Layout Clatronic.book Seite 66 Donnerstag, 9. Februar 2006 9:41 09 Playing media Stopping repeat Keep pressing the REPEAT-button (Fig. 2/2), until no message is displayed on screen after pressing the button. Selecting a section to be repeated You can define a freely selected section to be automatically repeated. To do this, proceed as follows: 1. Mark the beginning of the section to be repeated. During repetition press the button A-B (Fig. 2/3) on the remote control once.
Layout Clatronic.book Seite 67 Donnerstag, 9. Februar 2006 9:41 09 Playing media Page GB Adjusting the volume D NOTE: Further settings concerning the subject "Viewing Angle" 69, "Angle mark". Press the + button (Fig. 2/8) to increase the volume. Press the - button (Fig. 2/10) to reduce the volume. NOTE: Please remember, that this will only change the output volume of the DVD-Player. In order to adjust the volume to your requirements you may also have to change the volume of the replay device.
Layout Clatronic.book Seite 68 Donnerstag, 9. Februar 2006 9:41 09 Changing the default settings Deleting a Playlist entry 1. Press the PROGRAM-button. You will now see a Playlist. 2. Use the Cursor Buttons (Fig. 2/14) to navigate to the desired track (for CDs) or the desired title and chapter (for DVDs) you want to delete. 3. Delete the selected element by pressing the Clear-button (Fig. 1/28) on the remote control.
Layout Clatronic.book Seite 69 Donnerstag, 9. Februar 2006 9:41 09 Changing the default settings In many menus you will find slide controls to adjust e.g. the volume or the brightness of the screen. 3/ 4 The slide control is used as follows: 1/2 1. Select with the Play-button. 1/4 OFF 2. Move the control with the Cursor Buttons ( , GB FULL ). 3. Confirm the entry with the Play-button. Fig.
Layout Clatronic.book Seite 70 Donnerstag, 9. Februar 2006 9:41 09 Changing the default settings OSD language Select the desired language for the on-screen displays. G E NE R A L S E T UP P A G E T V - D IS P L A Y A N G LE M A RK O S D L A N GU A G E C A P TI O N S S C R EE N S AV E R L A S T M E M OR Y E N GL I S H F R EN C H GERMAN I T AL I A N S P AN I S H Fig.
Layout Clatronic.book Seite 71 Donnerstag, 9. Februar 2006 9:41 09 Changing the default settings Audio setup page D The Audio setup page gives you the possibility to make a quite a number of setting, which influence the audio output. GB A U D I O S E T UP P A G E A N A LO G A UD I O S ET U P D I G I T AL A U DI O S E TU P D O L BY D I G I TA L S ET U P C H A NN E L DE L A Y E Q U AL I Z E R 3 D P RO C E SS I N G HDCD Fig.
Layout Clatronic.book Seite 72 Donnerstag, 9. Februar 2006 9:41 09 Changing the default settings Center speaker NOTE: The menu "Center Speaker" is only available if the option "5.1 CH" has been activated in the menu "Downmix". LARGE: The speakers emits bass and treble. A N AL O G A U D I O S E TU P P A G E D O W NM I X F R O NT S P EA K E R C E N T E R SP E A K E R LARGE R E A R S P E AK E R S M AL L S U B WO O F ER OFF T E S T S P E AK E R D I A L OG D.R.
Layout Clatronic.book Seite 73 Donnerstag, 9. Februar 2006 9:41 09 Changing the default settings D Dialog NOTE: A N AL O G A U D I O S E TU P P A G E D O W NM I X F R O NT S P EA K E R C E N TE R S PE A K E R R E A R S P E AK E R S U B WO O F ER T E S T S P E AK E R DIALOG 00 D.R.C After selecting L/T or Stereo in the menu Downmix you have the possibility to set the volume of the dialogs. Use the Cursor button to increase or Cursor button to reduce the volume of the dialogs. Fig. 31 D.R.
Layout Clatronic.book Seite 74 Donnerstag, 9. Februar 2006 9:41 09 Changing the default settings LPCM output Here you can determine the scanning rate of the Audio signal. A higher scanning rate generally results in a better Audio signal. D I G I T AL A U D I O S E T U P P A G E D I G I T AL O U TP U T CD D O L BY D I G I TA L DTS MPEG L P C M O U TP U T 48K 96K Fig. 34 Dolby Digital Setup Dual Mono The Audio output is normally in stereo.
Layout Clatronic.book Seite 75 Donnerstag, 9. Februar 2006 9:41 09 Changing the default settings Here you can delay the output from the central or the rear speakers, in order to achieve a well balanced sound impression for the listener. The delay is set in milli-seconds. 1. Use the Cursor Buttons ( , ) to select the menu option "Channel Delay". 2. Press the Play-button (Fig. 2/27) to confirm your input. Fig. 37 3.
Layout Clatronic.book Seite 76 Donnerstag, 9. Februar 2006 9:41 09 Changing the default settings Super Bass E Q U A L I Z ER P A G E S O U ND M O DE B A S S B O O ST S U P E R B AS S T R E BL E B OO S T Activation of the function "Super Bass" increases the intensity of the bass once again. ON OFF Fig. 40 Treble Boost Activation of the function "Treble Boost" intensifies treble sounds E Q U A L I Z ER P A G E S O U ND M O DE B A S S B O O ST S U P ER B A SS T R E B L E BO O S T ON OFF Fig.
Layout Clatronic.book Seite 77 Donnerstag, 9. Februar 2006 9:41 09 Changing the default settings Panorama Panorama mode creates a very spacious surround effect. There is a possibility to switch the Panorama mode on or off. Dimension With "Dimension" you can set the depth of the surround sound. Center Width With "Center Width" you can set the balance between center and front speakers.
Layout Clatronic.book Seite 78 Donnerstag, 9. Februar 2006 9:41 09 Changing the default settings Video output V I D E O S E T UP P A G E V I D E O O U T PU T T V - M OD E C O L OR S E TT I N G Select the Video output options for the connected replay device to be used. OFF YUV RGB OFF: Select this option, if the replay device is connected to the DVD-Player via the Composite-Video and/or S-Video connection.
Layout Clatronic.book Seite 79 Donnerstag, 9. Februar 2006 9:41 09 Changing the default settings On the preference page you have the possibility to make a number of settings. P R E F E R EN C E P A G E T V T YP E PBC The DVD-Player must be Stop-Mode to be able to select the preference page. If it is not possible to select the preference page in Stop-Mode, press the Stop button a second time and try it again. D E F AU L T Fig.
Layout Clatronic.book Seite 80 Donnerstag, 9. Februar 2006 9:41 09 Changing the default settings Subtitle P R E F E R EN C E P A G E T V T YP E PBC AUDIO SUBTITLE D I S C ME N U P A R EN T A L D E F AU L T E N GL I S H F R EN C H GERMAN S P AN I S H I T AL I A N D A NI S H P O RT U G UE S E Activate/deactivate subtitles and/or set the favourite language to be used for the subtitles appearing on the screen. The selected language will then automatically be used when playing a DVD.
Layout Clatronic.book Seite 81 Donnerstag, 9. Februar 2006 9:41 09 Changing the default settings Select the command "Default/Reset" if you want to reset the player to the factory implemented default settings. Any settings you have made will be lost. GB P R E F E R EN C E P A G E T V T YP E PBC AUDIO S U B TI T L E D I S C ME N U P A R EN T A L DEFAULT RESET Fig.
Layout Clatronic.book Seite 82 Donnerstag, 9. Februar 2006 9:41 09 Working in file mode If you want to operate the DVD-Player with parental control, you must first enter a password. This password safeguards the settings for the parental control, so that it can only be changed by yourself. Working in file mode Besides the possibility of playing "normal" films or music from CDs/DVDs, this DVD-Player also gives you the possibility to play Video or Audio files from CDs, DVDs which are saved in file systems.
Layout Clatronic.book Seite 83 Donnerstag, 9. Februar 2006 9:41 09 Working in file mode Manual: Press the PREV (Fig. 2/9) or NEXT-button (Fig. 2/23) on the remote control to scroll forward or back. D Scrolling GB Automatic: After the replay has started press the Play-button (Fig. 2/27) a second time. The photos change automatically. NOTE: In order to exit the automatic picture sequence and to change to the file selection dialogue press the Menu-button on the remote control.
Layout Clatronic.book Seite 84 Donnerstag, 9. Februar 2006 9:41 09 Working in file mode Selecting MP3 files and starting replay 1 2 3 4 5 01:23 04:21 8 9 10 11 128 6 7 A 001/005 \0001\ ... 01- DSG 02- DSG 1117 1100 03- DSG 04- DSG 0000 0150 12 Fig. 62 1. The file selection dialogue appears (Fig. 62).
Layout Clatronic.book Seite 85 Donnerstag, 9. Februar 2006 9:41 09 Working in file mode Selecting a point in a file 1. Press the button A-Time on the remote control twice. A time code input window appears on the screen. 2. Enter the desired point to which you would like to jump with the Numerical Buttons on the remote control. Enter the ciphers for hour, minutes and seconds successively. 3. Press the Play-button to start. Stopping the replay Press the STOP-button (Fig.
Layout Clatronic.book Seite 86 Donnerstag, 9. Februar 2006 9:41 09 Troubleshooting Troubleshooting Before sending the Player to the Customer Services, use the following table to check whether you can rectify the fault yourself. WARNING: Before trouble shooting, switch the player off and remove the mains plug. Wait until the player and accessories have cooled down. Never use a defective player.
Layout Clatronic.book Seite 87 Donnerstag, 9. Februar 2006 9:41 09 Disposal At the end of the service life of the appliance, in particular if it is malfunctioning, make the appliance unusable by pulling the mains plug out of the socket and separating the power cable. Dispose of the appliance according to the environmental regulations applicable in your country. Electrical waste may not be disposed of together with household waste.
Layout Clatronic.book Seite 88 Donnerstag, 9. Februar 2006 9:47 09 STANDBY OPEN/CLOSE 1 2 3 4 5 6 7 8 9 10 11 12 13 19 REPEAT A-B PROGRAM MUTE YPbPr PLII DISPLAY REV FWD PREV. NEXT STEP/PAUSE STOP VOLUME C TIT AU DI O 17 18 Fig. 2 88 RE TU RN PLAY 14 15 16 SETUP MENU B E.
Layout Clatronic.book Seite 89 Donnerstag, 9. Februar 2006 9:47 09 Componenti apparecchio/Volume di fornitura Interruttore ON/OFF 14 Interruttore di rete ON/OFF 2 Display 15 Indicatore DVD 3 Cassetto portadischi CD/DVD 16 Indicatore riproduzione 4 Tasto „Open/Close“ 17 Indicatore CD 5 Tasto „Play“ 18 Visualizzazione tempo 6 Tasto „Pause“ 19 Indicatore dolby 7 Tasto „Stop“ 20 Indicatore DTS 8 Uscita 5.
Layout Clatronic.book Seite 90 Donnerstag, 9.
Layout Clatronic.book Seite 91 Donnerstag, 9. Februar 2006 9:47 09 Componenti apparecchio/Volume di fornitura ... 89 Dati tecnici ............................................................................ 90 Avvertenze di sicurezza........................................ 94 Istruzioni per l’uso................................................................. Bambini................................................................................. Alimentazione della corrente ........................
Layout Clatronic.book Seite 92 Donnerstag, 9. Februar 2006 9:47 09 Modifica delle impostazioni preliminari ............. 108 Comprendere la struttura del menu ...................................... Utilizzo del menu .................................................................. Panoramica del menu principale .......................................... Pagina di configurazione generale........................................ Pagina di configurazione audio.............................................
Layout Clatronic.book Seite 93 Donnerstag, 9. Februar 2006 9:47 09 Siamo lieti della Sua preferenza per questo lettore DVD 709! Le auguriamo molta soddisfazione con l'apparecchio e La ringraziamo per l'acquisto! Simboli in queste istruzioni per l'uso Importanti avvertenze per la Sua sicurezza sono particolarmente contrassegnate.
Layout Clatronic.book Seite 94 Donnerstag, 9. Februar 2006 9:47 09 Avvertenze di sicurezza Avvertenze di sicurezza Istruzioni per l’uso Prima di utilizzare l'apparecchio leggete completamente queste istruzioni per l'uso. Conservate bene il manuale. Nel caso date l'apparecchio a terzi, consegnategli anche le presenti istruzioni per l'uso. La inosservanza di queste istruzioni può portare a lesioni gravi o danni all'apparecchio.
Layout Clatronic.book Seite 95 Donnerstag, 9. Februar 2006 9:47 09 Avvertenze di sicurezza Questo apparecchio è classificato come prodotto laser della Classe 1 (CLASS 1 LASER). L'etichetta appartenente si trova all'esterno sull'apparecchio. D Laser Raggi laser possono danneggiare gli occhi. Perciò osservate quanto segue: In nessun caso aprire l'apparecchio. Non tentate di smontare l'apparecchio nelle sue parti.
Layout Clatronic.book Seite 96 Donnerstag, 9. Februar 2006 9:47 09 Installazione e collegamento Impiego conforme all'uso previsto Il lettore DVD è destinato esclusivamente per i seguenti compiti: Riproduzione di video DVD/CD. Riproduzione di dischi CD audio. Qualsiasi altro impiego vale come non conforme all'uso previsto ed è proibito.
Layout Clatronic.book Seite 97 Donnerstag, 9. Februar 2006 9:47 09 Messa in funzione D Messa in funzione AVVERTIMENTO: Acido di batterie che fuoriesce può causare danni alla salute. Togliere le pile dal vano batteria non appena sono consumate oppure se si prevede di non utilizzare il telecomando per lungo tempo. Pulire l'acido di batteria fuoriuscito subito con un panno. In caso di contatto, lavare subito la parte rispettiva. Andare subito dal medico in caso lo si è inghiottito.
Layout Clatronic.book Seite 98 Donnerstag, 9. Februar 2006 9:47 09 Messa in funzione Collegamento del cavo video Mediante il cavo video vengono trasmessi i dati delle immagini dal vostro lettore DVD al vostro televisore o proiettore video. Avete quattro possibilità di collegare il vostro lettore DVD al vostro televisore/proiettore video. In dipendenza del vostro apparecchio di riproduzione selezionate una di queste possibilità.
Layout Clatronic.book Seite 99 Donnerstag, 9. Februar 2006 9:47 09 Messa in funzione Per i segnali del suono potete scegliere fra tre procedure di trasmissione. D Collegamento del cavo audio Principalmente dovete prima scegliere se il suono deve essere emesso attraverso il vostro televisore oppure attraverso un amplificatore stereo e/o del canale 5.1. In corrispondenza poi collegate il cavo audio al televisore o ad un amplificatore.
Layout Clatronic.book Seite 100 Donnerstag, 9. Februar 2006 9:47 09 Messa in funzione Accensione dell'apparecchio 2 -100-250V 50/60Hz POWER SOURCE AC 100-250V 50/60 Hz POWER CONSUMPTION 25W Fig. 11 100 Accendere l'interruttore principale del lettore DVD azionando l'interruttore di rete ON/OFF situato sul retro dell'apparecchio (Fig. 11).
Layout Clatronic.book Seite 101 Donnerstag, 9. Februar 2006 9:47 09 Indicazioni sul lettore DVD Con il lettore DVD 709 potete riprodurre una molteplicità di formati DVD Pagina 90, „Dati tecnici“. D Indicazioni sul lettore DVD I Dovete però osservare, che in moti casi i dischi DVD sono dotati di un cosiddetto „Codice regionale“. Questo codice indica per quale zona del mondo è destinato il disco DVD. Così il codice regionale „1“ ad esempio contrassegna dischi DVD che sono destinati per USA e Canada.
Layout Clatronic.book Seite 102 Donnerstag, 9. Februar 2006 9:47 09 Riproduzione di medi Riproduzione di medi Uso del telecomando Con il telecomando trasmettete comandi al lettore DVD. A ciò è importante che l'estremità superiore del telecomando sia puntata in direzione del lettore DVD. Inserimento dei dischi CD/DVD 1. Sul telecomando o sull’apparecchio premere il tasto Open/Close (Fig. 2/19). Il cassetto portadischi CD/DVD si apre. 2. Introdurre nel cassetto il disco CD/DVD (Fig. 12). 3.
Layout Clatronic.book Seite 103 Donnerstag, 9. Februar 2006 9:47 09 Riproduzione di medi D Nel menu vi sono a disposizione le seguenti informazioni/comandi: INDICAZIONE: Title/Titolo: visualizzazione/selezione del titolo attuale e del numero totale dei titoli. Per selezionare un altro titolo, digitate una cifra. Chapter/Capitolo: visualizzazione/selezione del capitolo attuale e del numero totale dei capitoli. Per selezionare un altro capitolo, digitate una cifra.
Layout Clatronic.book Seite 104 Donnerstag, 9. Februar 2006 9:47 09 Riproduzione di medi Avviare la riproduzione 1. Introdurre nel cassetto portadischi un disco CD/DVD 102, „Inserimento dei dischi CD/DVD“. 2. Premere il tasto Play (Fig. 2/27) del telecomando. L'indicatore di riproduzione (Fig. 1/16) si accende.
Layout Clatronic.book Seite 105 Donnerstag, 9. Februar 2006 9:47 09 Premere due volte il tasto Stop (Fig. 2/24), per terminare la riproduzione. Premendo di nuovo il tasto Play (Fig. 2/27), il disco CD/DVD viene riprodotto dall'inizio. Premere il tasto Prev (Fig. 2/9), per saltare all'inizio del capitolo o traccia precedente. Selezione del capitolo/traccia successivo Premere il tasto Next (Fig. 2/23), per saltare all'inizio del capitolo o traccia successivo. Selezione diretta del capitolo/traccia 1.
Layout Clatronic.book Seite 106 Donnerstag, 9. Februar 2006 9:47 09 Riproduzione di medi Ripetizione di una traccia di disco CD 1. Selezionare la traccia che deve essere ripetuta Pagina 105, „Selezione diretta del capitolo/traccia“. 2. Premere il tasto REPEAT (Fig. 2/2). Sullo schermo appare la segnalazione „REPEAT: [OFF]“. 3. Premere di nuovo il tasto REPEAT, per fare ripetere la traccia attuale. Fine della ripetizione Premere più volte il tasto REPEAT (Fig.
Layout Clatronic.book Seite 107 Donnerstag, 9. Februar 2006 9:47 09 Alla visione di dischi DVD, VCD e/o immagini potete modificare il ritaglio dell'immagine. Premere il tasto ZOOM (Fig. 2/30), per modificare il ritaglio dell'immagine. Premere più volte il tasto per selezionare il fattore zoom adatto e/o per ripristinare il fattore zoom originale. Modifica angolazione immagine Alcuni dischi DVD vi offrono la possibilità di selzionare l'angolazione immagine. Premere il tasto ANGLE (Fig.
Layout Clatronic.book Seite 108 Donnerstag, 9. Februar 2006 9:47 09 Modifica delle impostazioni preliminari Creazione di una playlist MP3 Introducendo un CD MP3, appare il dialogo di selezione file ( Pagina 125, „Selezione di file MP3 e avvio della riproduzione“). Per creare una playlist, procedere nel seguente modo: 1. Con i tasti di direzione (fig. 2/14) selezionare il titolo da aggiungere alla playlist. 2. Premere il tasto CLEAR (fig. 2/28). Nella riga informativa delle funzioni (fig.
Layout Clatronic.book Seite 109 Donnerstag, 9. Februar 2006 9:47 09 Modifica delle impostazioni preliminari Utilizzo del menu Nel menu principale navigate con i tasti di direzione (Fig. 2/14) del telecomando ( , ). G E NE R A L S E T UP P A G E T V - D I S P L AY 4 : 3 P A N S C AN A N G LE M A RK O S D LA N G UA G E 4 : 3 L E T T ER B O X 1 6 :9 C A P TI O N S Nel sottomenu invece navigate con i tasti di direzione ( , D Navigazione e selezione ).
Layout Clatronic.book Seite 110 Donnerstag, 9. Februar 2006 9:47 09 Modifica delle impostazioni preliminari Angle Mark/Segni angolazione G E NE R A L S E T UP P A G E T V - D IS P L A Y A N G L E M AR K O S D LA N G UA G E C A P TI O N S S C R EE N S AV E R L A S T M E M OR Y Alcuni film non sono registrati da una sola prospettiva, bensì da più di una.
Layout Clatronic.book Seite 111 Donnerstag, 9. Februar 2006 9:47 09 Modifica delle impostazioni preliminari Last Memory/Ultimo spazio memoria Definire come il lettore DVD deve comportarsi, quando l'utente durante la riproduzione preme il tasto Stop (Fig. 2/24).
Layout Clatronic.book Seite 112 Donnerstag, 9. Februar 2006 9:47 09 Modifica delle impostazioni preliminari Front Speaker/Altoparlante davanti A N AL O G A U D I O S E TU P P A G E D O W NM I X F R O N T S PE A K E R LARGE C E N TE R S PE A K E R. S M AL L R E A R S P E AK E R S U B WO O F ER T E S T S P E AK E R D I A L OG D.R.C LARGE: il basso e gli alti vengono trasmessi all’altoparlante davanti. SMALL: all’altoparlante vengono trasmessi solo gli alti (impostazione di default). Fig.
Layout Clatronic.book Seite 113 Donnerstag, 9. Februar 2006 9:47 09 Modifica delle impostazioni preliminari A N AL O G A U D I O S E TU P P A G E D O W NM I X F R O NT S P EA K E R C E N TE R S PE A K E R R E A R S P E AK E R S U B WO O F ER T E S T S P EA K E R ON D I A L OG OFF D.R.C Test Speaker/Prova altoparlanti Alla prova degli altoparlanti viene creato un pieno suono surround. I singoli altoparlanti vengono comandati uno dopo l’altro.
Layout Clatronic.book Seite 114 Donnerstag, 9. Februar 2006 9:47 09 Modifica delle impostazioni preliminari Manual: Attivare questa opzione per eseguire manualmente le impostazioni dell’uscita digitale audio per diversi formati. Le opzioni di menu „CD“, „Dolby Digital“, „DTS“ e „MPG“ possono ora essere selezionate. Eseguire qui le corrispondenti impostazioni.
Layout Clatronic.book Seite 115 Donnerstag, 9. Februar 2006 9:47 09 FULL - 1/4: la fascia dinamica viene compressa all'incirca per (1/4) fino al massimo (FULL). OFF: la fascia dinamica non viene compressa (default). D Modifica delle impostazioni preliminari Channel Delay/Ritardo canale Qui potete ritardare l'emissione dell'altoparlante centrale e/o posteriore, per ottenere che l'ascoltatore senta un suono bilanciato. L’impostazione del ritardo avviene in millisecondi. 1.
Layout Clatronic.book Seite 116 Donnerstag, 9. Februar 2006 9:47 09 Modifica delle impostazioni preliminari Super Bass/Super-Basso E Q U A L I Z ER P A G E S O U ND M O DE B A S S B O O ST S U P E R B AS S T R E BL E B OO S T Attraverso l’attivazione della funzione „Super Bass“ viene aumentata ancora di più l’intensità dei bassi. ON OFF Fig.
Layout Clatronic.book Seite 117 Donnerstag, 9. Februar 2006 9:47 09 INDICAZIONE: Le opzioni di menu „Panorama“, „Dimension“ e „Center Width“ possono essere selezionate soltanto, quando nel menu „Reverb Mode“ è attivata l’opzione „Music“ . D Modifica delle impostazioni preliminari Panorama La modalità Panorama provvede ad un effetto ampio di surround. Avete la possibilità di disinserire e inserire la modalità Panorama. Con dimensione potete impostare la profondità dell’immagine del suono surround.
Layout Clatronic.book Seite 118 Donnerstag, 9. Februar 2006 9:47 09 Modifica delle impostazioni preliminari Video output/Uscita video V I D E O S E T UP P A G E V I D E O O U T PU T T V - M OD E C O L OR S E TT I N G Selezionare le opzioni di uscita video per l’apparecchio di riproduzione collegato e da utilizzare. OFF YUV RGB OFF: selezionate questa opzione se il Suo apparecchio di riproduzione è collegato al lettore DVD attraverso il collegamento Composite-Video e/o S-Video.
Layout Clatronic.book Seite 119 Donnerstag, 9. Februar 2006 9:47 09 Modifica delle impostazioni preliminari In questo menu avete la possibilità di eseguire diverse impostazioni per adattare il segnale video.
Layout Clatronic.book Seite 120 Donnerstag, 9. Februar 2006 9:47 09 Modifica delle impostazioni preliminari PBC P R E F E R EN C E P A G E T V T YP E PBC AUDIO S U B TI T L E D I S C ME N U P A R EN T A L D E F AU L T ON OFF Attraverso PBC (Playback-Control), i menu interattivi preimpostati dal produttore, presenti sui dischi DVD e/o VCD, vengono automaticamente avviati. Se commutate l’opzione PBC su „Off“, le traccie vengono riprodotte automaticamente una dopo l’altra dal disco DVD e/o VCD.
Layout Clatronic.book Seite 121 Donnerstag, 9. Februar 2006 9:47 09 Modifica delle impostazioni preliminari 1 2 3 4 5 6 7 8 KI D S A F G PG PG 1 3 PG R R NC 1 7 AD U L T Alcuni dischi DVD hanno informazioni sul gruppo di destinazione. La procedura è simile al divieto/autorizzazione per film da cinema („vietato ai minori di 12 anni“ p.es.). Se avete attivato l'opzione di protezione bambini, allora la rispettiva informazione, se presente, viene letta dal DVD e confrontata con il valore da voi impostato.
Layout Clatronic.book Seite 122 Donnerstag, 9. Februar 2006 9:47 09 Modifica delle impostazioni preliminari Password Mode/Modalità password P A S S W O RD S E T U P P A GE P A S S W O RD M O D E ON P A S SW O R D OFF ON: ad ogni cambio della funzione di protezione per giovani viene richiesta l’immissione della password. OFF: la funzione di protezione per giovani può essere modificata senza l’immissione di una password. Fig.
Layout Clatronic.book Seite 123 Donnerstag, 9. Februar 2006 9:47 09 Operare nella modalità file I medi possono contenere molti dati/file. Per ciò dapprima dovete definire, quale file desiderate riprodurre. La struttura delle cartelle e file e strutturato in modo gerarchico, simile alla struttura delle cartelle e file sul vostro computer. Uso dei dischi CD/DVD 1. Introdurre il disco CD o DVD nel drive Pagina 102, „Inserimento dei dischi CD/DVD“). La modalità file si avvia automaticamente. 2.
Layout Clatronic.book Seite 124 Donnerstag, 9. Februar 2006 9:47 09 Operare nella modalità file Sfoglia Manuale: premere il tasto PREV (Fig. 2/9) o NEXT (Fig. 2/23) del telecomando per sfogliare in avanti o indietro. Automatico: dopo l'inizio della riproduzione, premere una seconda volta il tasto Play (Fig. 2/27). Il cambio immagine avviene adesso automaticamente.
Layout Clatronic.book Seite 125 Donnerstag, 9. Februar 2006 9:47 09 1 2 3 4 5 01:23 04:21 8 9 10 11 128 6 7 A 001/005 \0001\ ... 01- DSG 02- DSG 1117 1100 03- DSG 04- DSG 0000 0150 12 Fig. 62 1. Vedete il dialogo di selezione file (Fig. 62).
Layout Clatronic.book Seite 126 Donnerstag, 9. Februar 2006 9:47 09 Operare nella modalità file Selezione di un punto all’interno di un file Durante la riproduzione di un file avete la possibilità di selezionare un punto definito di questo file. 1. Premere due volte il tasto A-Time sul telecomando. Sullo schermo appare una finestra di immissione per il codice tempo. 2. Immettete il punto desiderato, in cui volete cambiare, servendovi dei tasti numerici sul telecomando.
Layout Clatronic.book Seite 127 Donnerstag, 9. Februar 2006 9:47 09 D Eliminazione di anomalie Prima di spedire l'apparecchio al Servizio clienti, controllare in base alla seguente tabella, se potete eliminare l'errore. AVVERTIMENTO: I prima di ricercare la causa dell'errore, spegnete l'apparecchio, staccate la spina elettrica di rete. Attendere fino a quando l'apparecchio e gli accessori si sono raffreddati. Mai utilizzare un apparecchio difettoso.
Layout Clatronic.book Seite 128 Donnerstag, 9. Februar 2006 9:47 09 Smaltimento Anomalia Possibile causa I titoli vengono riprodotti viene utilizzata la playlist nella sequenza errata Il disco DVD non può il disco DVD non è essere riprodotto finalizzato Rimedio Cancellare la playlist Pagina 108, „Cancellazione di una registrazione nella playlist“. Utilizzare un disco DVD finalizzato.
I D Layout Clatronic.book Seite 129 Donnerstag, 9.
Layout Clatronic.book Seite 130 Donnerstag, 9. Februar 2006 9:52 09 STANDBY OPEN/CLOSE 1 2 3 4 5 6 7 8 9 10 11 12 13 19 REPEAT A-B PROGRAM MUTE YPbPr PLII DISPLAY REV FWD PREV. NEXT STEP/PAUSE STOP VOLUME C TIT AU D 17 18 afb. 2 130 RE TU RN PLAY 14 15 16 SETUP MENU B E.
Layout Clatronic.book Seite 131 Donnerstag, 9. Februar 2006 9:52 09 Onderdelen van het apparaat/Omvang van de levering 1 Aan-/Uit-schakelaar 15 DVD-indicator 2 Display 16 Weergave-indicator 3 CD/DVD-vak 17 CD-indicator 4 Toets „Openen/Sluiten“ 18 Tijdweergave 5 Toets „Weergave“ 19 Dolby-indicator 6 Toets „Pauze“ 20 DTS-indicator 7 Toets „Stop“ 21 VCD-indicator 8 5.
Layout Clatronic.book Seite 132 Donnerstag, 9. Februar 2006 9:52 09 Onderdelen van het apparaat/Omvang van de levering Technische gegevens Soort apparaat Model Spanning Vermogen Afmetingen (B x H x D) Gewicht Laser Signaalformaat Frequentiekarakteristiek DVD-speler DVD 709 100 - 250 V ~ 50/60 Hz 15 W 430 x 38 x 265 mm ca.
Inhoudsopgave Onderdelen van het apparaat/Omvang van de levering .................................................................. 131 Technische gegevens........................................................... NL Layout Clatronic.book Seite 133 Donnerstag, 9. Februar 2006 9:52 09 132 Gebruiksaanwijzing............................................................... Kinderen ............................................................................... Stroomvoeding..................................
Layout Clatronic.book Seite 134 Donnerstag, 9. Februar 2006 9:52 09 Voorinstellingen veranderen ............................... 150 Menuopbouw begrijpen ........................................................ Menu gebruiken .................................................................... Overzicht van het hoofdmenu ............................................... Algemene instellingspagina .................................................. Audio instellingspagina .......................................
Het verheugt ons, dat u heeft gekozen voor de DVD-speler DVD 709! Wij wensen u veel plezier met het apparaat en danken u voor de aankoop! Symbolen in deze gebruiksaanwijzing Belangrijke instructies voor uw veiligheid zijn speciaal gekenmerkt. Neem deze instructies absoluut in acht om ongevallen en schade aan het apparaat te vermijden: WAARSCHUWING: Waarschuwt voor gevaren voor uw gezondheid en wijst op mogelijke verwondingsrisico’s.
Layout Clatronic.book Seite 136 Donnerstag, 9. Februar 2006 9:52 09 Veiligheidsinstructies Veiligheidsinstructies Gebruiksaanwijzing Lees deze gebruiksaanwijzing volledig door, voordat u het apparaat gebruikt. Bewaar de handleiding goed. Indien u het apparaat doorgeeft aan derden, geef dan ook de gebruiksaanwijzing mee. Het niet in acht nemen van deze gebruiksaanwijzing kan zware verwondingen of schade aan het apparaat tot gevolg hebben.
Layout Clatronic.book Seite 137 Donnerstag, 9. Februar 2006 9:52 09 Veiligheidsinstructies Laser NL Dit apparaat is geclassificeerd als laserapparaat van de klasse 1 (CLASS 1 LASER). Het bijhorende etiket zit aan de buitenkant van het apparaat. Laserstralen kunnen de ogen beschadigen. Houd daarom rekening met het volgende: Maak het apparaat in geen geval open. Probeer nooit om het apparaat uiteen te halen.
Layout Clatronic.book Seite 138 Donnerstag, 9. Februar 2006 9:52 09 Opstellen en aansluiten Doelmatig gebruik De DVD-speler is uitsluitend bedoeld voor de volgende taken: Afspelen van video-DVDs/video CDs. Afspelen van audio-CDs. Elk ander gebruik geldt als niet-doelmatig en is verboden. Defect Als het apparaat defect zou zijn: Als de netaansluitleiding van dit apparaat beschadigd wordt, dan moet hij door de fabrikant of diens klantendienst vervangen worden om gevaren te vermijden.
Layout Clatronic.book Seite 139 Donnerstag, 9. Februar 2006 9:52 09 Ingebruikname Batterijen in de afstandsbediening plaatsen NL Ingebruikname WAARSCHUWING: OPGELET: Ongelijke batterijtypes of nieuwe en gebruikte batterijen mogen niet samen gebruikt worden. Verschillende batterijtypes hebben verschillende eigenschappen. Gebruik oude en nieuwe batterijen niet samen.
Layout Clatronic.book Seite 140 Donnerstag, 9. Februar 2006 9:52 09 Ingebruikname Videokabel aansluiten Met de videokabel worden de beeldgegevens van uw DVD-speler overgedragen naar uw televisie of videoprojector. U heeft vier verschillende mogelijkheden om de DVD-speler te verbinden met uw televisie/videoprojector. Kies al naargelang uw weergaveapparaat een mogelijkheid.
Layout Clatronic.book Seite 141 Donnerstag, 9. Februar 2006 9:52 09 Audiokabel aansluiten U kunt kiezen tussen drie overdrachtprocédé’s voor de geluidssignalen. In principe moet u eerst kiezen, of het geluid via uw televisie of via een stereo- resp. 5.1-versterker moet worden weergegeven. Al naargelang uw keuze sluit u de audiokabel dan aan aan de televisie of aan een versterker. NL Ingebruikname AANWIJZING: Indien uw versterker een digitale ingang bezit, dan moet u deze gebruiken.
Layout Clatronic.book Seite 142 Donnerstag, 9. Februar 2006 9:52 09 Over de DVD-speler Apparaat inschakelen 2 Schakel de hoofdschakelaar van de DVD-speler in door de net-Aan/Uit-schakelaar aan de achterkant van het apparaat te activeren (afb. 11). -100-250V 50/60Hz POWER SOURCE AC 100-250V 50/60 Hz O N LASER RADIATON O FF POWER CONSUMPTION 25W afb. 11 Over de DVD-speler U kunt met de DVD 709 een groot aantal DVD-formaten afspelen pagina 132, „Technische gegevens“.
Layout Clatronic.book Seite 143 Donnerstag, 9. Februar 2006 9:52 09 Begrippen Track: Met „track“ worden de passages van een audio-CD aangeduid. Hierbij kan het bijvoorbeeld om een lied, het deel van een symfonie enz. gaan. NL Mediums weergeven Titel/Hoofdstuk: Video-DVDs worden onderverdeeld in „titels“ en „hoofdstukken“. Een „titel“ kan daarbij b.v. een bepaalde film zijn, het „hoofdstuk“ daarentegen fragmenten van deze film.
Layout Clatronic.book Seite 144 Donnerstag, 9. Februar 2006 9:52 09 Mediums weergeven Menucommando's Met het menu werkt u als volgt: 1. Druk op de pijltoetsen (afb. 2/14) om in het menu te navigeren. 2. Druk op de toets Play (afb. 2/27), als u een menucommando wilt veranderen. 3. Voer daarna de gewenste waarde in ofwel met de cijfertoetsen (afb. 2/17) of met de pijltoetsen (afb. 2/14). 4. Bevestig uw invoer met de toets Play (afb. 2/27).
Layout Clatronic.book Seite 145 Donnerstag, 9. Februar 2006 9:52 09 Time Disp.: U verandert hier de tijdsweergave, die onder in het menu getoond wordt. U heeft de keuze uit de volgende opties: - Title Elapsed/Titellooptijd: Weergave van de weergaveduur van de titel tot nu toe. - Title Remain/Titelresttijd: Weergave van de resterende weergaveduur van de titel. - Chapter Elapsed/Hoofdstuk verstreken: Weergave van de weergaveduur van het hoofdstuk tot nu toe.
Layout Clatronic.book Seite 146 Donnerstag, 9. Februar 2006 9:52 09 Mediums weergeven Weergave stoppen Druk tijdens de weergave op de toets Stop (afb. 2/24). De weergave wordt gestopt. Druk nog een keer op de toets Play (afb. 2/27) om de weergave voort te zetten vanuit de laatste positie. AANWIJZING: De weergave wordt alleen dan voortgezet vanuit de laatste positie, als deze optie in de voorinstellingen van de DVD-speler niet onderdrukt werd . Druk tweemaal op de toets Stop (afb.
Layout Clatronic.book Seite 147 Donnerstag, 9. Februar 2006 9:52 09 Titel/Hoofdstuk herhalen 1. Selecteer het hoofdstuk of de titel, dat/die herhaald moet worden pagina 146, „Hoofdstuk/Track direct selecteren“. 2. Druk op de toets REPEAT (afb. 2/2). Op het beeldscherm verschijnt een melding, die aangeeft wat herhaald wordt, b.v. „Chapter“. Druk evt. meermaals op de toets REPEAT (afb. 2/2) om de selectie te veranderen, bijvoorbeeld om een titel in plaats van een hoofdstuk te laten herhalen.
Layout Clatronic.book Seite 148 Donnerstag, 9. Februar 2006 9:52 09 Mediums weergeven Snel vooruit- of terugspoelen De DVD-speler bezit de mogelijkheid om snel vooruit of terug te spoelen. 1. Druk op de toets FWD (afb. 2/22) resp. REV (afb. 2/7) om snel vooruit- resp. terugspoelen te starten. Op het beeldscherm wordt nu de huidige weergaverichting en snelheid getoond, b.v. „2x“. 2. Druk meermaals op de toets FWD resp. REV om de snelheid te veranderen.
Layout Clatronic.book Seite 149 Donnerstag, 9. Februar 2006 9:52 09 Playlist creëren In sommige gevallen wilt u de titels van b.v. een CD niet in de volgorde van de fabrikant horen. Met de functie „Playlist creëren“ kunt u zich een eigen weergavevolgorde creëren. Ga hiervoor als volgt te werk: NL Mediums weergeven 1. Druk op de toets PROGRAM. U ziet nu een tabel. Hier voert u de gewenste volgorde van de tracks (bij CDs) resp. van de hoofdstukken/titels (bij DVDs) in.
Layout Clatronic.book Seite 150 Donnerstag, 9. Februar 2006 9:52 09 Voorinstellingen veranderen Voorinstellingen veranderen Talrijke voorinstellingen kunt u comfortabel veranderen via het beeldschermmenu. U start het menu om de voorinstellingen te veranderen door op de toets Setup (afb. 2/25) van de afstandsbediening te drukken. AANWIJZING: Veel van de voorinstellingen kunt u zowel via de afstandsbediening als via het menu „Setup“ veranderen.
Layout Clatronic.book Seite 151 Donnerstag, 9. Februar 2006 9:52 09 Voorinstellingen veranderen NL Overzicht van het hoofdmenu Algemene instellingspagina (1) Audio instellingspagina (2) Video instellingspagina (3) 1 2 3 4 5 6 Voorinstelling instellingspagina (4) Wachtwoord instellingspagina (5) afb.
Layout Clatronic.book Seite 152 Donnerstag, 9. Februar 2006 9:52 09 Voorinstellingen veranderen OSD-taal Selecteer de gewenste taal voor de beeldschermmeldingen. G E NE R A L S E T UP P A G E T V - D IS P L A Y A N G LE M A RK O S D L A N GU A G E C A P TI O N S S C R EE N S AV E R L A S T M E M OR Y E N GL I S H F R EN C H GERMAN I T AL I A N S P AN I S H afb.
Layout Clatronic.book Seite 153 Donnerstag, 9. Februar 2006 9:52 09 Voorinstellingen veranderen A U D I O S E T UP P A G E A N A LO G A UD I O S ET U P D I G I T AL A U DI O S E TU P D O L BY D I G I TA L S ET U P C H A NN E L DE L A Y E Q U AL I Z E R 3 D P RO C E SS I N G HDCD Op de audio-instellingspagina heeft u de mogelijkheid om een groot aantal instellingen uit te voeren, die de geluidsweergave beïnvloeden. NL Audio instellingspagina afb.
Layout Clatronic.book Seite 154 Donnerstag, 9. Februar 2006 9:52 09 Voorinstellingen veranderen Center Speaker/Centerluidspreker AANWIJZING: Het menu „Center Speaker“ kan alleen geselecteerd worden, als in het menu „Downmix“ de optie „5.1 CH“ geactiveerd is. LARGE: De luidspreker geeft bass en hoge tonen weer. A N AL O G A U D I O S E TU P P A G E D O W NM I X F R O NT S P EA K E R C E N T E R SP E A K E R LARGE R E A R S P E AK E R S M AL L S U B WO O F ER OFF T E S T S P E AK E R D I A L OG D.C.
Layout Clatronic.book Seite 155 Donnerstag, 9. Februar 2006 9:52 09 Voorinstellingen veranderen AANWIJZING: Het menu „Dialog“ kan alleen geselecteerd worden, als in het menu „Downmix“ de optie „L/T“ of de optie „Stereo“ geactiveerd is. A N AL O G A U D I O S E TU P P A G E D O W NM I X F R O NT S P EA K E R C E N TE R S PE A K E R R E A R S P E AK E R S U B WO O F ER T E S T S P E AK E R DIALOG 00 D.R.
Layout Clatronic.book Seite 156 Donnerstag, 9. Februar 2006 9:52 09 Voorinstellingen veranderen LPCM-uitgang S P DI F S E T U P P A G E D I G I T AL O U TP U T CD D O L BY D I G I TA L DTS MPEG L P C M O U TP U T Hier kunt u de aftastsnelheid van het audiosignaal vastleggen. In het algemeen leidt een hogere aftastfrequentie tot een beter audiosignaal. 48K 96K afb. 34 Dolby Digital instelling Dubbel mono Normaal gezien gebeurt de geluidsweergave als stereoweergave.
Layout Clatronic.book Seite 157 Donnerstag, 9. Februar 2006 9:52 09 Voorinstellingen veranderen Als u een 5.1-audio-installatie gebruikt, dan kunnen er vervormingen van de geluidsindruk ontstaan door de verschillende verwijdering van luisteraars van de luidsprekergroepen. Klanken die gelijktijdig door de luisteraar gehoord moeten worden, komen zo na elkaar aan.
Layout Clatronic.book Seite 158 Donnerstag, 9. Februar 2006 9:52 09 Voorinstellingen veranderen Superbass E Q U A L I Z ER P A G E S O U ND M O DE B A S S B O O ST S U P E R B AS S T R E BL E B OO S T Door de activering van de functie „SUPER BASS“ wordt de intensiteit van de bassen nog eens versterkt. ON OFF afb.
Layout Clatronic.book Seite 159 Donnerstag, 9. Februar 2006 9:52 09 NL Voorinstellingen veranderen AANWIJZING: De menupunten „Panorama“, „Dimension“ en „Center Width“ kunnen alleen geselecteerd worden, als in het menu „Reverb Mode“ de optie „Music“ is geactiveerd. Panorama De panoramamodus zorgt voor een weids surroundeffect. U heeft de mogelijkheid om de panoramamodus in- of uit te schakelen. Dimension Met Dimension kunt u de diepte van het surroundgeluidsbeeld instellen.
Layout Clatronic.book Seite 160 Donnerstag, 9. Februar 2006 9:52 09 Voorinstellingen veranderen Video output V I D E O S E T UP P A G E V I D E O O U T PU T T V - M OD E C O L OR S E TT I N G Selecteer de video-uitgangsopties voor het aangesloten en te gebruiken weergaveapparaat. OFF YUV RGB OFF: Kies deze optie, als uw weergaveapparaat via de composite-video- en/of S-video-aansluiting met de DVD-speler is verbonden.
Layout Clatronic.book Seite 161 Donnerstag, 9. Februar 2006 9:52 09 Voorinstellingen veranderen In dit menu heeft u de mogelijkheid om diverse instellingen uit te voeren om het videosignaal aan te passen. C O L O R S ET T I N G S E T U P S H A RP N E SS B R I G HT N E SS NL Kleurinstelling SHARPNESS C O N TR A S T G A M MA HUE S A T UR A T I ON BRIGHTNESS CONTRAST GAMMA (zwart/wit afstemming) L U M A D E L AY HUE SATURATION afb.
Layout Clatronic.book Seite 162 Donnerstag, 9. Februar 2006 9:52 09 Voorinstellingen veranderen PBC P R E F E R EN C E P A G E T V T YP E PBC AUDIO S U B TI T L E D I S C ME N U P A R EN T A L D E F AU L T ON OFF Door PBC (Playback-Control) worden de interactieve menu's van de fabrikant op de DVDs resp. VCDs automatisch gestart. Als u de optie PBC op „OFF“ schakelt, dan worden de tracks automatisch in de volgorde van de DVD resp. VCD afgespeeld.
Layout Clatronic.book Seite 163 Donnerstag, 9. Februar 2006 9:52 09 Voorinstellingen veranderen P R E F E R EN C E P A G E T V - T YP E PBC AUDIO S U B TI T L E D I S C -M E N U P A R E N T AL D E F AU L T 1 2 3 4 5 6 7 8 KI D S A F G PG PG 1 3 PG R R NC 1 7 AD U L T Sommige DVDs bevatten informatie over de doelgroep. Het procédé is hierbij gelijkaardig aan de toelating voor bioscoopfilms („Toegelaten vanaf 12 jaar“ b.v.).
Layout Clatronic.book Seite 164 Donnerstag, 9. Februar 2006 9:52 09 In de bestandsmodus werken Wachtwoordmodus P A S S W O RD S E T U P P A GE P A S S W O RD M O D E ON P A S SW O R D OFF ON: Bij elke gewenste verandering van de jeugdbeschermingsfunctie wordt de invoer van het wachtwoord gevraagd. OFF: De jeugdbeschermingsfunctie kan zonder de invoer van een wachtwoord veranderd worden. afb.
Layout Clatronic.book Seite 165 Donnerstag, 9. Februar 2006 9:52 09 CD/DVD gebruiken 1. Leg de CD of DVD in de drive pagina 143, „CD/DVD laden“. De bestandsmodus start automatisch. 2. Selecteer het/de gewenste bestand(en) en start de weergave pagina 165, „Fotobestanden selecteren en weergave starten“. Fotobestanden selecteren en weergave starten De DVD-speler is uitstekend geschikt om uw digitale foto’s weer te geven.
Layout Clatronic.book Seite 166 Donnerstag, 9. Februar 2006 9:52 09 In de bestandsmodus werken Overzicht Als u tijdens de weergave van de foto's op de toets Stop van de afstandsbediening drukt, dan verschijnt er op het beeldscherm een overzicht met maximaal twaalf miniatuurbeelden van de volgende foto's. Slide Show: De automatische weergave wordt voortgezet. Menu: De bestandsselectiedialoog wordt opgeroepen. Slide Show afb. 61 M en u P r e v N e xt Prev: De vorige 12 foto's worden getoond.
Layout Clatronic.book Seite 167 Donnerstag, 9. Februar 2006 9:52 09 In de bestandsmodus werken 2 3 4 5 01:23 04:21 8 9 10 11 6 7 128 001/005 \0001\ ... 01- DSG 02- DSG 1117 1100 03- DSG 04- DSG 0000 0150 12 afb. 62 A 1. U ziet de bestandsselectiedialoog (afb. 62).
Layout Clatronic.book Seite 168 Donnerstag, 9. Februar 2006 9:52 09 In de bestandsmodus werken Bestand selecteren U heeft de mogelijkheid om tijdens de weergave naar een ander bestand te gaan. 1. Druk op de toets A-Time van de afstandsbediening. Op het beeldscherm verschijnt een invoervenster. 2. Voer het nummer van het gewenste bestand in met de cijfertoetsen van de afstandsbediening. 3. Start de weergave met de toets Play.
Layout Clatronic.book Seite 169 Donnerstag, 9. Februar 2006 9:52 09 Opheffen van fouten NL Opheffen van fouten Voordat u het apparaat naar de klantendienst stuurt, controleert u aan de hand van de volgende tabel of u de fout zelf kunt elimineren. WAARSCHUWING: Voordat u de fout begint op te sporen, schakelt u het apparaat uit en trekt u de netstekker eruit. Wacht tot apparaat en toebehoren zijn afgekoeld. Gebruik nooit een defect apparaat.
Layout Clatronic.book Seite 170 Donnerstag, 9. Februar 2006 9:52 09 Verwerking Fout DVD kan niet worden afgespeeld Mogelijke oorzaak DVD niet gefinaliseerd Oplossing Gebruik een gefinaliseerde DVD. Verwerking Als het gebruikseinde is bereikt, met name als er functiestoringen optreden, dan maakt u het uitgediende apparaat onbruikbaar door de netstekker uit het stopcontact te trekken en de stroomkabel door te snijden. Verwerk het apparaat overeenkomstig de in uw land geldende milieuvoorschriften.
NL D Layout Clatronic.book Seite 171 Donnerstag, 9.
Layout Clatronic.book Seite 172 Donnerstag, 9. Februar 2006 9:56 09 STANDBY OPEN/CLOSE 1 2 3 4 5 6 7 8 9 10 11 12 13 19 REPEAT A-B PROGRAM MUTE YPbPr PLII DISPLAY REV FWD PREV. NEXT STEP/PAUSE STOP VOLUME C .PB 18 Rys.
Layout Clatronic.book Seite 173 Donnerstag, 9. Februar 2006 9:56 09 Części urządzenia/Zakres dostawy 1 Wyłącznik 14 Wyłącznik sieciowy 2 Wyświetlacz 15 Sygnalizator DVD 3 Kieszeń CD/DVD 16 Sygnalizator odtwarzania 4 Przycisk „Open / Close” 17 Sygnalizator CD 5 Przycisk „Play” 18 Wyświetlacz czasu 6 Przycisk „Pause” 19 Sygnalizator Dolby 7 Przycisk „Stop” 20 Sygnalizator DTS 8 Wyjście 5.
Layout Clatronic.book Seite 174 Donnerstag, 9. Februar 2006 9:56 09 Części urządzenia/Zakres dostawy Dane techniczne Rodzaj urządzenia Model Napięcie Moc Wymiary (szer. x wys. x głęb.) Masa Laser Rodzaj sygnału Pasmo przenoszenia Odtwarzacz DVD DVD 709 100 - 250 V ~ 50/60 Hz 15 W 430 x 38 x 265 mm ok.
Layout Clatronic.book Seite 175 Donnerstag, 9. Februar 2006 9:56 09 D Spis treści Części urządzenia/Zakres dostawy ..................... 173 Dane techniczne ................................................................... 174 Zasady bezpieczeństwa........................................ 178 Instrukcja obsługi .................................................................. Dzieci .................................................................................... Zasilanie w energię elektryczną....
Layout Clatronic.book Seite 176 Donnerstag, 9. Februar 2006 9:56 09 Zmiana ustawień domyślnych............................. 192 Zrozumienie struktury menu ................................................. Korzystanie z menu .............................................................. Przegląd menu głównego ..................................................... Strona ustawień ogólnych..................................................... Strona ustawień audio ...............................................
Dziękujemy za dokonany wybór i zakup odtwarzacza DVD 709! Życzymy wiele satysfakcji i radości podczas użytkowania urządzenia! Symbole zastosowane w tej instrukcji obsługi Ważne informacje na temat bezpieczeństwa są oznaczone w szczególny sposób. Należy bezwzględnie przestrzegać tych wskazówek, by uniknąć wypadków i uszkodzenia urządzenia. OSTRZEŻENIE: Ostrzega przed zagrożeniami dla zdrowia i sygnalizuje możliwe zagrożenie w postaci obrażeń.
Layout Clatronic.book Seite 178 Donnerstag, 9. Februar 2006 9:56 09 Zasady bezpieczeństwa Zasady bezpieczeństwa Instrukcja obsługi Przed rozpoczęciem korzystania z urządzenia proszę starannie zapoznać się z instrukcją obsługi. Instrukcję obsługi należy przechowywać w bezpiecznym miejscu. W razie odsprzedaży lub przekazania urządzenia proszę dołączyć instrukcję obsługi. Nieprzestrzeganie zasad podanych w instrukcji obsługi może spowodować poważne obrażenia lub uszkodzenie urządzenia.
Layout Clatronic.book Seite 179 Donnerstag, 9. Februar 2006 9:56 09 Laser Urządzenie to jest sklasyfikowane jako urządzenie laserowe klasy 1 (CLASS 1 LASER). Przynależna etykieta znajduje się od zewnątrz urządzenia. D Zasady bezpieczeństwa Promienie lasera mogą uszkodzić wzrok. W szczególności należy przestrzegać następujących zasad: W żadnym razie nie należy otwierać urządzenia. Nie należy usiłować rozmontować urządzenia.
Layout Clatronic.book Seite 180 Donnerstag, 9. Februar 2006 9:56 09 Ustawianie i podłączanie Użytkowanie zgodne z przeznaczeniem Odtwarzacz DVD przeznaczony jest wyłącznie do następujących celów: Odtwarzanie płyt DVD / Video CD. Odtwarzanie płyt audio CD. Jakiekolwiek inne wykorzystanie jest niezgodne z przeznaczeniem i jest zabronione.
Layout Clatronic.book Seite 181 Donnerstag, 9. Februar 2006 9:56 09 Uruchamianie D Uruchamianie Wkładanie baterii do pilota zdalnego sterowania OSTRZEŻENIE: Wypływający z baterii kwas może powodować szkody na zdrowiu. Wyjąć baterie z komory baterii, gdy są one zużyte lub jeżeli pilot zdalnego sterowania nie będzie używany przez dłuższy czas. Rozlany z baterii kas należy natychmiast usuwać za pomocą ściereczki. W razie kontaktu ze skórą natychmiast umyć zabrudzone miejsce.
Layout Clatronic.book Seite 182 Donnerstag, 9. Februar 2006 9:56 09 Uruchamianie Podłączanie kabla wideo Za pomocą kabla wideo następuje transmisja danych obrazu pomiędzy odtwarzaczem DVD a odbiornikiem telewizyjnym lub wideoprojektorem. Istnieją różne możliwości podłączani odtwarzacza DVD do odbiornika telewizyjnego lub wideoprojektora. Należy wybrać możliwość, odpowiadającą urządzeniu, używanemu do odtwarzania obrazu.
Layout Clatronic.book Seite 183 Donnerstag, 9. Februar 2006 9:56 09 Podłączanie kabla audio Można wybierać pomiędzy dwoma sposobami transmisji sygnałów dźwiękowych. Należy zawsze zdecydować najpierw, czy dźwięk będzie odtwarzany przez odbiornik telewizyjny, czy przez wzmacniacz stereo albo wzmacniacz 5.1-kanałowy. Odpowiednio do tego należy podłączyć kabel audio do telewizora lub wzmacniacza.
Layout Clatronic.book Seite 184 Donnerstag, 9. Februar 2006 9:56 09 Informacje o odtwarzaczu DVD Włączanie urządzenia 2 -100-250V 50/60Hz POWER SOURCE AC 100-250V 50/60 Hz O N LASER RADIATON Włączyć odtwarzacz DVD wyłącznikiem głównym przez przestawienie włącznika sieciowego od tyłu urządzenia w pozycję włączenia (Rys. 11). O FF POWER CONSUMPTION 25W Rys.
Layout Clatronic.book Seite 185 Donnerstag, 9. Februar 2006 9:56 09 Pojęcia Track: Pojęciem „Track” nazywane są pojedyncze fragmenty płyty CD. Mogą to być przykładowo pojedyncze utwory, frazy symfonii itp. D Odtwarzanie mediów Tytuł/rozdział: płyty wideo DVD dzielone są na „Tytuły” i „Rozdziały”. „Tytułem” może tu być np. cały film, natomiast MPEG-4: ten odtwarzacz DVD potrafi ponadto odtwarzać pliki, skomprymowane zgodnie ze standardem MPEG-4 (skrót od Moving Picture Experts Group-4).
Layout Clatronic.book Seite 186 Donnerstag, 9. Februar 2006 9:56 09 Odtwarzanie mediów Polecenia w menu Korzystanie z menu przebiega w następujący sposób: 1. Naciskać przyciski kierunkowe (Rys. 2/14), aby poruszać się po menu. 2. Chcąc zmienić polecenie w menu należy nacisnąć przycisk Play (Rys. 2/27). 3. Następnie należy wprowadzić wymaganą wartość za pomocą przycisków cyfrowych (Rys. 2/17) lub za pomocą przycisków kierunkowych (Rys. 2/14). 4. Potwierdzać wybór przyciskiem Play (Rys. 2/27).
Layout Clatronic.book Seite 187 Donnerstag, 9. Februar 2006 9:56 09 Time Disp.: można tu zmieniać sposób wyświetlania czasu, który pokazywany jest u dołu menu. Do wyboru są następujące opcje: D Odtwarzanie mediów - Title Elapsed:pokazywanie dotychczasowego czasu odtwarzania utworu. - Title Remain: pokazywanie pozostałego czasu odtwarzania utworu. - Chapter Elapsed: pokazywanie dotychczasowego czasu odtwarzania rozdziału. - Chapter Remain: pokazywanie pozostałego czasu odtwarzania rozdziału.
Layout Clatronic.book Seite 188 Donnerstag, 9. Februar 2006 9:56 09 Odtwarzanie mediów Zatrzymywanie odtwarzania W trakcie odtwarzania nacisnąć przycisk Stop (Rys. 2/24). Odtwarzanie zostaje zatrzymane. Ponownie nacisnąć przycisk Play (Rys. 2/27), aby kontynuować odtwarzanie od ostatniej pozycji. WSKAZÓWKA: Odtwarzanie jest kontynuowane od ostatniej pozycji tylko wtedy, jeżeli opcja ta nie została wyłączona w ustawieniach odtwarzacza DVD . Dwukrotnie nacisnąć przycisk Stop (Rys.
Layout Clatronic.book Seite 189 Donnerstag, 9. Februar 2006 9:56 09 Odtwarzanie mediów 1. Wybrać utwór, który ma zostać powtórzony Strona 188, „Bezpośrednie wybieranie rozdziału/utworu“. 2. Nacisnąć przycisk REPAT (Rys. 2/2). Na ekranie pojawia się komunikat „REPEAT: [OFF]”. D Powtarzanie utworu z CD Zakończenie powtarzania Naciskać przycisk REPEAT (Rys. 2/2) tyle razy, aż po jego naciśnięciu nie pojawi się żaden komunikat na ekranie.
Layout Clatronic.book Seite 190 Donnerstag, 9. Februar 2006 9:56 09 Odtwarzanie mediów Powiększanie fragmentu obrazu Podczas oglądania płyt DVD, VCD wzgl. zdjęć można powiększyć fragment obrazu. Nacisnąć przycisk ZOOM (Rys. 2/30), aby zmienić wycinek obrazu. Kilkakrotnie naciskać ten przycisk, aby wybrać współczynnik powiększenia wzgl. aby przywrócić pierwotne powiększenie. Zmienianie perspektywy kamery Niektóre płyty DVD dają możliwość wybierania perspektywy kamery. Nacisnąć przycisk ANGLE (Rys.
Layout Clatronic.book Seite 191 Donnerstag, 9. Februar 2006 9:56 09 Odtwarzanie mediów Przy zakładaniu płyty CD z muzyką MP3 pojawia się dialog wyboru plików ( Strona 208, „Wybieranie plików MP3 i startowanie odtwarzania“). D Sporządzanie Playlist MP3 Aby sporządzić Playlist, należy postąpić w następujący sposób: 1. Za pomocą przycisków kierunkowych (rys. 2/14) wybrać twór, który ma znaleźć się w Playlist. 2. Nacisnąć przycisk CLEAR (rys. 2/28). W pasku informacyjnym funkcji (rys.
Layout Clatronic.book Seite 192 Donnerstag, 9. Februar 2006 9:56 09 Zmiana ustawień domyślnych Zmiana ustawień domyślnych Za pomocą menu ekranowego można wygodnie zmieniać liczne ustawienia domyślne. Menu zmiany ustawień domyślnych wywoływane jest przez naciśnięcie przycisku Setup (Rys. 2/25) na pilocie zdalnego sterowania. WSKAZÓWKA: Wiele z ustawień domyślnych można zmieniać zarówno za pomocą pilota zdalnego sterowania, jak i za pośrednictwem menu „Ustawienia domyślne”.
Layout Clatronic.book Seite 193 Donnerstag, 9. Februar 2006 9:56 09 Zmiana ustawień domyślnych D Przegląd menu głównego General setup page/Strona ustawień ogólnych (1) Audio setup page/Strona ustawień audio (2) Video setup page/Strona ustawień wideo (3) 1 2 3 4 5 6 Rys. 17 Preferences page/Strona ustawień wstępnych (4) Password setup page/Strona ustawień hasła (5) Exit setup/Ustawień Wyjscia (6) Strona ustawień ogólnych TV DISPLAY/Odbiornik telewizyjny Rys.
Layout Clatronic.book Seite 194 Donnerstag, 9. Februar 2006 9:56 09 Zmiana ustawień domyślnych OSD Language Proszę wybrać wymagany język dla menu ekranowego. GENE RAL S E TUP P AGE T V -D IS P LA Y A NG LE MA RK O S D L A N GU A G E CA P T I ON S S CRE E N SA V ER L A ST ME MO R Y E N GL I S H F RE NCH GE RMAN I T AL I A N S PA NI S H Rys.
Layout Clatronic.book Seite 195 Donnerstag, 9. Februar 2006 9:56 09 Zmiana ustawień domyślnych Strona ustawień audio Na stronie ustawień audio można dokonywać całego szeregu ustawień, wpływających na sygnał dźwiękowy odtwarzacza. D A U D I O S E T UP P A G E A NA LO G AU DIO S ET U P DIGITAL AUDIO SETUP DO L BY DI G IT A L SE T UP CH ANN EL DEL A Y E Q UA LI Z E R 3 D P ROC ES S IN G HD CD Rys. 24 Analog Audio Setup Downmix PAGE L/R S T ER EO V S URR 5 .1 CH Rys.
Layout Clatronic.book Seite 196 Donnerstag, 9. Februar 2006 9:56 09 Zmiana ustawień domyślnych Center Speaker/Głośnik centralny WSKAZÓWKA: Menu „Center Speaker” można wybrać tylko wtedy, jeżeli w menu „Downmix” aktywna jest opcja „5.1 CH”. LARGE: głośnik odtwarza niskie i wysokie tony. ANALOG AUDIO SE TUP DOW NMIX F R ONT S P EA K ER C E N T E R SP E A K E R RE A R SP E AK E R S U B WO O F ER T E S T SP E AK E R DIA L OG D.R .
Layout Clatronic.book Seite 197 Donnerstag, 9. Februar 2006 9:56 09 Zmiana ustawień domyślnych D Dialog WSKAZÓWKA: Menu „Dialog” można wybrać tylko wtedy, jeżeli w menu „Downmix” aktywna jest opcja „L/T” lub opcja „Stereo”. ANALOG AUDIO SE TUP PAGE DOW NMIX F R ONT S P EA K ER CE NTE R S PE A KE R RE A R SP E AK E R S UB WO O F ER T E S T SP E AK E R DIALOG 00 D.R.C Po wybraniu w menu Downmix ustawień L/T lub Stereo istnieje możliwość ustawienia głośności dialogów.
Layout Clatronic.book Seite 198 Donnerstag, 9. Februar 2006 9:56 09 Zmiana ustawień domyślnych LPCM output/Wyjście LPCM Można tu ustawić częstotliwość próbkowania sygnału audio. Ogólnie wyższa częstotliwość próbkowania zapewnia lepszy sygnał audio. DIGITA L A UDIO S E TUP P AGE DIGITAL OUTPUT CD D O L BY D I G IT A L DT S M PE G LPCM OUTPUT 4 8K 96K Rys. 34 Dolby Digital Setup Dual Mono Normalnie dźwięk wysyłany jest w trybie stereofonicznym.
Layout Clatronic.book Seite 199 Donnerstag, 9. Februar 2006 9:56 09 Zmiana ustawień domyślnych A U D I O SE T U P PAG E A NA LO G AU DIO S ET U P DIGITAL AUDIO SETUP DO L BY DI G IT A L SE T UP CHANNEL DELAY E Q UA LI Z E R 3 D-P ROCE SS ING HDCD Przy używaniu zestawu muzycznego 5.1-kanałowego mogą powstać zniekształcenia wrażenia dźwiękowego na skutek różnych odległości głośników od słuchacza. W takim przypadku dźwięki, które powinny być słyszane równocześnie, docierają do słuchacza jeden po drugim.
Layout Clatronic.book Seite 200 Donnerstag, 9. Februar 2006 9:56 09 Zmiana ustawień domyślnych Super Bass E Q U A L I Z E R PAG E S O UND MODE B A SS BO O S T S U P E R B AS S T R EB LE B OO S T Aktywacja funkcji „SUPER BASS” powoduje jeszcze większe zwiększenie intensywności niskich tonów. ON OFF Rys.
Layout Clatronic.book Seite 201 Donnerstag, 9. Februar 2006 9:56 09 WSKAZÓWKA: Punkty menu „Panorama”, „Dimension” i „Center Width” można wybierać tylko wtedy, gdy w menu „Reverb Mode” aktywna jest opcja „Music”. D Zmiana ustawień domyślnych Panorama Tryb panoramiczny (Panorama) zapewnia poszerzenie efektu otaczającego dźwięku (surround). Istnieje możliwość włączania lub wyłączania trybu panoramicznego. Dimension Funkcja rozmiaru (Dimension) pozwala na ustawiane głębokości dźwięku surround.
Layout Clatronic.book Seite 202 Donnerstag, 9. Februar 2006 9:56 09 Zmiana ustawień domyślnych Video output/Wyjście wideo V I D E O S E T UP P A G E V I D E O O U T PU T TV-M OD E COL O R SE TTING Wybrać opcje wyjścia wideo odpowiednio do podłączonego i używanego urządzenia odtwarzającego. OFF Y UV RGB OFF: Tę opcję należy wybierać, jeżeli urządzenie odtwarzające jest podłączone do odtwarzacza DVD kablem S-Video lub kablem kompozytowym wideo (Composite Video).
Layout Clatronic.book Seite 203 Donnerstag, 9. Februar 2006 9:56 09 Zmiana ustawień domyślnych W tym menu można dokonywać różnych ustawień, pozwalających na dopasowanie sygnału wideo. C O L O R S ET T I N G S E T U P S HA RP NES S B RI G HT NE SS D Color Setting Setup/Ustawienie kolorów SHARPNESS CONTR AS T G A MMA HU E S A T URA T I ON BRIGTHNESS CONTRAST GAMMA (kompensacja czerni/bieli) L UMA DE LA Y HUE SATURATION Rys.
Layout Clatronic.book Seite 204 Donnerstag, 9. Februar 2006 9:56 09 Zmiana ustawień domyślnych Audio P R E F E R EN C E P A G E T V T Y PE PBC AUDIO S UB T I T LE DI S C ME NU P A REN T AL DE FA UL T E NG LI S H FRENCH G ER MAN S PA NI S H I T AL I A N DA NISH P OR TUGUES E Ustawić preferowany język, w którym ma być odtwarzana płyta DVD. Wybrany język jest wtedy odtwarzany automatycznie przy wyświetlaniu płyty DVD.
Layout Clatronic.book Seite 205 Donnerstag, 9. Februar 2006 9:56 09 4 PG 13: Koniecznie zaleca się oglądanie w obecności rodziców. Niektóre fragmenty mogą nie nadawać się dla dzieci w wieku poniżej 13 lat. D Zmiana ustawień domyślnych 5 PGR: Oglądanie w obecności rodziców jest konieczne. 6 R: Młodzież w wieku poniżej 17 lat może oglądać film tylko w towarzystwie osoby dorosłej. 7 NC17: Młodzież w wieku poniżej 17 lat nie może oglądać tego filmu.
Layout Clatronic.book Seite 206 Donnerstag, 9. Februar 2006 9:56 09 Praca w trybie plików Hasło W tym menu można zmieniać hasło do ustawień blokady rodzicielskiej. O L D PAS S WO R D N E W PA S S W O R D P A SS W O R D P W D OK Aby móc zmienić hasło należy wpisać aktualne hasło. Hasło główne brzmi „49540”. WSKAZÓWKA: W razie zapomnienia hasła można dezaktywować blokadę rodzicielską za pomocą hasła głównego. Rys. 59 Aby zmienić hasło należy wykonać następujące czynności: 1.
Layout Clatronic.book Seite 207 Donnerstag, 9. Februar 2006 9:56 09 1 2 1. Pojawia się dialog wyboru plików (Rys. 60). Ma on następującą strukturę: - Wybrane pliki - łączna liczba plików (1) - Aktualny folder (2) - Lista plików (3) - Okno podglądu (4) - Wskazanie rozdzielczości aktualnego zdjęcia (5) 001/005 3 \0001\ ...
Layout Clatronic.book Seite 208 Donnerstag, 9.
Layout Clatronic.book Seite 209 Donnerstag, 9. Februar 2006 9:56 09 4. Za pomocą przycisków kierunkowych ( , ) wybrać plik do odtwarzania i rozpocząć odtwarzanie przez naciśnięcie przycisku Play (Rys. 2/27). Aktualnie wybrany plik jest podświetlany na pomarańczowo. D Praca w trybie plików Wybieranie plików MPEG4 i startowanie odtwarzania 001/005 Sample_1 Sample_2 Sample_3 Sample_4 1. Pojawia się dialog wyboru plików (Rys. 63).
Layout Clatronic.book Seite 210 Donnerstag, 9. Februar 2006 9:56 09 Rozwiązywanie problemów Rozwiązywanie problemów Przed przesłaniem urządzenia do serwisu proszę sprawdzić na podstawie poniższej tabeli, czy błąd / usterkę można usunąć we własnym zakresie. OSTRZEŻENIE: Przed rozpoczęciem poszukiwania przyczyny usterki należy wyłączyć urządzenie i wyjąć wtyk przewodu zasilającego z gniazda. Należy odczekać na schłodzenie urządzenia i akcesoriów. Nigdy nie wolno używać uszkodzonego urządzenia.
Layout Clatronic.book Seite 211 Donnerstag, 9. Februar 2006 9:56 09 Utylizacja Możliwa przyczyna Używana jest Playlist Utwory są odtwarzane w niewłaściwej kolejności Płyta DVD nie może Płyta DVD nie została zamknięta być odtwarzana Rozwiązanie problemu Usunąć Playlist w Playlist“. Strona 191, „Usuwanie wpisu D Błąd / usterka Użyć zamkniętej płyty DVD.
Layout Clatronic.book Seite 212 Donnerstag, 9. Februar 2006 9:56 09 Deklaracja zgodności Deklaracja zgodności Firma Clatronic International GmbH oświadcza niniejszym, że urządzenie DVD 709 spełnia zasadnicze wymagania europejskiej dyrektywy w sprawie zgodności elektromagnetycznej (89/336/EWG) oraz w sprawie urządzeń niskonapięciowych (93/68/EWG).
PL D Layout Clatronic.book Seite 213 Donnerstag, 9.
Layout Clatronic.book Seite 214 Donnerstag, 9. Februar 2006 9:59 09 STANDBY OPEN/CLOSE 1 2 3 4 5 6 7 8 9 10 11 12 13 19 REPEAT A-B PROGRAM MUTE YPbPr PLII DISPLAY REV FWD PREV. NEXT STEP/PAUSE STOP VOLUME C TIT AU D 17 18 Obr. 2 214 RE TU RN PLAY 14 15 16 SETUP MENU B E.
Layout Clatronic.book Seite 215 Donnerstag, 9. Februar 2006 9:59 09 Části přístroje/Obsah dodávky 1 Hlavní vypínač 18 Ukazatel času 2 Displej 19 Dolby indikátor 3 CD/DVD 20 Indikátor DTS 4 Tlačítko "Otevřít/zavřít" 21 Indikátor VCD 5 Tlačítko "Zpět" 6 Tlačítko "Pauza" 7 Tlačítko "Stop" 8 5.
Layout Clatronic.book Seite 216 Donnerstag, 9.
Popis obsahu Části přístroje/Obsah dodávky ............................ 215 Technická data ..................................................................... CZ Layout Clatronic.book Seite 217 Donnerstag, 9. Februar 2006 9:59 09 216 Bezpečnostní předpisy......................................... 220 Návod k obsluze ................................................................... Děti ....................................................................................... Napájení ...................
Layout Clatronic.book Seite 218 Donnerstag, 9. Februar 2006 9:59 09 Změna přednastavení........................................... 234 Seznámení se stavbou menu ............................................... Používání menu .................................................................... Přehled o hlavním menu ....................................................... Všeobecná nastavovací stránka ........................................... Nastavovací stránka Audio .......................................
Mnohokrát děkujeme! Těší nás, že jste se rozhodli pro DVD přehrávač DVD 709! Přejeme Vám s tímto přístrojem mnoho radosti a děkujeme za jeho nákup! Symboly v tomto návodu k obsluze Důležitá upozornění k Vaší bezpečnosti jsou označena zvlášt’. Bezpodmínečně tato upozornění respektujte, aby nedošlo k nehodám a poškozením přístroje: CZ Layout Clatronic.book Seite 219 Donnerstag, 9. Februar 2006 9:59 09 VAROVÁNÍ: Varuje před nebezpečími ohrožujícími Vaše zdraví a poukazuje na možná rizika.
Layout Clatronic.book Seite 220 Donnerstag, 9. Februar 2006 9:59 09 Bezpečnostní předpisy Bezpečnostní předpisy Návod k obsluze Přečtěte si tento návod k obsluze velmi důkladně, a to ještě před samotným použitím přístroje. Návod k obsluze dobře opatrujte. Pokud předáváte přístroj třetí osobě, předávejte spolu s ním také návod k obsluze. Nerespektování tohoto návodu k obsluze může vézt k těžkým poraněním nebo k poškozením stroje.
Layout Clatronic.book Seite 221 Donnerstag, 9. Februar 2006 9:59 09 Bezpečnostní předpisy Tento přístroj je klasifikován jako laserový přístroj třídy 1 (CLASS 1 LASER). Příslušná etiketa se nachází na vnější straně přístroje. CZ Laser Laserové paprsky mohou poškodit oči. Proto dodržujte následující: V žádném případě přístroj neotvírejte. Nepokoušejte se přístroj rozebrat. Za účelem snížení rizika: Údržbové práce nechte vždy provádět pouze výrobce nebo v oddělení pro služby zákazníkům.
Layout Clatronic.book Seite 222 Donnerstag, 9. Februar 2006 9:59 09 Sestavení a zapojení Správné používání přístroje DVD přehrávač je zásadně určen pro následující úkoly: Přehrávání videa na DVD/CD. Přehrávání audio-CD. Každé další použití přístroj je považováno za nepovolené a je zakázáno.
Layout Clatronic.book Seite 223 Donnerstag, 9. Februar 2006 9:59 09 Uvedení do provozu Vložení baterek do dálkového ovládání CZ Uvedení do provozu VAROVÁNÍ: Vytékající kyselina z baterií může způsobit poškození zdraví. Baterie vyjměte ze zásobníku okamžitě, jakmile jsou prázdé, anebo v případě, že dálkové ovládání nebude delší dobu používáno. Vytékající kyselinu okamžitě utřít hadrem. Při kontaktu s pokožkou zasažené místo okamžitě omýt vodou. Při spolknutí okamžitě vyhledat lékaře.
Layout Clatronic.book Seite 224 Donnerstag, 9. Februar 2006 9:59 09 Uvedení do provozu Připojení kabelu videa Videokabelem jsou přenášena obrazová data z Vašeho DVD přehrávače k televiznímu přístroji nebo video-projektoru. Máte čtyři různé možnosti, jak spojit DVD přehrávač s vaším televizorem/video-projektorem. Zvolte si s ohledem na Váš přehrávač jednu z možností.
Layout Clatronic.book Seite 225 Donnerstag, 9. Februar 2006 9:59 09 Zapojení audio-kabelu Můžete volit mezi třemi různými možnostmi přenosu zvukového signálu. V první řadě musíte nejprve zvolit, zda bude zvuk přenášen přes televizi nebo přes stereo - resp.5.1- zesilovač. Na základě tohoto rozhodnutí poté připojte audio-kabel k televizoru nebo k zesilovači. CZ Uvedení do provozu UPOZORNĚNÍ: Jestliže Váš zesilovač disponuje digitálním vstupem, měli byste použít ten.
Layout Clatronic.book Seite 226 Donnerstag, 9. Februar 2006 9:59 09 O DVD-přehrávači Zapínání přístroje Zapněte hlavní spínač DVD přehrávače, a to přepínačem "On/Off" na zadní straně přístroje (Obr. 11). 2 -100-250V 50/60Hz POWER SOURCE AC 100-250V 50/60 Hz O N LASER RADIATON O FF POWER CONSUMPTION 25W Obr. 11 O DVD-přehrávači S přehrávačem DVD 709 si můžete přehrát velký počet DVD formátů. Strana 216, „Technická data“. Dejte ale pozor, protože DVD jsou v mnoha případech vybaveny tzv.
Layout Clatronic.book Seite 227 Donnerstag, 9. Februar 2006 9:59 09 Pojmy Track: Termínem "Track" se označují sekce na audio-CD. Může se jednat například o píseň, větu v sympfonii atd. Titel/ Chapter/Titul/Kapitola: Video-DVD jsou pro rozdělování používána označení "Titul" a "Kapitola". "Titul" může být např. jeden konkrétní film, "Kapitola" jednotlivé kapitoly filmu.
Layout Clatronic.book Seite 228 Donnerstag, 9. Februar 2006 9:59 09 Přehrávání médií Příkazy v menu V menu se pracuje následovnì: 1. Stiskněte směrová tlačítka (Obr. 2/14), díky tom se budete moci operovat v menu. 2. Stisknìte tlaèítko Play (Obr. 2/27), jestliže chcete měnit nějaké příkazy v menu. 3. Zadejte poté požadovanou hodnotu směrovým tlačítkem (Obr. 2/17) nebo směrovým tlačítkem (Obr. 2/14). 4. Potvrďte Vaše zadání tlaèítkem Play (Obr. 2/27).
Layout Clatronic.book Seite 229 Donnerstag, 9. Februar 2006 9:59 09 - Title Remain/Zbývající čas titulu: Zobrazení zbývajícího času přehrávaného titulu. - Chapter Elapsed/Kapitola-přeškrtnuta: Zobrazení času přehrávané kapitoly. - Chapter Remain/Zbývající čas kapitoly: Zobrazení zbývajícího času přehrávané kapitoly. Start přehrávání CZ Přehrávání médií 1. Vložte CD/DVD do příslušné přihrádky Strana 227, „Vkládání CD/DVD“. 2. Na dálkovém ovladači stiskněte tlačítko Play (Obr. 2/27).
Layout Clatronic.book Seite 230 Donnerstag, 9. Februar 2006 9:59 09 Přehrávání médií Zastavení přehrávání Stiskněte během přehrávání tlačítko Stop (Obr. 2/24). Přehrávání bude zastaveno. Jestliže stisknete tlačítko Play (Obr. 2/27), bude přehrávání z této pozice pokračovat. UPOZORNĚNÍ: Přehrávání bude pokračovat z této poslední pozice v případě, že tato funkce nebyla v nastavení DVD přehrávače deaktivována. Na dálkovém ovládání stiskněte dvakrát tlačítko Stop (Obr.
Layout Clatronic.book Seite 231 Donnerstag, 9. Februar 2006 9:59 09 Opakování titulu/kapitoly 1. Vyberte si kapitolu nebo titul, od kterého má opakování probíhat Strana 230, „Přímá volba kapitoly/stopy“. 2. Stiskněte tlačítko na dálkovém ovladači REPEAT (Obr. 2/2). Na obrazovce se objeví hlášení, které udává, co bude opakováno např. "kapitola". Stiskněte příp. vícekrát tlačítko REPEAT (Obr. 2/2), k změně výběru, namísto opakování kapitoly opakování jednoho titulu.
Layout Clatronic.book Seite 232 Donnerstag, 9. Februar 2006 9:59 09 Přehrávání médií Provádění rychlého přetáčení vpřed nebo vzad DVD přehrávač disponuje možností provádět rychlé přetáčení dopředu a dozadu. 1. Stiskněte tlačítko FWD (Obr. 2/22) resp. REV (Obr. 2/7), kterým budete přetáčet dopředu nebo dozadu. Na obrazovce se nyní ukazuje aktuální stav směru přetáčení a rychlost, např. "2x". 2. Opakovaně stiskněte tlačítko FWD resp. REV, tím změníte rychlost přetáčení.
Layout Clatronic.book Seite 233 Donnerstag, 9. Februar 2006 9:59 09 Sestavení playlistu Z nějakých důvodů nechcete tituly např. z CD přehrávat v pořadí určeném od výrobce. Funkcí "Sestavení playlistu" si můžete vyrobit vlastní pořadí přehrávaných titulů. Postupujte následovně: CZ Přehrávání médií 1. Stiskněte tlačítko PROGRAM. Nyní vidíte tabulku. Zde zadáváte požadované pořadí Tracků (u CD) resp. kapioly/titulu (u DVD).
Layout Clatronic.book Seite 234 Donnerstag, 9. Februar 2006 9:59 09 Změna přednastavení Změna přednastavení Velké množství přednastavení můžete pohodlně změnit přes menu na obrazovce. Nastartování menu proprovádění změn přednastavení provedete stisknutím tlačítka Setup (Obr. 2/25) na dálkovém ovládání. UPOZORNĚNÍ: Mnoho přednastavení je možné změnit přes dálkové ovládání,ale také přes menu "Přednastavení".
Layout Clatronic.book Seite 235 Donnerstag, 9. Februar 2006 9:59 09 Změna přednastavení CZ Přehled o hlavním menu General setup page/Všeobecná nastavovací stránka (1) Audio setup page/Nastavovací stránka audia (2) Video setup page/Nastavovací stránka-video (3) 1 2 3 4 5 6 Preference page/Nastavovací stránka přednastavení (4) Password setup page/Nastavovací stránka hesla (5) Obr.
Layout Clatronic.book Seite 236 Donnerstag, 9. Februar 2006 9:59 09 Změna přednastavení Captions/Podtitulek G E NE R A L S E T UP P A G E T V -D IS P LA Y A NG LE MA RK OS D LA NGUA GE CA PTIONS S CRE E N SA V ER L A ST ME MO RY Podtitulky popisují vedle jazykového obsahu také okolní zvuky, např. odkaz "Tichá hudba" a poskytují další informace k filmu. Tato funkce je především zaměřena na sluchově postižené a hluché diváky.
Layout Clatronic.book Seite 237 Donnerstag, 9. Februar 2006 9:59 09 Změna přednastavení CZ Analogové Audio zařízení Downmix Změňte charakteristiku výstupu z reproduktoru: A N AL O G A U D I O S E TU P P A G E DOW NMIX L/R F R ONT S P EA K ER S T ER EO CE NTE R S PE A KE R V S URR RE A R SP E AK E R 5 .1 CH S UB WO O F ER T E S T SP E AK E R DIA L OG D.R.C Obr. 25 L/R: Zvolte toto nastavení, pokud chcete DVD přehrát v Pro Logic Dolby Stereoefektu.
Layout Clatronic.book Seite 238 Donnerstag, 9. Februar 2006 9:59 09 Změna přednastavení Rear Speaker/Surroundový reproduktor UPOZORNĚNÍ: Nabídka „Rear Speaker“ je volitelná jenom tehdy, když je v nabídce „Downmix“ aktivována alternativa „5.1 CH“. LARGE: Zadní surroundový reproduktor vydává basy a výšky. A N AL O G A U D I O S E TU P P A G E DOW NMIX F R ONT S P EA K ER CE NTE R S PE A KE R RE AR S P EAK ER LA RGE S UB WO O F ER S MA LL T E S T SP E AK E R OFF DIA L OG D.R .
Layout Clatronic.book Seite 239 Donnerstag, 9. Februar 2006 9:59 09 Změna přednastavení A N AL O G A U D I O S E TU P P A G E DOW NMIX F R ONT S P EA K ER CE NTE R S PE A KE R RE A R SP E AK E R S UB WO O F ER T E S T SP E AK E R ON D I A L OG Off D.R.C AU TO Obr. 32 Funkcí D.R.C. můžete omezit maximálně nastavitelnou hlasitost, abyste zabránili poškození Vašich reproduktorů. CZ D.R.C ON: Maximálně nastavitelná hlasitost bude omezena. OFF: Omezení maximálního nastavení hlasitosti je vypnuto.
Layout Clatronic.book Seite 240 Donnerstag, 9. Februar 2006 9:59 09 Změna přednastavení Zařízení Dolby Digital Dual Mono/Duble mono Za normálních okolností probíhá vydávání tónů jako stereo. Zde máte možnost zvolit namísto stereo zvuku mono. DO L BY DI G IT A L SE T UP DU AL MONO S T E RE O DY NA MIC L -MONO R-M ON O MI X -MO NO STEREO: Stereo přehrávání (původní nastavení). L-MONO: Mono přehrávání. Při tomto nastavení bude u všech reproduktorů vydáván signál "levého" stereo-kanálu.
Layout Clatronic.book Seite 241 Donnerstag, 9. Februar 2006 9:59 09 Změna přednastavení Sound Mode/Zvukový modus E Q U A L I Z E R PAG E S O UND MODE B A SS BO O S T S UP ER B A SS T R EB LE B OO S T Můžete nastavit frekvenční charakteristiku tak, že je přímo v souladu s konkrétním žánrem hudby. OFF RO CK P OP L IV E DA NCE TE CHNO CL AS S IC S OF T CZ EQUALIZER 1. Stisknutím směrových tlačítek zvolíte v menu bod "SOUND MODE". 2.
Layout Clatronic.book Seite 242 Donnerstag, 9. Februar 2006 9:59 09 Změna přednastavení Zpracování -3D Pro Logic II 3 D P ROC ES S IN G P AG E P R O L O GI C I I ON M od e O FF P a no ra ma A UTO Di me nsio n Ce n te r Wi dt h Obr. 42 Funkce "Pro Logic II" převádí stereo-signály jako např. Audio-CD, MP3, VCD nebo SVCD do pěti zvukových efektů blízkých realitě.
Layout Clatronic.book Seite 243 Donnerstag, 9. Februar 2006 9:59 09 Změna přednastavení HD CD SE TUP PA GE FILTER OFF 1x 2x S tímto přístrojem máte možnost přehrávat HDCD-kódovaná CD a DVD. S funkcí "HDCD" pak máte možnost dosáhnout zvuku vysoké kvality s detailnějším vybarvením. Všeobecně platí, že čím větší HDCD filtrace, tím kvalitnější zvuk. CZ HDCD Obr. 44 Nastavovací stránka pro video Na nastavovací stránce pro Video máte možnost nastavit množství funkcí, které ovlivní vycházející obraz.
Layout Clatronic.book Seite 244 Donnerstag, 9. Februar 2006 9:59 09 Změna přednastavení TV-Mode UPOZORNĚNÍ: Když je v nabídce „Video output“ aktivována alternativa „Off“, není nabídka „TV-Mode“ navolitelná. V I DE O S ET UP P AG E V I DE O OUTP UT TV-M OD E COL O R SE TTING P RO G RE SS I VE INTE RLA CE Obr. 47 Funkcí "TV-MODE" potvrdíte formát signálu, který bude předáván Vašemu přehrávači.
Layout Clatronic.book Seite 245 Donnerstag, 9. Februar 2006 9:59 09 Změna přednastavení P RE F E REN CE P AG E T V T Y PE PBC A UDIO S UB T I T LE DIS C ME NU P A REN T AL DE FA UL T Přirpůsobte provedení DVD přehrávače na systém přenosu barev Vašeho přehrávače. K dispozici jsou následující možnosti: P AL MUL T I NTS C CZ TV-Type PAL: Tuto funkci zvolte pro televizní kanály z Evropy, které podporují vysílací systém PAL.
Layout Clatronic.book Seite 246 Donnerstag, 9. Februar 2006 9:59 09 Změna přednastavení Disc-Menu P RE F E REN CE P AG E T V T Y PE PBC A UDIO S UB T I T LE DIS C ME NU P A REN T AL DE FA UL T E NG LI S H FRE NCH G ER MAN S P ANISH I T AL I A N DA NISH P OR TUGUES E Zvolte upřednostňovaný jazyk, v kterém má být DVD menu na obrazovce zobrazeno. Zvolený jazyk bude automaticky spouštěn připřehrávání DVD.
Layout Clatronic.book Seite 247 Donnerstag, 9. Februar 2006 9:59 09 Nastavovací stránka pro heslo P AS SW O RD SE T UP PA GE P A SS WO RD MO DE P A SS WO RD Jestliže chcete Váš DVD přehrávač zabezpečit pojistkou pro mladistvé,pak musíte zadat heslo. Ochranou hesla budou ochráněna nastavení k pojistce mladistvých, a to tak, že budete moci provádět změny pouze Vy. CZ Změna přednastavení Obr.
Layout Clatronic.book Seite 248 Donnerstag, 9. Februar 2006 9:59 09 Práce v datovém modusu Práce v datovém modusu Vedle možnosti přehrávat "normální" filmy nebo hudbu z CD/DVD, máte u tohoto DVD přehrávače k tomu také možnost přehrávat video- nebo audio-data z CD/DVD, které jsou uloženy v datovém systému. Taková média jsou k dispozici často tehdy, když vyrábíte CD s digitálními fotografiemi nebo MP3 s hudbou na Vašem počítači. Média mohou obsahovat bezpočet dat.
Layout Clatronic.book Seite 249 Donnerstag, 9. Februar 2006 9:59 09 Práce v datovém modusu Ruční: Stiskněte tlačítko PREV (Obr. 2/9) nebo NEXT (Obr. 2/23) na dálkovém ovládání, podle toho, zda chcete listovat dopředu nebo dozadu. CZ Listování Automatické: Stiskněte po spuštění přehrávání podruhé tlačítko Play (Obr. 2/27). Výměna obrázků probíhá nyní automaticky.
Layout Clatronic.book Seite 250 Donnerstag, 9. Februar 2006 9:59 09 Práce v datovém modusu Překrývání ze středu obrázku, horizontálně a verikálně Překrývání v proužcích, horizontálně nebo verikálně Žádné překrývání Volba dat MP3 a start přehrávání 1 2 3 4 5 01:23 04:21 8 9 10 11 6 7 128 001/005 \0001\ ... 01- DSG 02- DSG 1117 1100 03- DSG 04- DSG 0000 0150 12 Obr. 62 A 1. Nyní máte zorazen výběr dat- Dialog (Obr. 62).
Layout Clatronic.book Seite 251 Donnerstag, 9. Februar 2006 9:59 09 Práce v datovém modusu Máte možnost, během přehrávání dat přejít k jinému souboru. 1. Stiskněte tlačítko A-Time na dálkovém ovládání. Na obrazovce se objeví zadávací okénko. 2. Zadejte číslo požadovaného souboru s pomocí číselných tlačítek na dálkovém ovládání. CZ Volba dat 3. Tlačítkem Play odstartujte přehrávání. Zvolit pozici v rámci souboru Máte možnost, během přehrávání dat přejít ke konkrétnímu místu v tomto souboru. 1.
Layout Clatronic.book Seite 252 Donnerstag, 9. Februar 2006 9:59 09 Odstranění závad Odstranění závad Ještě před tím, než přístroj odešlete oddělení služeb zákazníkům, prověřte dle následující tabulky, zda se závadu nepodaří odstranit Vám. VAROVÁNÍ: Než se vydáte cestou hledání závady, přístroj vypněte, vytáhněte ze zásuvky. Počkejte až přístroj i příslušenství vychladnou. Rozbitý přístroj nikdy nepoužívejte.
Layout Clatronic.book Seite 253 Donnerstag, 9. Februar 2006 9:59 09 Likvidace CZ Likvidace Jestliže dosáhne přístroj konce svého užití, zvláště jestliže se vyskytnou závady funkčnosti, znehodnot’te přístroj tak, že vytáhnete zástrčku ze zásuvky a sít’ový kabel přeříznete. Přístroj zlikvidujte v souladu s předpisy ochrany přírody platnými ve Vaší zemi. Elektroodpa nesmí být likvidován společně s domovním odpadem.
0_1LetzteSeite.fm Seite 1 Donnerstag, 9. Februar 2006 10:04 10 DVD 709 Clatronic International GmbH Service Center Industriering Ost 40 47906 Kempen Tel.: 0 21 52 - 20 06 666 Mail: hotline@clatronic.de www.clatronic.de Ver.