Operation Manual Brush-E ∙ Brush- S ∙ Brush-P ∙ Brush-T ∙ Brush-TP 4 3 2 1 5 6 7 www.gre ising.
instructions for use Product description Model: Unit No.: Built: Customer registration Stock No.: The user is obliged to: • observation of EC Regulations 89/655 and their national implementation • observation of the current national regulations concerning industrial safety • utilisation of the machine in accordance with instructions All rights reserved. Printing, in whole or in part, is only allowed with prior consent of the manufacturer. Errors and omissions excepted. Kai Greising e. K.
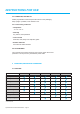
index 1 SAFETY REGULATIONS 5 1.1 Correct utilisation 1.2 Tips and definitions 1.3 Obligations and liability 5 5 5 2 INTRODUCTION 7 2.1 Technical data 2.2 Conformity 2.3 General view 2.4 Accessories 7 7 8 8 3 FUNCTION, METHOD OF OPERATION 8 3.1 3.2 3.3 3.4 3.5 Function review Method of operation Safety and monitoring equipment Switching over supply voltage Operating and display elements 8 9 9 9 9 4 TRANSPORT, SETTING UP 12 4.1 Safety regulations 12 5 12 OPERATING 5.
instructions for use 7 FAULTS 18 7.1 Correcting faults 18 8 SERVICING 21 8.1 Safety regulations 21 9 21 CLOSING DOWN, STORING 9.1 Preparing for storage 9.2 Packaging, transporting and retransporting 9.3 Maintenance during storage 21 21 21 10 DISPOSAL 21 10.
1 SAFETY REGULATIONS 1.1 Correct utilization The units are intended for cleaning welded seams, for removing oxide coating on stainless steel welded seams, for etching conductive metal surfaces and for galvanizing and blasting small areas. The function is only guaranteed when original parts are used. Any other or any use beyond those determined is not considered to be correct. The manufacture cannot be held responsible for any damages resulting from such incorrect use.
instructions for use 1.3.2 Risks involved when using the unit The unit has been built in accordance with the latest technical standards and the recognized regulations concerning safety. In spite of this, danger of injury to the user or a third party and/or damage to the unit or other materials could arising during use. The unit may only be used: • for the process previously determined • in a perfectly safe condition 1.3.3 Guarantee and liability Our „General Conditions of Sale and Supply“ apply.
Further information • Should skin or clothes come into contact with chemicals, they should be washed immediately with plenty of water. • Do not eat or drink at the workplace. • Always wash your hands before taking a break. • Keep the equipment and chemicals away from children. 1.3.7 Maintenance and servicing, repairing faults The prescribed maintenance work and inspections are to be carried out on schedule.
instructions for use 2.3 Transport, Setting up Please pay attention to the transport instructions on the packaging. Keep upright. If possible, store vibration - free. 2.3.1 Surrounding conditions • Temperature - 5 °C to + 55 °C • Humidity Dry, indoors, dew-protected • To be erected Dust-free, level, away from explosive gases • Suitable materials All conductive metal surfaces 2.4 ACCESSORIES The contents of the various accessory sets can be read in the current price-lists.
3.2 Method of Operation • electrochemically pickling and cleaning • etching electrochemically • blasting with glass pearls or aluminous abrasive 3.3 Safety and Monitoring Equipment • 35 Amp (1) and 4 Amp (2) A excess current switch on the front of the unit 6,3 A cut - out fuse on the rear of the unit (12). 3.5 OPERATING AND DISPLAY ELEMENTS 3.5.
instructions for use 1 2 3 4 Clean Marker Brush-E pickling level 1 pickling level 2 electropolishing dark marking 5 6 7 Clean Marker Brush-S Clean Marker Brush-P pickling level 1 pickling level 2 pickling level 3 electropolishing dark marking light marking electrolyte supply only Brush-P Clean Marker Brush-T Clean Marker Brush-TP pickling level 1 pickling level 2 pickling level 3 electropolishing dark marking 8 9 10 light marking blasting electrolyte supply only Brush-TP Operation Manual Clean M
When electro - polishing, material is removed from the surface of the workpiece by specific electrolytes used in conjunction with an external DC source. The material set free by the electrolyte is non - polluting and follows under flattening conditions. In contrast to mechanical removal processes, flattening by electro - polishing begins in the micro range and includes, during longer polishing periods, larger structures which are rounded and flattened off on their top surface.
instructions for use 4 TRANSPORT, SETTING UP 4.1 SAFETY REGULATIONS 4.1.1 Temporary storage Always keep the unit in its outer packaging and in a dry room indoors. 4.1.2 Unpacking Without using sharp tools, remove the outer packaging carefully. Keep the original packaging. Always use it for storing and transporting the unit. 4.1.
5.1.1 Unit adjustments for cleaning for Clean Marker Brush devices selector switch (see page 10) brush attachment 1 (A) selector switch brush attachment 2 (B) marking stencil (C) + marking felt 1 marking stencil 60° (D) + cleaning felt symbol 1 pickling with brush 2 pickling with brush 3 pickling with brush* 4 pickling with electrod* 5 polishing 6 dark marking 7 light marking* 5.2 Cleaning with Clean Marker brush attachments 5.2.
instructions for use be etched by simply pressing the felt on the stencil. Larger areas are best etched by stroking the tool head several times over the entire surface of the stencil. This takes between 1.5 and 2 seconds. If the etching appears rusty, then either do not use the tool quite so long or decrease the voltage. The tool should be held at right angles to the work piece and the whole surface used for contact with the stencil.
5.4 DEALING WITH SHORT-TERM STENCILS 5.4.1 Marking with short - term stencils • place the short-term stencil with the blue/green side facing you into the typewriter/matrix printer (without ribbon) • type the desired lettering onto the blue/green side • remove the short-term stencil and cut it to the desired size.
instructions for use make sure the air is dry, otherwise the blasting agent will form lumps Set the desired working pressure on the regulator. The compressed air set will be displayed on the Manometer. max. 7 bar, recommended is 2 − 4 bar air consumption about 150 l / min at 5 bar Fill blasting agent into the container make sure the blasting agent is dry The lid (15) is to be unscrewed when blasting agent is filled into the container. Using a funnel, fill the container with blasting agent up to approx.
16 17 18 19 6 MAINTENANCE 6.1 SAFETY REGULATIONS Maintenance may only be carried out by an authorised person. Before beginning maintenance, switch off the unit and secure against inadvertent switching on, e. g. by „pulling the plug“. Work must be executed along the lines prescribed in Chapter 1 „safety measures“ . 6.1.
instructions for use 7 Disturbances 7.1 Removing disturbances 7.1.
7.1.
instructions for use 7.1.3 Blasting function not working blasting function not working connect blasting tube (3.5.
8 SERVICING 8.1 SAFETY REGULATIONS Maintenance may only be carried out by an authorized person. Before beginning maintenance, switch off the unit and secure against inadvertent switching on, e. g. by „pulling the plug“. Work must be executed along the lines prescribed in Chapter 1 „safety measures“ . 9 CLOSING DOWN, STORING The unit must be stored in the environment described in Chapter 2.3. 9.
instructions for use 10.1 METHOD OF PROCEDURE Use Neutralyt GN 2 to neutralize Greinox waste to pH 7 in the following ratio: • 1 litre Greinox 1000 to 11.2 litres Neutralyt GN 2, • 1 litre Greinox 2000 to 7.3 litres Neutralyt GN 2. Used fibreglass pads, cloths and fluid remains (except for those soaked in gold electrolyte) should be neutralised to pH 7 with Neutralyt GN 2. The soiled water can then be disposed off in the normal way.
11 YOUR OPINION INTERESTS US Telefax (to Fax-No. 0 73 31 / 98 17 22) Clean Marker We constantly strive for an improvement in quality and would be interested to have your opinion concerning our products and instructions for use Please use this fax form. Customer: Unit type: Order No.
instructions for use 12 Declaration of Conformity in accordance with the Low Voltage Regulations 2006/95/EG Manufacturer: Kai Greising e. K. Clean Marker Industriestr. 29/2 73340 Amstetten Tel.