
Installation Guide


Page 9 of 9
8.
Apply adhesive to the tops of the 2x4’s that are already in place in the channel, if they are needed for
height adjustment and insert the support box structure.
9.
Place the CleanCut Step into position once more to inspect the fit and position. This is the final
opportunity to make any adjustments if necessary.
10.
Apply adhesive to the top of the large support box. It is recommended that an extra bead of adhesive be
placed on the ends of the large support box as the Step curves up toward the ends. Place a substantial
bead of adhesive on the top left and right side of the tub where the CleanCut Step will be seated.
Adhesive on the top of the tub reinforces the CleanCut Step.
11.
Prior to placing the CleanCut Step into the channel, it is necessary to gently pass a low flame several
times along the perimeter of the cut out where the tub is met. This will help promote bonding between
the step and the bath tub once adhesive is applied. Use caution when using the torch and do not hold
heat on area of the product as it may discolor or melt.
12.
Place the CleanCut Step into the channel and gently press into place.
Completing the Installation
1.
Before finalizing the installation, first make sure the CleanCut Step is in proper position and fully
compressed. Press firmly and evenly on the CleanCut Step to ensure proper placement. Thoroughly wipe
the tub area with isopropyl alcohol where the adhesive will bond, and allow enough time to flash off
before applying the adhesive. DO NOT apply the isopropyl alcohol directly on the adhesive as it will
prevent the adhesive from drying or curing. DO NOT use to clean or smooth your final bead as well.
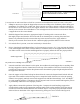
2.
It is necessary to caulk around the entire perimeter of the CleanCut Step. Begin by using the
recommended adhesive along the sides of the CleanCut Step. Begin on the left side and complete the
process, before moving to the right side and bottom. It is recommended that you wear gloves during this
step to avoid direct exposure to the adhesive.
3.
Run your gloved finger along the beads and wipe the excess on a folded paper towel. Try to smooth the
beads one-time only.
4.
Underneath the bottom edges of the CleanCut Step are a bit more difficult to see and the angled tip
should be used in completing this step. Use the small mirror to inspect the bead and to verify that all
surfaces have been properly sealed.
5.
It is also recommended to remove the stopper from the tub upon completion of the installation to prevent
from accidentally filling the tub with water and, if desired, replace trip lever with a blank cap.
6.
Spend a few minutes at the end of the job to once again clean up the tub and the bathroom area. Upon
completion, place a sign on the CleanCut Step warning not to use the tub for 2 days while the
adhesive cures.
IMPORTANT REMINDER – if completing the install on behalf of another, please leave the customer
packet that includes warranty registration information with the end-user at the conclusion of the
installation.
The CleanCut Step installation is now complete. CleanCut sincerely thanks you for your interest in the CleanCut Step and looks
forward to assisting you in any way possible. Visit our website at www.cleancutbath or call us toll-free at (877) TUB-STEP (822-
7837) with any questions or concerns you may have.