CHAT® 150 | CHATAttach® 150 - Group Speakerphone USER’S MANUAL
Telephone 1.800.283.5936 FAX 1.801.974.3669 E-mail On the Web tech.support@clearone.com www.clearone.com CHAT 150 | CHATAttach 150 USER’S MANUAL CLEARONE PART NO. 800-156-201, July 2014, Rev. 2.8 © 2014 ClearOne Inc. All rights reserved. No part of this document may be reproduced in any form or by any means without written permission from ClearOne. ClearOne reserves specific privileges. Information in this document is subject to change without notice. U.S. PATENTS: D539,274; D556,189; D531,999.
Table of Contents CHAPTER 1: INTRODUCTION CHAPTER 6: APPENDIX PRODUCT OVERVIEW............................................................... 1 Service and Support.............................................................. 1 Technical Support.................................................................. 1 Sales and Customer Service................................................. 1 Product Returns..................................................................... 1 UNPACKING......................
CHAPTER 1: INTRODUCTION PRODUCT OVERVIEW Thank you for purchasing the ClearOne CHAT 150 group speakerphone. The CHAT 150 is a speakerphone for individual or small group use. The CHAT 150 connects to telephones, PCs, and video conferencing systems for rich, full-duplex audio communications.
IMPORTANT SAFETY INFORMATION Read the safety instructions before using this product. This personal speaker phone is not designed for making emergency telephone calls when the power fails. You must make alternative arrangements for telephone access to emergency services. • Read and understand all instructions. Follow all warnings marked on the product. • Unplug the product from the outlet before cleaning. Do not use liquid cleaners or aerosol cleaners. Use only a damp cloth for cleaning.
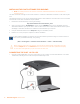
UNPACKING The illustration below shows the parts that ship in the box with each model of the CHAT 150. Contact your dealer for replacement parts and accessories. CHATAttach 150 USB Packout > NOTE: ClearOne is not responsible for product damage incurred during shipment. You must make claims directly with the carrier. Inspect your shipment carefully for obvious signs of damage. If the shipment appears damaged, retain the original boxes and packing material for inspection by the carrier.
REPLACEMENT PARTS & ACCESSORIES The illustration below shows all parts and accessories available for the CHAT 150. Contact your dealer for replacement parts or accessories. CHATAttach Expansion Cable Packout CHAT 150 CONFIGURATIONS The CHAT 150 comes in several configurations, as shown below. The CHAT 150 group speakerphone itself is the same in all configurations; different accessories have been packaged with the unit to enable a variety of connections.
CHAPTER 2: GETTING STARTED CHAT 150 CONTROLS MUTE STATUS INDICATOR MUTE STATUS INDICATOR VOLUME STATUS INDICATOR MUTE STATUS INDICATOR VOLUME DOWN VOLUME UP MUTE LED Indicators The three microphone LED indicators illuminate blue when the CHAT 150 microphones are active (unmuted). The indicators illuminate red when the CHAT 150 microphone mute function is active. The seven volume LED indicators illuminate blue to indicate the current volume setting—more lights indicate higher volume.
INSTALLING THE CHAT SOFTWARE FOR WINDOWS > NOTE: The install procedure is the same for all versions of Windows XP, Windows Vista and Windows 7 operating systems. The CHAT 150 can be used right out of the box and there’s no software to download or install if it is to be used only with a PC. The following procedure can be used to download and install the CHAT software for the CHAT 150 if it is to be used with other devices or if the CHAT 150 firmware requires updates. 1.
CONNECTING THE CHAT 150 TO EXTERNAL DEVICES Connecting to a Telephone ClearOne provides configurations of the CHAT 150 that make it possible to connect your CHAT 150 to enterprise telephone handsets from Cisco and Avaya (see CHAT 150 Configurations in the Introduction to this manual). The CHAT 150 phone Breakout Box is the interface between the CHAT 150 and the particular telephone. 1. Using the included 25’ RJ-45 cable, connect the Phone Breakout Box to your CHAT 150. 2.
8 3. If you have a headset that you typically use with your telephone, connect it to the headset jack on the CHAT 150 Phone Breakout Box. 4. Slide the correct power supply clip for your country into the included power supply. The power supply may contain a plastic shield that must be removed before inserting the clip. Technical Support: 800.283.
5. Using the included power supply, connect the CHAT 150 Phone Breakout Box to a power outlet. 6. The blue LED indicators on the CHAT 150 illuminate, indicating that the CHAT 150 is powered and ready for use. 7. Next, connect the CHAT 150 to your PC. This will allow you to use the CHAT software to configure the CHAT 150 for use with your enterprise telephone. Refer to Connecting the CHAT to a PC section at the end of this chapter.
2. Using the included 6’ RCA cable, connect the CHAT 150 VC Breakout Box to both your video conferencing device and/or TV/monitor, as shown in the following illustration. The cable has two RCA connectors on one end, and five on the other end, split into two groups with two and three connectors. The end with two connectors goes to the VC Breakout Box. The blue connector connects to the Audio In port (identified by the icon), and the black connector goes to the Audio Out port (identified by the icon).
4. Using the included power supply, connect the CHAT 150 VC Breakout Box to a power outlet. 5. The blue LED indicators on the CHAT 150 illuminate, and the LED power indicator on the VC Breakout Box illuminates, indicating that the CHAT 150 is powered and ready for use. 6. Next, connect the CHAT 150 to your PC (or USB device). This will allow you to use the CHAT software to configure the CHAT 150 for use with your video conference system. Refer to Connecting to a PC section earlier in this chapter.
CHATAttach: Connecting Two CHAT Devices The CHATAttach makes it possible to connect two CHAT devices together for larger conference settings using the CHATAttach accessory kit. In order to use the CHATAttach accessory, the following criteria must be met: 1. Both CHAT devices must be the same model number - both CHAT 150, both CHAT 160 or both CHAT 170 devices mixing CHAT models using CHATAttach is not currently possible. 2. Both CHAT devices must have identical firmware versions installed.
CHATAttach Working Modes The following table outlines the CHATAttach working modes. Mode # Mode Code 1 Solid Red LED on both CHAT devices Description Condition CHAT devices are in MUTE mode. Normal 2 Solid Blue LED on both CHAT devices CHAT devices are in UNMUTE mode. Normal 3 Single Blue Volume light on both CHAT devices No PC attached. CHAT devices are in STAND-BY mode and will WAKE-UP when a PC is reattached to a device. All previous CHAT device settings will be reinstated.
CHAPTER 3: CONFIGURING THE CHAT 150 CONFIGURING YOUR CHAT 150 This section describes how you configure your CHAT 150 for the specific devices you are connecting to. The CHAT software contains a database of pre-configured device settings that allows you to instantly select and apply optimal settings for supported devices. > NOTE: From time to time, ClearOne adds additional devices to the database.
3. Click Device Setup from the buttons on the left. The Device Setup screen appears displaying the general types of devices you can configure for use with the CHAT 150. 4. From the Select 1st column, select the type of device you are connecting to the CHAT 150. 5. In the Select 2nd column, select the manufacturer of your device. If you are selecting PC and Laptop, select All. If you are connecting to a VC Breakout Box and your manufacturer is not listed, select Other. 6.
MY DEVICES My Devices displays all of the devices that you have configured for use with your CHAT 150. This screen allows you to easily switch between settings for your listed devices, including any saved custom configurations, if you have created custom audio settings for your device (see Advanced Settings: Database later in this chapter for more information on saving custom settings).
CHAPTER 4: USING THE CHAT APPLICATION USING THE CHAT APPLICATION 1. If not already open, start the CHAT application. 2. Click the My Devices button and select the device you want to tune (select the Other or All option if your device/ application is not listed), then click the Apply to CHAT button. 3. For external hardware devices, connect the device to the CHAT 150 using the appropriate connection diagrams located in Chapter 2: Getting Started. 4.
UPDATE FIRMWARE & DATABASE The Update Firmware screen displays the current firmware version, unit name, and checks ClearOne’s website for available firmware and device database updates. Update Firmware allows you to automatically update to the most recent firmware and device database using the Check for updates button, or you can use the Select File button to manually load an existing firmware file.
> NOTE: If no new firmware or device database updates are available, the following messages will appear below the progress bar: “Your device contains the most recent firmware” “Your database contains the most recent updates” This indicates that your firmware and database are current. No updates are required. 5. Click the Update button to install available updates. The Update dialog box appears.
When you click either of the update buttons, an Update dialog appears. 6. Click Yes to proceed with the firmware or device database update, or No to cancel. 7. A second Update dialog appears. Click Yes to proceed or No to cancel. 8. A series of messages appears below the progress bar indicating that the updates are in progress. WARNING: Do not unplug the CHAT 150 while updates are in progress. 9.
MANUAL UPDATES > NOTE: This procedure is for advanced users, technical support purposes, and corporate environments where IT security policies may prohibit automatic updates. Loading an incorrect firmware file can cause unpredictable results. In most cases, you should use the automatic update procedure by pressing the Check for updates button. To manually change the firmware version or database package loaded into your CHAT 150, use the following procedure: 1.
HELP The Help button provides the following options: • Click Help to activate the online help file. • Click About to get information about your CHAT 150, including software and firmware revision numbers. • Click ClearOne Homepage to visit the ClearOne website using your default web browser. • Click Registration to register your CHAT 150 with ClearOne using your default web browser. ADVANCED Advanced displays the current audio settings for your CHAT 150.
ADVANCED SETTINGS: AUDIO SETTINGS Audio Settings displays the current audio settings and allows you to change them for the CHAT 150 currently connected to your PC. You can also create custom audio settings for a device (see Advanced Settings: Database later in this chapter for more information). The audio settings are as follows: • USB Audio: These controls affect the audio settings of the CHAT 150 when it is connected via USB to your computer.
ADVANCED SETTINGS: DATABASE Database displays the devices configured for the CHAT 150 and allows you to edit them. The CHAT 150 device database includes all of the audio settings for the devices pre-programmed by ClearOne (identified by the icon next to each device) and any custom audio settings you set up and wish to save for later use. The icon indicates that the device is in your My Devices list and can be edited.
Click Ok to close the View Database Record dialog. To create a custom audio settings for a device, perform the following procedure: 1. Click the New button from the Main Advanced screen shown above. The Add Settings to Database dialog appears with the settings of the device you had selected in the database view. 2. Adjust the audio settings or click Upload from CHAT to upload and display the CHAT 150’s current settings. 3. Click the Select 1st drop-down box and select the desired device type.
EDIT CUSTOM AUDIO SETTING 1. To edit custom devices, click the Edit button (appears in the place of the View button for custom devices) after selecting the custom device you wish to edit. The Edit Database Record appears. 2. Adjust the audio settings, or click Upload from CHAT to upload the CHAT 150’s current audio settings. 3. When you are finished editing, click Ok. 4. Click Yes to save the device with the new audio settings or click No to return to the Edit Database Record dialog.
CHAPTER 5: MAINTENANCE CARING FOR YOUR CHAT 150 • Follow all warnings and instructions in this manual. • Unplug all cables from the CHAT 150 before cleaning. • Unplug the power supply from the wall outlet (Phone/VC only) before cleaning. • Do not use liquid or aerosol cleaners. Use a damp cloth moistened with water to clean the outside of your CHAT 150 and power supply.
INTERRUPTED FIRMWARE UPDATE RECOVERY If firmware programming was interrupted (such as by a power loss or an accidental cable disconnection), the CHAT 150 might become unstable. The CHAT 150 software will boot into a generic mode and the Generic Mode screen will be displayed. To perform the firmware update, read and follow the instructions on the screen then click the Update Firmware button (see the Update Firmware & Database section in Chapter 4: Using The CHAT Application for detailed instructions).
CHAPTER 6: APPENDIX SPECIFICATIONS System Requirements Windows XP Windows Vista Windows 7 Connections USB: Version 2.
EUROPEAN COMPLIANCE See the ClearOne Website for specific and most up-to-date European Compliance/Conformity-related information at: http://www.clearone.com/resources#uc_voice FCC PART 15/ICES-003 COMPLIANCE This equipment has been tested and found to comply with the limits for a Class B digital device pursuant to Part 15 of the FCC Rules and Industry Canada ICES-003. These limits are designed to provide reasonable protection against harmful interference in a residential installation.
CHAT® 150 | CHATAttach® 150 —— 多方会议扬声器 用户手册
电话 1 800 283 5936 传真 1 801 974 3669 电子邮件 网址 tech.support@clearone.com www.clearone.com CHAT 150 | CHATAttach 150 用户手册 CLEARONE PART NO. 800-156-201,2014 年 7 月,第 2.
目目录 第 1 章:介绍 第 6 章:附录 产品概述.................................................................................... 1 服务和支持............................................................................ 1 技术支持 ............................................................................... 1 售后服务 ............................................................................... 1 产品退货 ............................................................................... 1 开箱 .................................................
第 1 章:介绍 产品概述 感谢您购买了 ClearOne 公司的 CHAT 150 多方会议扬声器。CHAT 150 是一种适合个人和小型团体使用的多方会议 扬声器。CHAT 150 可以连接到电话、PC、视频会议系统,并提供丰富的全双工音频通讯。 您可以将 CHAT 150 与多种设备和应用程序一起使用,包括: • • • • • • • 企业电话, 如 Avaya,Cisco 等 视频会议系统,如 Tandberg,Sony,Polycom 等 网络电话应用程序,例如 Skype 和 Vonage VoIP 软件电话,例如 Avaya, Cisco,CounterPath 等 Web 网络会议,如 IBM/Lotus Workplace,微软 Live 等 即时语音消息应用程序 音频播放器,如 iTunes,QuickTime 等 服务和支持 如果您需要更多关于如何设置或操作您的 CHAT 150 多方会议扬声器,请与我们联系。我们欢迎并鼓励您提出宝贵意 见,以便我们不断改进我们的产品,更进一步满足您的需求。 技术支持 电话: 传真: 电邮: 网站: 1 800 283 5936(美国) 1 80
重要安全信息 在使用本产品前,请阅读安全说明。此个人会议扬声器在电源出现故障时,并无拨打紧急电话的功能。您必须另行安排 使用紧急电话服务。 • 请阅读和理解全部说明,并遵守产品上标注的所有警告提示。 • 在清洁本产品之前,要从插座上拔下来。请勿使用液体清洁剂或喷雾清洁剂。清洁只能使用湿布。 • 使用本产品时,请勿在靠近有水的地方,例如浴缸,厨房水槽,或游泳池。 • 将本产品放置在一个平整、水平、干爽的表面进行操作。 • 切勿将产品靠近热源散热器或暖气,让产品充分散热。 • 本产品只能在产品标签上指定的电源下运作。如果您不能确定您所在位置的电力系统,请咨询经销商或当地的电力 公司。 • 不要使墙上的插座负荷超载和延长电源线;这可能会导致火灾或触电。 • 切勿将液体洒到本产品上或产品内。 • 请勿拆解本产品。打开或取下盖子,都可能会使您触碰危险电压或有其他风险。不正确的重新组装可能会使您在后 续使用过程中导致触电。拆开产品则保修无效。 • 如出现以下情况,请将本产品插头从插座上拔下,并与合格的技术服务人员联系: a. 当电源线或插头损坏或磨损时。 b.
开箱 下图显示各种型号的 CHAT 150 产品及其包装中的配套配件。请联系您的经销商更换零配件。 CHATAttach 150 USB 拆包 > 注意:ClearOne 公司对运输过程中产生的产品损坏并不负责。如有损坏,请直接与承运人联系索赔。 请仔细检查您的货物是否有明显的损坏迹象。如果货物出现损坏,请保留原来的盒子和包装材料,由 承运人检验。请立即联系您的承运人。 为确保安全性和合规性,请您只使用 CHAT 150 配套的电源。合格的电源有:Glob Tek 型号:GT- 41052-1509, 和 Phihong 型号:PSA05R-090。如果您的电源丢失或损坏,请联系 ClearOne 公司的技术支持予以更换。 第 1 章:介绍 3
更换零配件 下图显示了供 CHAT 150 使用的所有部件及配件。请联系您的经销商更换零配件。 CHAT 150 附件 CISCO 附件套装 860-156-220L 接线盒为 Cisco 7940, 7960, 7970 电话电筒 AVAYA 附件套装 860-156-222L VC 附件套装 860-156-230 接线盒为 AVAYA 2410, 2420, 4610.
第 2 章:入门 CHAT 150 控制 静音状态指示灯 MUTE STATUS INDICATOR 静音状态指示灯 MUTE STATUS INDICATOR 音量状态指示灯 VOLUME STATUS INDICATOR 静音状态指示灯 MUTE STATUS INDICATOR 降音 VOLUME DOWN 升音 UP VOLUME 静音 MUTE LED 指示灯 当 CHAT 150 的麦克风处于激活状态(非静音)时,麦克风 LED 指示灯会亮起三个蓝灯。当 CHAT 150 麦克风静音功 能打开时,指标灯会亮起红灯。七个音量 LED 指示灯亮起蓝灯时表明当前的音量设置,音量越高则亮的灯越多。 音量和静音按钮 使用升/降音按钮来调整 CHAT 150 的音量级别。使用静音按钮可以使 CHAT 150 的麦克风静音,再次按静音按钮可取 消静音。 如果您是将 CHAT 150 连接到一台 PC,你可以使用 Windows 的音量控制或者也可以在 CHAT 软件应用程序中调整。 > 注意:如果您是将 CHAT 150 连接到一台 PC,那么您通过 CHAT 150 按钮对音量进行的任何调整
安装 CHAT 软件到 WINDOWS > 注意:所有版本的 Windows XP,Windows Vista 和 Windows7 操作系统的安装过程都是相同的。 CHAT 150 可以开箱即用。如果仅用于 PC,不必下载或安装任何软件。 如果 CHAT 150 用来连接其他设备,或者如果 CHAT 150 的固件需要更新,则可通过以下过程下载和安装 CHAT 软件。 1. 通过访问下面的网站来下载 CHAT 软件: http://www.clearone.com/resources#uc_voice 2. 从“BY PRODUCT”窗口中选择您的设备并单击 SEARCH 按钮,屏幕上将只显示适用于您的设备的软件供您下 载。选择 CHAT 50/150 的最新软件版本,系统将会显示一个确认窗口,请您确认是否将软件下载到您的电脑上。 3. 解压下载的文件夹,然后运行 Setup.exe 开始安装过程。 4.
连接 CHAT 150 到外部设备 连接到一部电话 ClearOne 公司提供了 CHAT 150 的配置方法,可以将您的 CHAT 150 连接到 Cisco 和 Avaya 的企业电话上(参见本手 册介绍中的 CHAT 150 配置内容 )。CHAT 150 电话接线盒是 CHAT 150 和特定电话之间的接口。 1. 使用附带的 25’ RJ-45 电缆,连接电话接线盒与 CHAT 150。 2.
3. 如果您有一个经常与您电话一起使用的耳机,请将它插在 CHAT 150 电话接线盒的耳机插孔上。 电话接线盒 耳机 4.
5. 使用附带的电源,将 CHAT 150 电话接线盒连接到电源插座上。 电话接线盒 电源适配器 6. CHAT 150 上的蓝色 LED 指示灯点亮,表明 CHAT150 已通电并准备工作。 7.
2.
4. 使用附带的电源,将 CHAT 150 电话接线盒连接到电源插座上。 5. CHAT 150 上的蓝色 LED 指示灯点亮,并且 VC 接线盒上的 LED 电源指示灯也点亮,表明 CHAT 150 已通电并准 备工作。 6.
CHATAttach:连接两台 CHAT 设备 CHATAttach 中的 CHATAttach 工具包可将两台 CHAT 设备连接在一起,用于设置大型会议。 使用 CHATAttach 工具包,必须满足以下条件: 1. 两台 CHAT 设备必须是同一型号,两台都是 CHAT 150,都是 CHAT 160,或者都是 CHAT 170,设备。目前, 不同 CHAT型号还不能和 CHATAttach 设备搭配使用。 2. 两台 CHAT 设备必须都安装相同的固件版本。固件必须兼容 CHATAttach。为了确保这一点,从网站下载固件的最 新版本,并使用最新固件配置每一个将要连接到 CHATAttach 配件上的设备。所有旧的 CHAT 150 设备需要更新固 件,以便与 CHATAttach 配件一起工作。 3. 为获得最佳性能,CHAT 设备之间的距离至少必须为 5’。 使用下列步骤来连接 CHATAttach 配件。 1. 使用带转接头的 CHATAttach 电缆连接两台 CHAT 设备。 2. 两台 CHAT 150 设备同时放置时,相距至少 5’。 3.
CHATAttach 工作模式 下表概述了 CHATAttach 工作模式。 模式 # 模式代码 描述 条件 1 两台 CHAT 设备上的 LED 红灯常亮 CHAT 设备在静音模式下。 正常 2 两台 CHAT 设备上的 LED 蓝灯常亮 CHAT 设备在非静音模式下。 正常 3 两台 CHAT 设备上只 亮一个蓝色音量灯 没有连接到 PC。CHAT 设备处于待机模式,当 PC 重 新连接到设备时,将唤醒该设备。CHAT 设备的所有 以前的设置将被恢复。 正常 CHATAttach 故障排除 下表描述了在使用 CHATAttach 配件时可能出现的问题和可能的原因,帮助您及时发现问题并予以解决。 错误 # 错误代码 原因 1 两台设备的 LED 红灯 同时闪烁 在 CHAT 设备上的固件支持 CHATAttach,但固件版本是不一样的。 下载并安装最新的固件到两台 CHAT 设备上 2 两台设备上的 LED 蓝灯同时闪烁 在同一时间连接了多台 PC。 只将一台 PC 连接到 CHAT 设备 3 4 > 一台 CHAT 设备上 LED 红灯闪烁
第 3 章:配置 CHAT 150 配置您的 CHAT 150 本节介绍如何配置能将您的 CHAT 150 连接到特定设备。CHAT 软件包含了一个预配置的设备设置的数据库,它可以让 您瞬间为所支持的设备选择和应用最佳设置。 > 注意:ClearOne 公司会不时地为数据库增加新的设备。更新您的 CHAT 软件,包括所有目前支持的 设备,请参阅本章后面的更新固件和数据库小节中的内容。 如果您连接到 CHAT 150 的特定设备没有在数据库中列出,您可以通过本章后面介绍的说明创建一个自定义的设备。 设备安装 为您的设备配置 CHAT 150,请执行以下步骤: 1. 使用附带的 USB 电缆,将 CHAT 150 连接到您的 PC 或笔记本电脑上。CHAT 150 上的蓝色 LED 指示灯点亮,表 明 CHAT150 已通电并准备工作。 2.
3. 单机左栏中的按钮 Device Setup。Device Setup 界面显示出常见类型的设备,方便您配置 CHAT 150。 4. 从 Select 1st 栏中,选择您要连接到 CHAT 150 的设备类型。 5. 在 Select 2nd 栏中,选择您的设备的制造商。如果您选择 PC and Laptop,请选择 All。如果您要连接到 VC 接线盒,并且您的制造商不在列表中,请选择 Other。 6. 从 Select 3rd 栏中选择设备的型号。如果您选择的是 PC and Laptop,请选择 All。如果您选择的是 VC Breakout Box,并且指定的型号不在列表中,请选择 Other。 7. 三栏选择完成后,在界面下方的 Add to My Device 和 Apply to CHAT 按钮将会激活。 8. 当您核对这三列中的选项后,单击 Apply to CHAT 按钮,将这些设置应用到 CHAT 150 上。将会弹出一个消息 框,显示该设置已成功应用到您的 CHAT 150。 9.
我的设备 My Devices 可显示出您为使用 CHAT 150 配置的所有设备。这个屏幕让您轻松地在您所列设备的设置之间切换,包括 任何已保存的自定义配置,前提是您已经为您的设备创建了自定义音频设置(参见本章后面的高级设置:数据库部分, 介绍了关于保存自定义设置的详细信息)。 选择您希望与您的 CHAT 150 一起使用的设备,然后单击 Apply to CHAT 按钮,将音频设置应用到您的 CHAT 150。 如果想从 My Devices 列表中删除一个设备,在列表中选中该设备,然后单击 Remove from MyDevices 按钮。 请注意,这仅仅是从 My Devices 列表中删除设备。而不会从设备数据库中删除它(更多的信息请参见本章后面的 高级设置:数据库部分) 优化声音质量 为了获得最佳的音质,您必须为将用到的每台设备和应用程序调整 CHAT 150 的音频设置,下面的内容描述了其调整 过程。 > 注意:在 CHAT 软件中的音量设置与 Windows 音量设置是同步的。使用 CHAT 软件或 CHAT 150 中 的按钮来改变音量,同样也会改变 Windows 中的音量设置。反之
第 4 章:使用 CHAT 应用程序 使用 CHAT 应用程序 1. 如果尚未打开程序,请启动 CHAT 应用程序。 2. 点击 My Devices 按钮,然后选择您想要调整的设备(如果您的设备∕应用程序不在列表中,请选择 Other 或者 All 选项),然后单击 Apply to CHAT 按钮。 3. 对于外部硬件设备,使用第 2 章:入门中介绍的相应连接图,将这个外部设备连接到 CHAT 150。 4. 在外部设备上调节扬声器和并将音量设置为 50%(音量的一半)。 5.
更新固件和数据库 在 Update Firmware 屏幕上显示的是当前的固件版本,设备名称,并且检查 ClearOne 公司网站上是否有固件和设备 数据库的更新。使用 Check for updates 按钮,可以让您自动更新到最新的固件文件和设备数据库,或者您可以使用 Select File 按钮来手动加载现有的固件文件。 > 注意 CHAT 150 所连接到的电脑,必须能够连接到互联网才能使用 Check for updates 选项。 检查固件更新 更新固件和设备数据库,请执行下列步骤: 18 1. 启动 CHAT 150 软件,见本手册前面相关内容。 2. 单击位于窗口的左侧的 Update Firmware 按钮。 3. 单击 Check for updates 按钮,检查该网站的可用更新。 4. 在进度条上会显示以下一系列信息: • “Locating website...
> 注意:如果没有新的固件或设备数据库更新可用时,在进度条上将出现以下信息: “Your device contains the most recent firmware” “Your database contains the most recent updates” 这表明您的固件和数据库是最新的。不需要更新。 5.
当你点击任一更新按钮,都将会弹出一个 Update 对话框。 6. 单击 Yes 将继续固件或设备数据库的更新,或 No 取消更新。 7. 出现第二个 Update 对话框。单击 Yes 继续,或 No 取消。 8. 一系列的信息会显示在进度条的下方,表明更新正在进行中。 警告:当更新正在进行时,不要拔掉 CHAT 150 电源。 9. 当更新完成后会出现下面的进度条下面的消息: • “Update Successful! The firmware for CHAT has been changed to ”, 其中显示的时新固件版本号。 • “Update Successful! The database has been updated to ” ,其中 是新固件版本号。 10.
手动更新 > 注意: 这个程序是为高级用户、技术支持,以及存在 IT 安全规定而禁止自动更新的企业环境所准 备。加载了不正确的固件文件可能会导致无法预测的结果。在大多数情况下,您应该按 Check for updates 按钮,使其自动更新程序。 如要手动更改固件版本或将数据库程序包加载到您的 CHAT 150 上,请使用以下过程: 1. 在 Update Firmware 屏幕上按 Select File 按钮。显示 Open 对话框。 2. 从 List files of type 下拉菜单中,选择 Firmware 或 Database package 下载。 3. 在系统上所有可用的适合 CHAT 的文件列表显示在左侧滚动列表框中。选择要上传的文件,然后按下 OK 按钮。 选择 Cancel 按钮取消更新,并返回到前一个画面。如果更新文件是直接从网站下载的,使用该窗口中心偏右的文 件夹列表,导航至保存下载文件的文件夹。 4. 找到并选中该文件后,点击 Update 进行更新。 5. 弹出警告对话框后,单击 Yes 手动加载所选的固件文件,或选择 No 取消加载。 6.
帮助 Help 按钮提供了以下选项: • 单击 Help,启动联机帮助文件。 • 单击 Abo ut,可获得您的 CHAT 150 软件和固件的版本号等信息。 • 单击 ClearOne Homepage,将使用默认的 Web 浏览器访问 ClearOne 公司网站首页。 • 单击 Registration,使用默认的 Web 浏览器在 ClearOne 公司注册您的 CHAT 150。 高级设置 Advanced 显示您的 CHAT 150 的当前音频设置。 在 Advanced 屏幕中,可以为您的 CHAT 150 调整音频设置,将您的设置保存为自定义设备,查看和编辑 CHAT 150 设备数据库,并且查看 CHAT 150 的日志文件。本节将介绍如何使用这些功能。 22 技术支持:800 283 5936
高级设置:音频设置 Audio Settings 显示当前音频设置,用户可以对当前连接在 PC 上的 CHAT 150 设备音频进行更改。您也可以自定义音 频设置(更多内容,请参见本章后面内容高级设置:数据库)。 音频设置如下所示: • USB Audio:当 CHAT 150 通过 USB 连接到计算机上时,可以通过该功能控制设备的音频设置。Mute 按钮,可 以使 CHAT 150 上的麦克风或扬声器静音。使用滑块来调节麦克风和扬声器音量等级。CHAT 软件中的麦克风和扬 声器音量等级调节,自动反映在 Windows 麦克风和扬声器音量的变化上。 • Line Audio:在 CHAT 150 通过 I/O 插口连接到诸如手提电话及电话会议设备上时,该功能控制 CHAT 150 的音频 设置。仅当 USB 连接模式及变灰显示时,该功能不可用。输入滑块用来调节输入到扬声器的音频音量等级,而输 出滑块则是调节电话接收方的输出音频音量等级。 • Speaker:该设置仅在 VC 连接盒连接时可用。以下选项可用: • Normal:USB 音频和来自 VC 连接盒的线路音频通过 CHAT 150 扬声
高级设置:数据库 Database 显示 CHAT 150 配置的设备,方便用户编辑。CHAT 150 设备数据库包括 ClearOne 预制设备的所有音频设置 (通过每个设备旁的 图标表示),以及用户建立并以备后用的所有自定义音频设置。 该 图标表示,该设备在 My Devices 列表中,并且可以编辑。 要查看设备的设置,可以选择该设备,再单击 View 按钮,或者双击设备名称。弹出 View Database Record 对话框。 24 技术支持:800 283 5936
单击 Ok,关闭 View Database Record 对话框。 要创建自定义音频设置,操作如下: 1. 单击上述主高级界面上的 New 按钮。弹出 Add Settings to Database 对话框,该数据库视图中显示用户先前选 择的设备设置。 2. 调整音频设置,或单击 Upload from CHAT,上传并显示 CHAT 150 的当前设置。 3. 单击 Select 1st 下拉菜单框,选择期望的设备类型。或者,也可以输入一个自定义名称(如需)。 4. 单击 Select 2nd 下拉菜单框,选择期望的生产厂商(或输入用户自定义名称)。 5. 在 Select 3rd 栏中输入新设备型号的名称。输入第一个字符后,立即弹出 Ok 按钮。 6. 如果您不希望添加该设备到 My Devices 列表中,取消选择 Include in My Devices 复选框。默认添加新设备到现 有列表中。 7. 完成所有选择后,单击 Ok,保存自定义音频设置。 8.
编辑自定义音频设置 1. 要编辑自定义设备,选择您希望编辑的自定义设备,然后单击 Edit 按钮(在自定义设备的 View 按钮处)。弹出 Edit Database Record 对话框。 2. 调整音频设置,或单击 Upload from CHAT,上传并显示 CHAT 150 的当前设置。 3. 完成编辑后,单击 Ok。 4. 单击 Yes 保存带有新音频设置的设备,或单击 No,返回 Edit Database Record 对话框。取消改动, 单击 Cancel。 5.
第 5 章:维护 保护您的 CHAT 150 • 遵守本手册中的所有警告和指示。 • 清洁前,拔去 CHAT 150 的所有电缆。 • 清洁前,从墙上插座拔去电源(仅电话和 VC)。 • 请勿使用液体清洁剂或喷雾清洁剂。将抹布湿润用来清洁 CHAT 150 及其电源外部。 故障排除 如果您的 CHAT 150 音频出现问题,可能是您没有优化(调整)您连接的硬件设备。如果您还没有优化该设备,参见 第 3 章优化声音质量。 如果仍然有问题,采用以下步骤,排除 CHAT 150 的故障: 1. 启动 CHAT 150 软件,校验连接在 CHAT 150 上的硬件设备的音频设置。如果仍然不能解决问题,那么进一步检查 您的硬件设备(参见硬件设备的使用手册,或者联系技术支持)。 2. 保证所有电缆都已正确、安全连接。校验硬件设备的电缆连接按照示意图正确连接(更多信息,参见第 2 章: 入门)。 3. 如果 CHAT 150 通过 USB 集线器连接,保证 USB 集线器连接在外接电源上。 4.
固件更新中断恢复 如果固件软件中断(例如停电或偶然电缆断开),CHAT 150 可能会不稳定。CHAT 150 软件就会启用一般模式,显示 General Mode 界面。 要更新固件,请阅读和遵守界面上的指示,然后单击 Update Firmware 按钮(更多内容,参见 第 4 章:使用 CHAT 应用的更新固件&数据库)。在固件更新过程中,进程条上会显示“Initializing”和“Recovering”信息,然后再显示典 型更新信息,直到更新结束为止。 如果 CHAT 150 试图在一般(DFU)模式中启动,从而从程序设计错误中恢复,将会显示一系列指示窗口。请遵照屏幕 上指示解决问题。 28 技术支持:800 283 5936
第 6 章:附录 规格 系统要求 Windows XP Windows Vista Windows 7 连接 USB: 兼容 2.0 版本 类型: Mini-B 母转接 合规 RoHS REACH FCC 法规 A 级第 15 部分(FCC Class A Part 15) ICES-003 CE 列明标准(CE Listed) UL 列明标准(UL Listed) 转接接头: 转接:RJ-45(8 芯) 型号 通过 VC 连接盒(BoB)的线性输入 频率响应:20 Hz - 20 kHz +/- 1 dB 最大输入电平:+6 dBu 输入阻抗:10 kΩ 910-156-200-00 CHATAttach 150 • 双台(2)CHAT 150 设备,及连接线和电源 通过 VC 连接盒(BoB)的线性输出 频率响应:20 Hz - 20 kHz +/- 1 dB 最大输出电平:+6 dBu 输出阻抗:50 Ω 控制 音量升高 音量降低 麦克风静音 音频 扬声器 带宽: 190 Hz - 20 kHz 85 dB SPL @ 1 英尺(0.30 米) 麦克风 带宽:50Hz – 7.
欧盟符合性 更多关于欧盟符合性的最新详细信息,请参见 ClearOne 网址: http://www.clearone.com/resources#uc_voice FCC PART 15 及 ICES-003 符合性 本设备经测试,符合美国 FCC 技术法规第 15 部分(FCC Part 15)及加拿大工业部(IC)的干扰成因设备标准 #3 (ICES-003)关于 B 级数字设备的规定。这些限制标准为确保此设备在居住地区使用时,防止产生有害干扰。本设备 产生、使用并能够发射无线电频率。如未按使用说明书进行安装和使用,可能会对无线电通讯造成有害干扰。然而, 无法保证采用何种安装模式可以完全避免干扰。如果该设备对无线电或电视接收造成有害干扰,导致必须开启或关闭 该设备,用户可以尝试以下几种方法避免干扰: • 调整接收天线。 • 将此设备远离其他信号接收设备。 • 将该设备与其他信号接收设备分置在不同电源上。 • 与供应商取得联系,或向资深广播电视技术人员咨询 。 FCC PART 15.