MAX™ IP Response Point™ Administrator’s Guide
TECHNICAL SUPPORT Telephone Fax Email Web 1.800.283.5936 1.801.974.3760 1.801.977.0087 tech.support@clearone.com www.clearone.com document title CLEARONE PART NOs. 800-158-380-00 (REVISION 1.0 October 2008) © 2008 ClearOne. All rights reserved. No part of this document may be reproduced in any form or by any means without written permission from ClearOne. ClearOne reserves specific privileges. Information in this document is subject to change without notice.
Chapter 1: Product Overview 1 Appendix : B - Tools and Resources 24 PRODUCT OVERVIEW SERVICE AND SUPPORT Important safety information Unpack System Requirements Microsoft Response Point Software Download 1 1 2 3 3 3 Assessment checklist Deployment checklist 24 26 Appendix : C - Compliance 28 Chapter 2: Installation 4 Connecting your conference phone Connecting Additional MAX IP Response Point Phones Manually assigning an IP address Manually provisioning your MAX IP Response Point ph
Chapter 1: Product Overview PRODUCT OVERVIEW Thank you for purchasing the ClearOne MAX™ IP Response Point™ expandable conferencing phone. MAX IP Response Point provides premium, full-duplex audio to small conference rooms as a single unit and to larger rooms as an expanded system. Up to four MAX IP Response Point units can be linked, expanding not only microphone coverage but loudspeaker coverage and control access as well.
Important safety information Read all safety information before using this product. • Read and understand all instructions. • Follow all warnings and instructions marked on the product. • Unplug this product from the wall outlet before cleaning. Use a damp cloth for cleaning. Do not use liquid cleaners or aerosol cleaners. • Do not use this product near water, including bathtubs, sinks, or near a swimming pool. • Do not place this product on an unstable cart, stand, or table.
Unpack Place the conferencing pod and base unit on a level surface. Ensure you have received all items shown in figure 1. Use the pack-out diagrams below to verify that you received all components for your MAX product. Note: Inspect your shipment carefully for obvious signs of damage. ClearOne is not responsible for product damage incurred during shipment. You must make claims directly with the carrier.
Chapter 2: Installation Connecting your conference phone Connect the Connection cable from the Link Out jack on the base unit to the Link In jack on the conferencing pod (see figure 2.1). Figure 2.1 Connecting the MAX IP Response Point Warning: DO NOT plug a laptop or PC into the Link Out jack on the base unit or conferencing pod as severe electrical damage could occur. Connect the base unit to the Ethernet jack using the Ethernet cable.
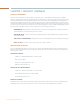
Chapter 3: Configuration of the MAX IP Response Point Phone Manually assigning an IP address If DHCP is disabled or you wish to assign a static IP address, perform the following steps: 1. Press and hold the REDIAL/PROG key until the program icon appears on the LCD screen. Note: If a key is not pressed within 30 seconds of entering program mode, the MAX IP Response Point phone will beep and return to normal operation mode. 2. Press the 2 key. The default IP address is displayed on the LCD screen.
3. Make note of the IP address and press the CLEAR key. The phone will exit Program mode. 4. Start Internet Explorer. Note: Only Internet Explorer, release 6.0 or later with Java 1.5 or later installed, is supported by the MAX IP Response Point phone. 5. Enter the phone’s IP address into the Internet Explorer address field and press the ENTER key on your computer’s keyboard. (You can also enter the DNS name or the phone’s name on the network in order to get to the web interface login screen.) 6.
Configuration: User Preferences screen Use the Configuration: User Preferences (see figure 3.3) screen to enable/disable automatic level control (ALC) and automatic gain control (AGC), to mute/unmute the incoming ringer, to select the incoming ringer melody, to set the time zone, and to determine if you want the time automatically adjusted for Daylight Savings. Figure 3.
Configuration: Trace/Logging Settings screen Use the Configuration: Trace/Logging Settings screen (see figure 3.4) to control logging for general audio processing and SIP subsystems, as well as system logs and trace flags. Figure 3.4 Configuration: Trace/Logging Settings screen Note: This screen is only used to diagnose problems you might be experiencing on your MAX IP Response Point phone.
Tools: Diagnostics - VoIP Statistics screen Use the Tools: Diagnostics - VoIP Statistics screen (see figure 3.6) to check the phone state, update firmware, reboot the phone, and restore default settings. Figure 3.5 View Log: Device Log File screen • Check Phone State: Click this button to view VoIP statistics, including the number of packets received, the number of packets lost, and the percent packet loss. These statistics are displayed in real time and are only available when the phone is in a call.
Chapter 4: User Options PROGRAMMING OPTIONS To allow for individual preferences and enhance ease of use, the following features can be programmed: DHCP, host IP, subnet mask, default gateway IP address, ringer melody, VLAN on/off, help line number, and AGC/ALC. You can also restore factory defaults. To Change Dynamic Host Configuration Protocol (DHCP) 1. Press and hold the REDIAL/PROG key until the Program icon appears on the LCD screen (see figure 4.1) Figure 4.
5. Using the number keys, enter the desired subnet mask. 6. Press REDIAL/PROG to save the selection; a confirmation tone will play. Press CLEAR to exit programming mode. 7. The phone will reboot. To Program a Default Gateway IP Address 1. Press and hold REDIAL/PROG until the Program icon will appear on the LCD screen (see figure 4.1). Note: DHCP must be disabled in order to change the subnet mask manually. 2. Press 4 to enter the Default Gateway IP Address menu.
Chapter 5: Response Point Configuration MAX IP Response Point software This section describes how to integrate the MAX IP Response Point into your existing Response Point system. Microsoft Response Point phones and devices have a blue button that allows you to use Response Point features, such as transferring a call using voice activated dialing. To Connect a New Phone or Device: 1. Using an Ethernet cable, connect the phone to the LAN. 2. Connect the phone to a power source with the power cord. 3.
2. In the Tasks pane, under Properties, click Change Date and Time. 3. In the Set Date and Time on Base Unit dialog box, enter the correct values for the date and time settings. 4. Click OK. The base unit will automatically restart. After it restarts, the base unit will display the new date and time. 5. Next, you’ll configure the new device in your Response Point system.
• Click Add Phone. A. Ensure the MAX IP Response Point is powered and connected to the network. B. The MAX IP Response Point will appear in the device list. C. Highlight the device, click Next. D. Select Assign User to Assign or Create a user and click Next. • From the list, choose the user you wish to assign to the phone, highlight and click OK. • To Create a New User: select New User. • Follow the New User wizard. E. Assign your user to “Recieve calls on this phone”. Click Next.
F. Name the phone, click Next. G. Click Finish to complete the process. The MAX IP Response Point is now ready for use with your Response Point phone system.
Chapter 6: Troubleshooting Troubleshooting Use this section to diagnose and resolve the most common issues that may occur with your product. MAX IP Response Point Troubleshooting Caring for your MAX IP Response Point • Follow all warnings and instructions marked on your MAX IP Response Point. • Unplug base unit and conferencing pod from the wall outlet before cleaning. • Do not use liquid or aerosol cleaners.
Response Point Troubleshooting Six Questions to Ask Before Troubleshooting the System Before taking any drastic measures to repair the Response Point phone system, ask yourself the following questions: 1. Did you verify the IP address? Response Point identifies a device by the IP address that is assigned to it. It’s important to locate this information when troubleshooting because it can provide valuable information. 2.
Issue 1: Undetected Devices Problem: “The device that I configured has a red X next to its name in the discovered-devices list.” Cause: IP addresses are leased to each device for an allotted period of time. Using Dynamic Host Configuration Protocol (DHCP) service enables the phone system to automatically reconnect when IP addresses change. Occasionally, a device might lose its IP address because this connection process is interrupted or delayed.
upper-right corner of the page . Then select Factory Restore, and click the Restore button. Issue 4: Faulty Connection to Phone Lines Problem: “There’s no dial tone.” Cause: If you’ve eliminated the possibility that your phone service is down, the phone line might have lost connection to the base unit. The LEDs on the base unit should remain constantly lit when the associated phone line is properly configured. When the connection is faulty, the corresponding LED may flutter or sporadically flash on and off.
Cause: If you’ve verified that the hardware, Public Switched Telephone Network (PSTN) lines, and service connections are working, dropped calls might be caused by a faulty phone line in your rollover sequence. In these cases, the base unit does not actually drop the call, but rather the call terminates automatically when passed to the malfunctioning phone line. Solution: Ask your phone service provider to fix the faulty line or to position it at the end of your rollover pattern.
Customer Service and Support ClearOne is committed to providing best-in-class customer service and support. If you need assistance installing, configuring, or operating your MAX IP Response Point conference phone, or if you have questions about ClearOne products or services, please contact us at one of the locations listed below. ClearOne also welcomes your comments and suggestions so we can continue to improve our products and serve our customers’ needs.
Appendix : A - Specifications DIMENSIONS (W x D x H) Phone section: 10.5” x 10.5” x 3” (26.7 cm x 26.7 cm x 7.6 cm) Base unit: 4.25” x 5.5” x 2.5” (10.8 cm x 14 cm x 6.4 cm) WEIGHT Phone section: 2.7 lb (1.2 kg) Base unit: .6 lb (0.27 kg) Shipping: 10 lb (4.
Appendix : B - Tools and Resources Assessment checklist The Assessment Checklist is provided to help you with Response Point planning.
Router details Switch types Switch connectivity Open switch ports Logical Network Subnets DHCP Types SMTP server information Data Security Firewall type Firewall VoIP support Infrastructure Ethernet traffic testing Network cable testing Patch cable type Sufficient network jacks Sufficient power outlets Active network drops Data Center power capacity Data Center UPS capacity Provider Information PSTN or VoIP Number of PSTN lines 25 Technical Services: 800-283-5936 - BETA
PSTN features PSTN provider details VoIP provider details Internet/WAN connectivity Deployment checklist Use this Checklist to prepare for a Response Point deployment. It will ensure that all necessary planning tasks are preformed and all necessary information has been recorded.
SMTP server port Provider Information Lines provisioned for Response Point Dedicated lines provisioned Features enabled on all lines VoIP telephony bandwidth sufficient VoIP IAD sufficient Firewall and router support VoIP Infrastructure Data center power capacity Data center UPS capacity Administration Administrators identified Administration password defined Response Point base unit IP address Response Point Administrator software installed Administrator training 27 Technical Services: 800-283-5936 - BET
Appendix : C - Compliance EUROPEAN COMPLIANCE Conformity of the equipment with the guidelines below is attested by the CE mark. EC Declaration of Conformity Manufacturer’s Name: ClearOne Communications Manufacturer’s Address: Edgewater Corporate Park South Tower 5225 Wiley Post Way, Suite 500 Salt Lake City, Utah 84116 U.S.A. EU Representative Name: ClearOne Communications Ltd.
IEC 60950-1: 2001 Safety of Information Technology Equipment, Including Electrical Business Equipment. RoHS - 2002/95/EC Restrication of the Use of certain Hazardous Substances in Electrical and Electronic Equipment (EEE) & WEEE - 2002/96/EC Waste of Electrical and Electronic Equipment (EEE). We herein certify that the products listed above are in compliance with the EU directive 2002/95/EC and EU directive 2002/96/EC.