
Operation Manual

36
Select ButtonF. : Displays the Converge Pro LCD programming menu and selects the highlighted option.
LED Bar MeterG. : Displays the audio level of a selected input, output, processing, or fader channel. Default
meters: 880-Output 12, 880T-Output 12 , 840T-Output 8, 8i-Mic 1, TH20-Telco Tx, VH20-VoIP Tx, SR1212-
Output 12.
AMP Fault Indicator• LEDs(880TA, SR 1212A): Indicates amplifier faults:
1-4 indicates clip »
5 indicates thermal overload »
6 indicates fault »
7 indicates fan on/off »
Telco/VoIP Tx Rx Indicators (840T, TH20, VH20)• : Indicates transmit and receive activity during
Telco/VoIP calls.
Amplifier On/Off SwitchH. (880TA, SR 1212A): Turns power to the amplifiers on or off.
NOTE (880TA, SR 1212A): This does NOT disconnect power from the AC mains. To disconnect unit power
from the mains, disconnect the unit’s power cord from the mains socket. To reconnect power, plug the
unit’s power cord into the mains socket following all safety instructions and guidelines.
Telco On/Off Button & LEDsI. : This button connects/disconnects the communications line attached to the
device while the LEDs indicate the connection status of the attached line (840T, TH20, VH20 (VoIP only),
880T, 880TA ).
In addition to making configuration adjustments from the front panel, you can also run macros and execute presets.
For more information on using front panel controls, see Controls and Connections.
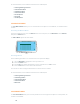
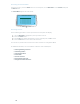
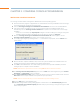
Adjusting LCD Menu Parameters
Use the following procedure to adjust LCD Menu parameters:
Press the 1. Select button to access the Converge Menu.
Scroll to the parameter you want to adjust using the 2. Menu Dial.
Press the 3. Select button to select the parameter. The parameter will stop flashing when selected.
Select the value for the parameter using the 4. Menu Dial.
Press the 5. Select button to save the parameter value. To discard the change and return to the previous menu,
press the Esc button.
NOTE: Use the Console software in Configuration Mode for advanced configuration tasks.