
Specifications


5. Collector Installation
5.1. Collector Mounting
Apricus solar collectors are come with a standard frame, which is suitable for flush
mounting in cases where the roof is suitably pitched. See Appendices 1-3 for frame
diagrams. For installation on low-pitched roofs, flat roofs or for wall mounts, an
additional adjustable frame kit is available. Depending on the roofing material, the
standard frame may be attached to the roof with flashed bracketing solutions
(corrugated steel, asphalt), roof attachment straps (tiled roof) or round feet (asphalt).
An adjustable frame kit designed and provided by Apricus is capable of turning the
standard frame into a rack, in order to position the manifold and tubes at the ideal
azimuth and tilt for almost any location.
5.1.1. Frame Material
a) All frame components are made of 439 or 304 grade stainless steel making
the frame both strong and corrosion resistant*. It is important that frame
attachment points and externally supplied fasteners are also of suitable
structural strength and corrosion resistance.
* The level of corrosion resistance will depend on environmental conditions.
5.1.2. Galvanic Reaction between SS and Zinc Galvanized Steel
a) Galvanized Steel: Zinc galvanized steel roofing or Uni-strut must NOT
directly contact stainless steel as galvanic reaction between the two metals can
cause premature oxidation of the zinc coating and the metal underneath.
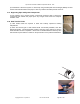
Apricus offers rubber pads which are perfect for separating the metals. (see image to right)
b) Fasteners: Use stainless steel fasteners, if possible. If using galvanized steel bolts, separate dissimilar
metals using a nylon, high density EPDM or Silicone rubber washer.
5.1.3. Roof Installation
Four types of roof installations are outlined in this manual:
1. Flush installation on a suitable pitch roof. See section 5.2
2. Installing on a roof with insufficient pitch. See section 5.3
3. Installing on a flat surface. See section 5.4
4. Installing on a wall. See section 5.5
5.1.4. Manifold and Bottom Track Attachment
a) Attachment Plates: The Manifold and Bottom Track are secured to the standard frame channels using
special attachment plates (see diagrams right). These plates are attached to the frame channels before they
leave the factory They only need to be LOOSENED in order to allow enough movement to fit the Manifold
and Bottom Track in place. The plates are designed so that while somewhat loose, they enable the
Manifold and Bottom Track to slide left and right for positioning and allow the standard frame channels to be
easily adjusted side to side to suit the roof framing layout.
b) Tightening Nuts: Once correctly located, the nuts should be hand tightened ONLY using the supplied
wrench, locking the Manifold and Bottom Track in place. DO NOT use a power tool or longer hand tool to
tighten the nuts as stainless steel is prone to galling (cold welding), if excessive friction or over-torquing
occurs. In other words, the nuts can lock to the shaft before they are completely seated, if they are over-
tightened. It is also a good idea to use some lubricant on the threads, such as WD-40 which will help to
prevent issues.
Split washers are supplied to ensure the stainless steel bolts do not loosen over time. In areas with high
temperature swings from winter to summer, it may also be worth using thread lock glue.
c) Upside-down Bolts: NOTE: Some bolts are upside-down with the nut on top. This so you can see the
threads and helps prevent you from loosening the bolt so much that the nut drops off. The bolt head is
prevented from rotating by use of nut locks (the rectangular C channel washers), removing the need to use
Apricus Solar Collector Installation & Operation Manual - USA
Copyright © 2011 – Apricus Inc Doc: A7-05.4.12-PB Page 34 of 129