
Specifications


5.7.3. Post Installation Cleaning
Clean each evacuated tube with a fluid glass cleaner and cloth then dry clean with newspaper.
5.7.4. Take Photographs
a) Always take several digital photographs of the solar collector on the roof. These serve as an important
record, if there is ever an issue with the installation.
b) Send copies of ALL installation photos to Apricus at office-usa@apricus.com so we can add to the library
of installations photos. Your installation may be eligible for creation of a case study, promoting your
company, and even awards and prizes that Apricus offers to top installers from time to time.
c) Complete an installation record form in triplicate. Leave the original with the owner, retain a copy for your
own records and fax or mail a 3rd copy to Apricus office in USA. The home owner should also be
encouraged to complete an installation record online at www.apricus.com
5.8 Post Installation
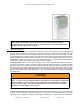
5.8.1. Collector Operation
a) Once all the tubes are installed and the sun is shining, the solar collector will begin to produce heat after
a 5-10 minute warm up period. Check the controller and pump for correct operation and adjust settings as
required. Make sure that you have set the controller in a suitable mode for normal automatic operation.
5.8.2. Clean Up
a) Once the system is confirmed as operating correctly, ensure the installation site is cleaned of all garbage.
Presentation is extremely important!
Apricus Solar Collector Installation & Operation Manual - USA
Copyright © 2011 – Apricus Inc Doc: A7-05.4.12-PB Page 43 of 129