
Specifications


27
THE SMART SOLUTION FOR ENERGY EFFICIENCY
DOAS CM3500 Controller
Rev.:31 July, 2013
climatemaster.com
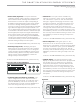
Figure 62: Heat Control and Stages
Figure 63:
• Heat Control (Figure 62) - This option allows the
modulating heating output to function in either the SCR-
Direct or Reverse mode. Selecting Direct will deliver a
direct minimum to maximum output corresponding to
0-10 VDC for heating applications which require 10 VDC
for maximum heating. Selecting Reverse will deliver a
minimum to maximum output corresponding to 10-0 VDC
signal. Note that digital input # 9 (Input Point ID9 – Sec
2.2.1.2.1 Digital Inputs) will act as a freeze protection input
in the Reverse mode. When Reverse is selected and input
#9 is energized, the output of the signal will be 0 VDC to
force maximum heating until input #9 is de-energized.
To change the heat control setting, press the ENTER key
until the cursor selects this setting. Use the arrow keys
until the desired setting is shown. Press the ENTER key to
select this setting and step to the next option.
To return to the UNIT REVISION screen, press the Esc key.
• Heat Stages (Figure 62) - Modifying this option
determines how many heat stages are to be controlled.
The operator has the choice of 1, 2 or 3. To change the
number of heaters, press the ENTER key until the cursor
selects this setting. Use the arrow keys until the desired
setting is shown. Press the ENTER key to select this
setting and step to the next option.
To return to the UNIT REVISION screen, press the Esc key.
• Control by (SAT, Zone Reset or OA Reset) - This
option configures the unit for SAT, Zone Reset or
OA Reset (Outside Air Reset). To modify this option,
press the ENTER key and use the arrow keys until
the desired setting is shown. Press the ENTER key to
select this setting and step to the next option.
To return to the UNIT REVISION screen, press the Esc key.
• Select Zone - This option will be available only
when the “Control by” option is set to Zone Reset.
The “Select Zone” option can then be selected for
Average or High/Low. Averaging the sensors simply
averages the readings. The High/Low selection uses
the extreme sensor in the group to control the unit.
The highest sensor would control the SAT in the
cooling mode and the lowest sensor would control the
SAT in the heating mode. To modify this option, press
the ENTER key until the cursor shows Select Zone. Use
the arrow keys until the desired setting is shown. Press
the ENTER key to select this setting and step to the
next option.
To return to the UNIT REVISION screen, press the Esc key.
• UnOcc Temp Cntrl - Setting this option to “On”
allows the unit to use the Unoccupied Temperature
Setpoints as a night setback control for the Zone Reset
of the SAT. To select this option, press the ENTER key
until the cursor selects UnOcc temp Cntrl. Use the
arrow keys until the desired setting is shown. Press the
ENTER key to select this setting and step to the next
option.
To return to the UNIT REVISION screen, press the Esc key.
• pAD Sm Display - This setting allows the smaller
display on the pAD remote zone sensor equipped with
the humidity sensor, to display the Time, Setpoint,
Temperature, RH Setpoint or the RH. Note that the
IAQ system does not use the RH Setpoint from the
pAD sensor at this time. To change this display, press
the ENTER key until the cursor selects this setting. Use
the arrow keys until the desired setting is shown. Press
the ENTER key to select this setting and step to the
next option.
To return to the UNIT REVISION screen, press the Esc key.