
User manual


Chapter 2
10
Configuring the Network
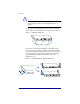
Now that youÕve made the network and power connections,
youÕre ready to conÞgure the network settings.
The NASRaQ requires speciÞc network information to
properly function. The information can be entered
automatically or manually.
Depending on the network environment, the NASRaQ may
be able to obtain the necessary information from a DHCP
server on your network. If so, it will attempt an automatic
conÞguration. If not, you need to enter the necessary
information manually, using the LCD console on the front
panel. See ÒUsing the LCD Console to ConÞgure the
NetworkÓ on page 11 for more information.
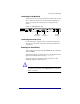
Automatic Configuration using a DHCP Server
When the NASRaQ is powered on, it checks to see whether a
DHCP server is present on the network. If thereÕs a
functioning DHCP server thatÕs set up to serve leased IP
addresses, the NASRaQ conÞgures itself automatically.
If the network information can be conÞgured automatically,
the LCD displays the NASRaQÕs assigned IP Address upon
completion of the boot process.
IMPORTANT: To function properly over long periods of time, the
NASRaQ’s IP address must remain the same, i.e., the DHCP
server must not assign it to a different machine at a later date.
Unfortunately, some DHCP servers do not honor requests for
permanent IP addresses. As a result, the system or network
administrator may need to assign a different (and permanent)
IP address to the NASRaQ. If so, change the network
configuration information. You should coordinate any changes
to the IP address, subnet mask, or gateway address with your
network administrator.