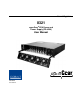
Cobalt Digital Inc. 8321 openGear® 2RU Frame and Power Supply (PS-8300) User Manual 8321-OM Version: 1.
OpenGear® 2RU Frame and Power Supply (PS-8300) User Manual • • • • • Cobalt Digital Inc. Part Number: 8321-OM Document Version: 1.1 Printed in the United States. Last Author: CGG Printing Date: 5/3/2012 The information contained in this Owner’s Manual is subject to change without notice or obligation. Copyright © 2012 Cobalt Digital Inc. All rights reserved. Contents of this publication may not be reproduced in any form without the written permission of Cobalt Digital Inc.
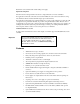
Important Regulatory and Safety Notices Before using this product and any associated equipment, refer to the “Important Safety Instructions” listed below so as to avoid personal injury and to prevent product damage. Products may require specific equipment, and /or installation procedures be carried out to satisfy certain regulatory compliance requirements. Notices have been included in this publication to call attention to these Specific requirements.
Important Safety Instructions Warning Warning Warning Read these instructions. Keep these instructions. Heed all warnings. Follow all instructions. The safe operation of this product requires that a protective earth connection be provided. A grounding conductor in the equipment's supply cord provides this protective earth. To reduce the risk of electrical shock to the operator and service personnel, this ground conductor must be connected to an earthed ground.
Product Power Cord Requirements Warning Warning North American Line Voltages 100 - 120 Volts This product is supplied with certified 10A/125V SVT type supply cords. Conductors are color coded white (neutral), black (line) and green or green/yellow (ground).
Maintenance/User Serviceable Parts Routine maintenance to this Cobalt Digital Inc. product is not required. This product contains no user serviceable parts. If the frame does not appear to be working properly, please contact Technical Support using the numbers listed under the “Contact Us” section on the last page of this manual. All Cobalt Digital Inc. products are covered by a generous 5-year warranty and will be repaired without charge for materials or labor within this period.
Contents Introduction 9 In This Chapter .......................................................................................................................... 9 A Word of Thanks ....................................................................................................... 9 Overview ..................................................................................................................... 9 Features ....................................................................................
Specifications 34 Service Information 35 In This Chapter ........................................................................................................................35 Troubleshooting Checklist.........................................................................................35 Frame Controller Alarm Mute/Bootload Button........................................................35 Warranty and Repair Policy...................................................................................
Introduction In This Chapter This chapter contains the following sections: • A Word of Thanks • Overview • Features • Documentation Terms A Word of Thanks Congratulations on choosing the openGear® 2RU Frame and Power Supply (PS-8300). The Cobalt Digital Inc. openGear® line includes video decoders and encoders, audio embedders and deembedders, distribution amplifiers, format converters, and much more. Cobalt Digital Inc.
Each frame comes standard with one PS-8300 power supply. Optional Cooling Fans The frame has been designed with an advanced cooling architecture to increase ventilation. For applications where the total card load is less than 40 Watt, the 8321 can be used without cooling fans. Frames should be mounted with 1RU empty space between frames.
Documentation Terms The following terms are used throughout this guide: 8321 User Manual • (V 1.1) • “Frame” refers to the frames that house the 8200 series cards. • All references to 8321 also include the 8321-C version with the cooling fan option. Refer to the section “Cooling Features” for details. • “Operator” and “User” both refer to the person who uses the frame.
Installation and Setup In This Chapter This chapter contains the following sections: • Static Discharge • Unpacking • Installing the Frame • Power Supply PS-8300 and Power Cable • Fault Reporting • Improving Performance • Ventilation and Cooling • Cable Connections • Rear I/O Modules Static Discharge Whenever handling the frame and other related equipment, please observe all static discharge precautions as described in the following note: ESD Susceptibility Static discharge can cause se
Installing the Frame The frame frame mounts in the rack frame by means of four rack screws fastened through the front mounting flanges. This should normally be sufficient to carry the load, including the weight of accompanying cables. However, in certain applications such as mobile truck installations, it may be desirable to also support the rear of the frame. The optional FSB-8321 Rear Support Bars and Brackets are specifically engineered to compensate for extra load stress.
Note In case of a power supply failure, contact your openGear® dealer. The PS-8300 is a power factor corrected supply, capable of working with all world AC standards (100-240V). The supply has an indicator LED on the front, and an error detection circuit that will indicate the conditions described in Table 1. Table 1. Status LED Descriptions LED Color Display and Description Fault Red When lit, an alarm condition is occurring on a card.
Improving Performance To improve performance and reliability, the PS-8300 has an on-board fan. Under high load conditions (>40 Watt), the optional CFM-8321 Cooling Fan Module must be added for increased ventilation. Ventilation and Cooling This frame has been specially engineered to minimize internal heat buildup and thus improve card reliability.
Cable Connections Power Supply Inputs SMPTE Alarm BNC Reference Connectors RossBUS Connector Ethernet Connector Figure 2. Frame Cable Connectors Power Cable Connection Use the following procedure to connect the power cable: 1. Connect the supplied power cable’s three prong male connector to an AC outlet. 2. Connect the cable’s female IEC connector to the frame socket marked PSU 1. 3.
Note: Refer to card product manuals or catalog/web pages for rear modules available for the cards being installed. Figure 4. BNC/Twisted-Pair Rear I/O Module 8321 User Manual • (V 1.1) Figure 5. 10 BNC Rear I/O Module Figure 6.
Rear I/O Module Installation If you received a custom rear I/O module for your openGear® card, you will need to install the I/O module in your frame before you can connect cables. Use the following procedure to install rear modules in the frame: 1. Ensure that the frame is properly installed according to instructions in the section “Installing the Frame” of this manual. 2. On the rear of the frame, locate the card frame slot. 3.
4. Align the top screw of the DFR-RM-82xx with the screw hole on the top edge of the backplane. 5. Using a Phillips driver and the supplied screw, fasten the DFR-RM-82xx panel to the backplane. Do not over tighten. 6. Ensure proper frame cooling and ventilation by having all rear frame slots covered with rear I/O modules or blank metal plates. If you need blanks, see the chapter, “Ordering Information” and contact your sales representative.
Dual Reference Connectors Two sets of looping BNC inputs are provided to accept two independent reference signals: • Analog black • Tri-level sync • AES/DARS reference This feature distributes one or two reference signals to all cards in the frame. Cards which need an external reference use this master reference signal in place of taking the signal from one of the card BNCs. This provides for ease of installation and reduction in reference cabling requirements.
SMPTE 269M Fault Reporting Option In This Chapter This chapter contains the following sections: • Overview • Frame Connections • Details Overview The SMPTE 269M Fault Reporting system, also known as a SMPTE “alarm,” provides an indication if one or more frame cards encounter a fault or an abnormal condition. This option is available when a Network Controller Card is installed in the Frame Controller Slot. The MFC-8320 is included if the frame has cooling fans in the front door.
Frame Connections The SMPTE 269M Fault Reporting connection on 8321 series frames is provided by the FAULT BNC connector, for interfacing with a customer-designed alarm system. SMPTE Fault BNC Figure 8. SMPTE 269M Alarm Reporting Frame Connections Details The fault report contacts are closed when the card detects an internal failure or a power loss condition. The fault report contacts are closed for about 2 milliseconds every 16 ms to report any error for which SMPTE fault reporting has been enabled.
Important Notes: The power dissipation of each product installed in this frame is indicated in the Specifications section of the documentation provided with each module. For long-term reliability and increased product life, it is recommended that the total dissipation of all modules installed in a 8321 frame should not exceed 40 Watt total without the CFM-8321, and 120 Watt total with the CFM-8321.
Frame Features In This Chapter This chapter contains the following sections: • • Cooling Features o Installing the Cooling Fan Module o Cooling Fan Functions and User Controls o Installing the Controller Card o Functions of the Controller Card o Controls and LEDs of the Controller Card Remote Control Networking Features o Installing the Network Controller Card o Ethernet Setup o Functions of the Network Controller Card o Controls and LEDs of the Network Controller Card • DashBoard and
Cooling Features The standard 8321 frame can be also be ordered as the 8321-C version, with the Cooling Fan Module installed as original equipment from the factory. However, for customers wishing to increase the ventilation on their standard 8321 frames, the optional CFM-8321 Cooling Fan Module is available as a field upgrade kit. The CFM-8321 module consists of a fan board, which installs in the frame door, and a controller card, which installs in a designated frame slot.
11. Tighten the 8 nuts until they just make contact with the rubber grommets on the 8321A-016 Fan PCB. Do not over tighten. 12. Reconnect the door to the frame extender arms with the two screws from step 4. This completes the procedure to install the Fan Board component of the CFM-8321 module. Next you will learn about the CFM-8321 functions and user controls. Cooling Fan Functions and User Controls The CFM-8321 provides LED and Alarm switching controls to the front edge of the 8321 frame door.
the screw. If necessary, remove any cards from the frame that would interfere with easy access and lines of sight. 2. Insert the MFC-8320 frame controller card, with the component side out as shown in Figure 11, into the card guides along the dividing wall between slot 20 and the PS8300 section of the frame, ensuring the card does not touch the Card Retaining Screw. 3.
Alarm LED Status OK LED Alarm Mute/Bootload Button Alarm Config Jumper Comm Activity LED Fan Board Connector Edge Figure 12. MFC-8320 Card Edge Controls MFC-8320 Alarm Configuration Jumper The Alarm Configuration Jumper enables or disables the audio alarm signal. The Alarm LED will still be lit if alarm conditions are occurring, but the audio will be off.
Ethernet Setup Refer to Cobalt® reference guide Remote Control User Guide (PN 9000RCS-RM) for step-by-step instructions for setting up network remote control of COMPASS™ cards using DashBoard™. Download a copy of this guide by clicking on the Support>Documents>Reference Guides link at www.cobaltdigital.com and then select DashBoard Remote Control Setup Guide as a download.
DIP Switches on the MFC-8320-N The following DIP Switches are located on the MFC-8320-N controller card. DIP_1 Switch DIP_1 switch disables the audio alarm signal as follows: • ON — This setting disables the audio alarm. • OFF — This setting enables the audio alarm. DIP_2 to DIP_7 Switches DIP_2 to DIP_7 switches are not used. DIP_8 Switch DIP_8 switch sets the default IP Address of the MFC-8320-N controller card as follows: • ON — This setting enables the card to use the default IP Address of 192.168.
Table 4. MFC-8320-N Controller Card LED Descriptions LED Color Location Alarm Red DS1 Status OK Green DS2 Comm. Activity Yellow DS3 Processor Red DS4 Error Red DS5 Transmitting Green DS6 Receiving Yellow DS7 Fault Red Fan Fail Red Display and Description When lit, an alarm condition is occurring in the frame. When lit, the fan control process is operating correctly. When lit, the card is communicating within the frame.
Enabling SNMP You must obtain a license key from Cobalt Digital Inc. to enable SNMP support. Use the following procedure to obtain your license key: 1. Request a license key from your distributor or at sales@cobaltdigital.com, quoting the 8-character hardware-ID provided on the page. 2. Open the Frame Configuration Page for the frame using DashBoard. OR Point your web browser to the IP address of the frame. 3. Select the tab titled SNMP Configuration.
Rear Support Bars and Brackets Under normal conditions, mounting the frame to the front of the rack with four rack screws should be sufficient to carry the load, including the weight of accompanying cables. The optional FSB-8321 Rear Support Bars and Brackets are specifically engineered to compensate for extra load stress associated with certain applications, such as mobile truck installations, to also support the rear of the frame. Figure 15.
Specifications This section includes the Technical Specifications table for the 8321 series frame. 8321 Series Frame Technical Specifications Category PS-8300 Power Supply Rack Frame Mechanical Frame Card Slots Frame Controller and Fans Comm I/O Controller Reference Inputs Environmental Parameter Specification Input 100-240VAC, 47-63Hz, 190W Output 1 +12V, ± 10%, 0.5A – 12.5A Output 2 -7.5V, ± 10%, 0A - 1.5A Total Sum of both outputs not to exceed 150W maximum Height 2RU 3.5" (8.
Service Information In This Chapter This chapter contains the following sections: • Troubleshooting Checklist • Frame Controller Alarm Mute/Bootload Button • Warranty and Repair Policy Troubleshooting Checklist Routine maintenance to this product is not required. In the event of problems with your frame, the following basic troubleshooting checklist may help identify the source of the problem.
Use the following procedure to reload the software: 1. Eject the card. 2. Press and hold the Alarm Mute/Bootload button, while re-inserting the card into the frame. 3. Release the button. The STATUS OK LED will flash GREEN while the card is waiting for a new software load. If a new software load is not sent to the card within 60 seconds, the card will attempt to restart with it's last operational software load.
Warranty and Repair Policy Cobalt Digital Inc. Limited Warranty This product is warranted to be free from defects in material and workmanship for a period of five (5) years from the date of shipment to the original purchaser, except that 4000, 5000, 6000, 8000 series power supplies, and Dolby® modules (where applicable) are warranted to be free from defects in material and workmanship for a period of one (1) year. Cobalt Digital Inc.
Ordering Information In This Chapter Your openGear® Two Rack Unit Frame and Power Supply (PS-8300) is a part of the openGear® family of products. Standard Equipment • 8321-C Digital Products Frame and Power Supply with Cooling Fans (2RU, holds 20 cards maximum) Optional Equipment Page 38 • PS-8300 openGear® Power Supply, 150W (redundancy option power supply for Cobalt Digital Inc.
Notes: 8321 User Manual • (V 1.
Contact Us Contact Cobalt Digital Inc. PHONE E-MAIL POSTAL SERVICE General Business Office and Technical Support 217.344.1243 Fax 217.344.1245 General Information Info@cobaltdigital.com Sales Information Sales@cobaltdigital.com Cobalt Digital Inc. 2406 East University Avenue Urbana, IL 61802 USA Visit us at the Cobalt Digital Inc. website. http://www.cobaltdigital.