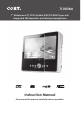
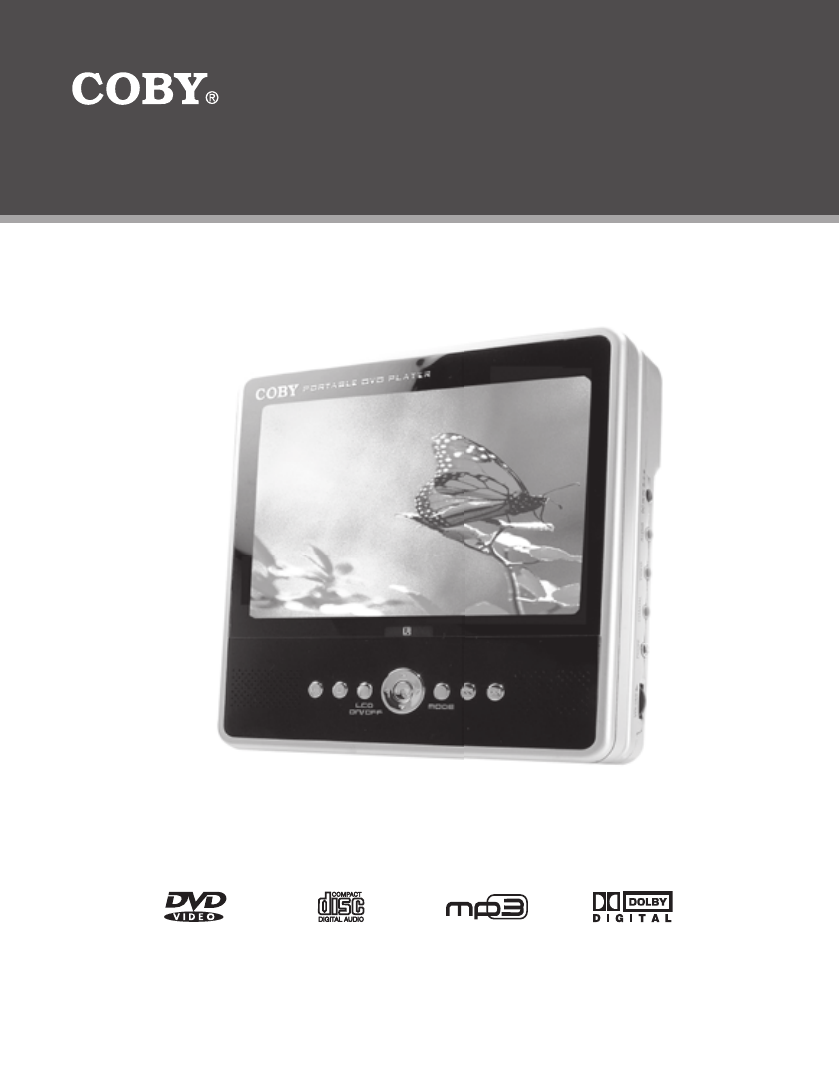
TF-DVD7060 7” Widescreen TFT LCD Portable DVD/CD/MP3 Player with Integrated FM Transmitter and Wireless Headphones Instruction Manual Please read this manual carefully before operation.
PRECAUTIONS CAUTION RISK OF ELECTRIC SHOCK DO NOT OPEN CAUTION: TO REDUCE THE RISK OF FIRE AND ELECTRIC SHOCK, DO NOT REMOVE THE COVER (OR BACK) OF THE UNIT. REFER SERVICING ONLY TO QUALIFIED SERVICE PERSONNEL. For Customer Use: Enter below the serial number that is located on the bottom of the unit. Retain this information for future reference. Model No. TF-DVD7060 Serial No.
SAFETY INSTRUCTIONS 1. Read Instructions: All the safety and operating instructions should be read before the product is operated. 2. Retain Instructions: The safety and operating instructions should be retained for future reference. 3. Heed Warnings: All warnings on the product and in the operating instructions should be adhered to. 4. Follow Instructions: All operating and usage instructions should be followed. 5. Cleaning: Unplug this product from the wall outlet before cleaning.
SAFETY INSTRUCTIONS 15. Outdoor Antenna Grounding: If an outside antenna is connected to the product, be sure the antenna system is grounded so as to provide some protection against voltage surges and built-up static charges.
TABLE OF CONTENTS PRECAUTIONS.................................................................................................................................. 2 SAFETY INSTRUCTIONS.................................................................................................................... 3 TABLE OF CONTENTS....................................................................................................................... 5 ABOUT OPTICAL DISCS......................................................
TABLE OF CONTENTS DVD/DISC FUNCTIONS................................................................................................................. 19 Search.....................................................................................................................................19 DVD Chapter/Title Search..............................................................................................19 DVD Time Search (within a specified title)......................................................
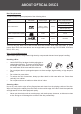
ABOUT OPTICAL DISCS Disc Requirements This DVD player supports playback of the following discs. Type Disc Mark Content Type Disc Size Max.
PACKAGE CONTENTS 1 3 2 Mute Clear Step TF-DVD7060 SCALE 1.000 4 5 6 7 1. TF-DVD7060 4. AV Cable 2. Battery Pack 5. AC Adapter + Cord 3. Remote Control 6. DC Car Adapter 8 7. FM Wireless Stereo Headphones (2) 8.
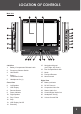
LOCATION OF CONTROLS Main Unit 6 7 9 8 10 Up 1 20 21 2 22 3 23 4 25 5 26 24 ENTER 11 12 13 14 Left View 15 16 17 18 19 15. Navigation Keypad (Left, Right, Up, Down) 1. Battery Compartment Release Latch 2. Frequency Selector Switch 3. Hold Switch 17. Mode 4. Power / Transmitter Switch 19. Next/Forward 5. Headphone Out (1) 16. Disc Compartment Latch 18. Previous/Reverse Right View Front View 20. Battery Indicator 6. Left Speaker 21. DC 9V Power In 7.
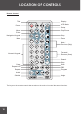
LOCATION OF CONTROLS Remote Control Title Display LCD Mode Power Setup Menu Play/Pause Enter Navigation Keypad Stop Mute Zoom Mute Next / Previous (Skip) Forward / Reverse (Scan) Numeric Keypad Search Clear Clear Repeat A-B Step Step Slow PBC Program Repeat Audio Subtitle Angle TF-DVD7060 The keys on the remote control that are also on the main unit control the same functions.
CONNECTIONS Audio/Video (AV) Output Your player comes equipped with AV output jacks. Use the AV Output connection to output your player’s DVD signal to an external display (e.g., a TV or monitor). • Refer to your TVs instruction manual for more information on setting it to the proper AV mode. • Be sure to turn off and unplug your player and TV before making these connections.
CONNECTIONS Dolby Pro Logic Surround Connection Your player can output 5.1-channel surround sound audio through the Coaxial Digital Audio Out jack. You will need a Dolby Pro Logic Surround amplifier and an coaxial adapter cable to use this feature. Dolby Pro Logic Surround Amplifier To Coaxial Audio Input Coaxial Cable (not supplied) To Coaxial Digital Audio Out Note: Please refer to your receiver’s instruction manual for more information on how to properly set up your surround sound system.
CONNECTIONS Wireless FM Transmitter Connection Your player comes equipped with an integrated wireless FM transmitter. • Use the FM transmitter with the wireless headphones for private listening without wires. • Use the FM transmitter with the car radio for shared listening without wires. To use the FM transmitter: 1. Set the Power / Transmitter Switch to the TRAN position. 2. Set the Frequency Selector switch to a frequency clear of radio broadcasts (88.1, 88.3, 88.5, or 88.7). 3.
GETTING STARTED Remote Control • Refer to the diagram. Remove the battery compartment cover located on the rear of the remote control. Insert batteries, making sure to match their polarities (+/-) to the markings on the inside of the compartment. Replace the cover. • To use the remote, point it at the remote sensor of the player. Operate the remote within 15 feet of the sensor and at an angle of +/- 60 degrees. • Batteries in the remote will last for approximately 1 year.
GETTING STARTED Using the DC (Car) Power Adapter This DC adapter should be used with DC car sockets. • Do not connect the DC power adapter to the battery recharge jack. • The DC power adapter is for in-car use, only. To DC 9V IN To DC Socket in Car Using the Battery Pack (DC) To install the battery pack: 1. Slide the battery compartment release latch in the direction of the arrow to open it. 2. Insert the battery pack and then close the battery compartment lid. SCALE1.
GETTING STARTED Using the Retractable Kick Stand There is a retractable kick stand located on the back of your player. Use the stand for convenient table-top viewing. 1. To open the stand, simply lift the stand up from its groove. 2. Stand the player up using the open stand as a brace. 3. To adjust the viewing angle: SCALE1.000 a. Slide the stand lock switch upwards to unlock the stand. b. Extend the stand to its desired length, then relock the stand with the switch. c. Stand the player up.
BASIC OPERATIONS Basic Disc Playback 1. Prepare the power supply. Set the Power Switch to the ON position to turn the player on. 2. Load a disc. Press the Open button to open the disc compartment lid. Insert a disc with the label-side up. Close the lid by hand (the lid will click into place). • 3. If a single-sided disc is inserted upside-down, the player will display “NO DISC” or “BAD DISC”. Start playback. Make sure the AV Switch is set to AV OUT to use the player’s built-in LCD screen.
BASIC OPERATIONS Menu Navigation To navigate DVD disc menus or the player’s setup menus: • Use the Navigation keys (Up/Down/Left/Right) to select a desired feature or option in the menu. • Press ENTER to confirm a selection in the menu. • • For some menu options, you may be able to use the numeric keypad to input data. Press Clear to cancel an entry. Numeric Keypad • Use the numeric keypad to skip directly to a DVD chapter or CD track.
DVD/DISC FUNCTIONS Search Press SEARCH to go directly to a desired point of a disc (e.g., Title, Chapter, Time). DVD Chapter/Title Search • Press SEARCH once to display the Chapter/Title Search Bar. • Press the LEFT/RIGHT navigation keys to select (highlight) an entry field. • Use the Numeric keypad to input the desired chapter/title number, or press the UP/DOWN navigation keys to increase/decrease the chapter/title number.
DVD/DISC FUNCTIONS Multi-Angle/Subtitle/Audio • During playback of a DVD that has been mastered with multiple angles, press ANGLE to view the available alternate camera angles. (A DVD may have up to 9 selectable angles.) • During playback of a DVD that has been mastered with subtitles, press SUBTITLE to view the available subtitle tracks. (A DVD may have up to 32 selectable subtitles.
DVD/DISC FUNCTIONS CD Program Mode 1. Load a CD and press PROGRAM. 2. Press the RIGHT navigation key to select the “Track” column; press the UP/DOWN navigation keys to select a track. 3. Press ENTER to confirm the selection. 4. Repeat steps 2-3 until you have finished programming your selections or when you have programmed the maximum 20 tracks. 5. Press PLAY to start playback. Press PROGRAM to cancel. MP3 Program Mode 1. Load an MP3-CD and press PROGRAM. 2.
FUNCTION BUTTONS Mode / LCD Mode Press the MODE button once (or LCD MODE on the remote) to adjust the brightness, contrast, and color of the LCD screen. 1. Press the UP/DOWN navigation keys to select the desired setting to adjust. From top to bottom, the settings are: Screen, Brightness, Contrast, Color, and Reset. 2. Press the LEFT/RIGHT navigation keys to adjust the selected setting.
DVD SETUP Enter DVD Setup mode to adjust the various internal DVD settings of the player. Make sure the player has been completely stopped before entering Setup mode. 1. Press SETUP while the player is in DVD mode to access the DVD Setup menu. 2. Use the NAVIGATION keys to select a desired item. 3. Press ENTER to confirm a selection. 4. Press SETUP to exit Setup mode (or select EXIT and press ENTER).
DVD SETUP Audio Setup Use the NAVIGATION keys to highlight the desired audio selection and press ENTER to confirm. Item Digital Out Description Sets the player’s Coaxial Digital Audio Out signal. For use with 5.1-channel receivers (see your receiver’s manuals for more details). Options (Default is in Bold) SPDIF/RAW, SPDIF/PCM, Off To minimize circuit interference, set the Digital Out option to “Off” when the coaxial digital audio connection is not in use.
SPECIFICATIONS Power Supply Rechargeable Battery DC: 9V, 2.5A AC: 100-240V UL Listed Adapter Power Consumption ≤ 9W Video Signal System NTSC Video Output Composite Video Audio Output 3.5mm Headphone (x2) 3.5mm Stereo Coaxial Digital Audio S/N Ratio 90dB Typical Dynamic Range (Audio) 90dB Typical Display Type 7” TFT LCD (16:9) Display Resolution 480 x 234 Operating Temperature 32ºF - 95ºF Unit Dimensions 6.50” x 1.97” x 5.98” (WHD) (main unit + battery) Weight 1.
TROUBLESHOOTING If you have a problem with this player, please read the troubleshooting guide below and check our website at www.cobyusa.com for Frequently Asked Questions (FAQs) and firmware updates. If these resources do not resolve the problem, please contact Technical Support. There is no power to the device. • Ensure that the Power Switch is physically set to the ON position. • Ensure that the AC adapter cord is securely connected to the player and the proper wall outlet.
NOTES 27
COBY Electronics Corp. 56-65 Rust Street. Maspeth, NY 11378 Portable MP3 Micro System with 256MB Integrated Flash Memory and SD/MMC Card Slot www.cobyusa.com. www.ecoby.