DVD938 EN 5.1-Channel Home Theater DVD System Instruction Manual.........................................................
Table of Contents Package Contents............................................................ 5 Features.............................................................................. 6 English About Optical Discs......................................................... 7 Disc Requirements....................................................................................................... 7 DVD Features......................................................................................................
Table of Contents Turning the Unit On................................................................................................... 24 Select the Video Line................................................................................................. 24 Select the Source Mode........................................................................................... 24 Load a Disc (or other media)...................................................................................
Table of Contents English Audio Setup Page....................................................................................................... 37 Analog Audio Setup.................................................................................... 37 Digital Audio Setup..................................................................................... 39 Dolby Digital Setup.....................................................................................40 Channel Delay...........................
Package Contents Please make sure that the items shown below are included in the package. Should an item be missing, please contact the local retailer from which you purchased this product. English 1. Coby DVD938 Main Unit 2. Satellite Speakers (x4) 3. Center Speaker (x1) 4. Subwoofer Speaker (x1) 5. Remote Control 6. AM Loop Antenna 7. FM Wire Antenna 8. AV Cable 9. Speaker Cables www.cobyusa.
Features Thank you for purchasing a Coby Home Theater System! Please read this manual carefully before connection and operation and keep it for future reference. English This DVD player is a new generation home player that can produce high-quality video and audio for your continued enjoyment. Built in digital audio decoders (Dolby Digital, LPCM, MPEG, etc.
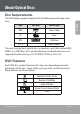
About Optical Discs Disc Requirements Type Disc Mark English This DVD player supports playback of the following media types and discs. Content Type DVD Audio + Video CD Audio JPEG Still Picture CD + G Audio + Graphics This unit can play back optical discs or memory cards that contain MP3, MPEG-4, or JPEG files. Discs and media types not listed above are not supported by this unit (e.g., PC CD-ROM, CD-Extra, CD-I, etc.
About Optical Discs English Some of the DVD features enabled by this player depend on how the DVD was produced. Some features may not be enabled if the disc does not support the feature, or it may require special settings. Check the features printed on the DVD package or follow the instructions found on the disc’s on-screen menu. DVD Region Codes DVD discs and DVD players are manufactured under a compulsory worldwide agreement, the DVD Regional Code System.
About Optical Discs Hold a DVD/CD by its edges. Avoid touching the recorded side of the disc. To remove a DVD/CD from its storage case, press down on the center retention mechanism of the case and lift the disc out. Do not bend or press discs. Do not subject discs to prolonged exposure to direct sunlight, high humidity, or high temperatures. To reduce the risk of scratches, always put discs back in their case after use. Store discs vertically in a cabinet.
DVD938 at a Glance Front Panel English 1 2 3 4 5 6 7 8 9 Name Microphone Input Jacks (1 and 2) Disc Tray Card Slot USB Port Display Screen Open/Close Play/Pause Stop Power/Standby 10 Volume Knob 1 Page 10 Description Connect external microphones (6.3mm plug) to enjoy Karaoke CD+G discs.
DVD938 at a Glance English Rear Panel 1 2 3 4 5 6 7 8 9 Name Main Power Switch Speaker Output Terminals Stereo Line Input Description Turn the main power on or off. Connection terminals for the five satellite speakers (2 front, 1 center, 2 rear) and the subwoofer. Optional connection to play stereo audio from an external audio source. An optional RCA stereo patch cable is required. Stereo Audio Output Optional connection to output stereo audio to an external receiver/player.
DVD938 at a Glance Remote Control English The remote control transmits a directional infrared beam. Be sure to aim the remote control directly at the infrared remote sensor during operation. The sensor may not be able to receive signals properly if the sensor is covered, if there is a large object between the remote control and the sensor, or if it is exposed to direct sunlight or a strong artificial light (e.g., fluorescent or strobe lights).
DVD938 at a Glance 1 English Remote Key Functions 1 2 3 7 13 4 10 5 6 11 15 3 1 3 3 3 3 www.cobyusa.
DVD938 at a Glance English 1 Name Power/Standby 2 3 Open/Close Numeric Keypad 4 5 6 GOTO SETUP SOURCE 7 USB 8 A-MODE 9 10 PLAY/PAUSE V-MODE 11 12 PROG STOP 13 OSD VOL+ Page 14 Description Turn the unit on or off (standby). The Main Power switch on the rear panel must be set to the ON position. Open or close the disc compartment tray. <0-9, 10>: Use the numeric keypad to input numbers where appropriate. <+10>: Add 10 to input numbers higher than 10.
DVD938 at a Glance 15 16 17 18 REVERSE SEARCH – NEXT RADIO + PREVIOUS RADIO – TITLE AM/FM MENU / AUTO 19 Navigation Keypad 20 21 ENTER AUDIO / MEMORY 22 SUBTITLE / MO/ST 23 S.EFFECT www.cobyusa.com Description Decrease the volume level. [Video & Music] Increase the rate of forward playback (fastforward). [Radio] Tune to a higher station frequency. [Video & Music] Increase the rate of reverse playback (rewind). [Radio] Tune to a lower station frequency [Video & Music] Skip to the next track.
DVD938 at a Glance 24 Name CH-LEVEL English 25 TONE 26 ANGLE 27 28 29 30 31 STEP ZOOM REPEAT A-B MUTE Page 16 Description Adjust the audio channel levels (use in conjunction with and . Adjust the bass and treble tone levels (use in conjunction with and ). [DVD] Change the angle view (requires a DVD featuring multiple camera angles). [DVD} Play DVD video frame by frame. [DVD] Use the picture zoom feature. Change the repeat playback options. Use the Repeat A-B function.
Connections Connections 1 VIDEO SYSTEM CONNECTION The following video outputs are available for this unit . Use the yellow of an AV cable to connect the composite video than output of Choose the bestplug available video connection. Avoid using more this unit to the video input of a TV/monitor. one connection at the same time to prevent signal interference. The 1. 2settings Component video of the Video unit must match the video connection used.
Connections Composite Video Out (Standard) Using the supplied AV cable: English 1. Connect one end of the yellow cable to the yellow Video Out jack of the unit. 2. Connect the other end of the yellow cable to the yellow Video In jack of a TV. Press on the remote until you see “CVBS” on the TV screen to set the unit to the composite video mode. The maximum output resolution for the composite video connection is 480i. Component Video Out (Best) Using an optional component video cable: 1.
Connections Choose the best available audio connection. Avoid using more than one connection at the same time to prevent signal interference. The audio settings of the unit must match the audio connection used. Change the audio settings in the System Setup menu (please refer to the System Setup section of this manual for more information). Speakers This unit has an integrated amplifier. Connect the supplied speakers to enjoy your movies with 5.1-channel surround sound! 1.
Connections 3. While pressing the speaker terminal levers of the unit, insert the bare wire into the hole, then release the lever to secure the connection. English 4. The speaker wire and terminal for each speaker is color-coded for your convenience.
Connections Coaxial Digital Audio Out (Optional, Best) For use with a digital decoding external amplifier/audio system. Using an optional coaxial digital audio cable: 1. Connect one end of the coaxial cable to the black Digital Audio Out jack of the unit. 2. Connect the other end of the coaxial cable to the Digital Audio In jack of an external audio system. Please refer to the documentation included with your external audio system for further help using this connection.
Connections After this connection has been made, press on the remote to switch to “LINE” mode to enjoy audio from the external device. English Depending on the type of patch cable used, you can use this connection with external devices with a 3.5mm stereo output jack or RCA stereo output jacks. Please refer to the documentation included with your external audio system for further help using this connection.
Connections • Install the unit on a level, flat and firm surface with good ventilation. Never block the cabinet vents; blocked vents will cause the unit to overheat and malfunction. • Do not install the unit in a place exposed to heating sources or direct sunlight. • Do not install the unit in a place exposed to moisture or rain. www.cobyusa.
Getting Started Turning the Unit On 1. Locate the Main Power switch on the rear panel of the unit and set it to the ON position. English 2. Press to turn the player on. Select the Video Line 1. Press on the remote to set the video mode that corresponds to the video connection used (e.g., Component or Composite). See the Connections section for details. 2. Set your TV to display the video line connection that corresponds to your DVD player (e.g.
Getting Started Press to switch between Memory Card, USB, and DVD modes. Select USB to play media from USB flash memory drives loaded in the USB Port. Select DVD mode to play optical discs (e.g., DVD, CD, or CD+G) from the disc tray. The unit must be placed in DVD mode before the Memory Card and USB modes can be accessed. Press to switch to DVD mode first, then press on the remote to change between Memory Card, USB, and DVD/Disc modes.
Getting Started Play/Pause/Stop Press to play the disc for the first time. English Press during playback to pause. Press again to resume playback. Press during playback to stop the disc (“Pre-Stop”). Press to resume playback at the time-point at which the disc was stopped. Press again when the disc is “Pre-Stopped” to stop playback completely. (When is pressed from this state, the disc will start playing from the beginning.
Getting Started Audio will be muted during fast-forward, fast-reverse, and stepped playback. English Repeat Playback Press to change the repeat playback mode. Adjusting the Sound Press to increase the volume level. Press to decrease the volume level. Press to turn the volume off completely. Press again to restore the volume to the previous level. Press to change toggle between audio output modes (5.1-channel surround and 2-channel stereo).
Operation Modes DVD/CD Discs 1. Press to place the unit in DVD source mode (LOADING/ DVD-VIDEO will appear on screen). English 2. Load a compatible DVD-video or CD-audio disc into the disc tray. A content menu will appear on screen. 3. Press to start playback. Some discs may start playing automatically or display a DVD menu specific to the disc. If a menu appears, use the to select a desired feature or option and then press to confirm.
Operation Modes MP3 Discs 2. Load a disc with compatible MP3 files into the disc tray. A content menu will appear on screen. Menu Operation Press the or arrows of the navigation keypad to select a folder or a file, then press [ENTER] to enter the selected folder or play the selected file. (You can also use the numeric keypad to select and confirm folders and files.) Press the arrow to return to the previous menu.
Operation Modes Karaoke Discs (CD+G) You can connect optional microphones to the unit to sing along with karaoke discs (e.g., CD+G). English 1. Press to place the unit in DVD source mode (LOADING/ DVD-VIDEO will appear on screen). 2. Press to enter the main setup menu of the unit. Navigate to the Karaoke setup menu. Set the MIC option to “ON” to enable the connected microphone(s) Set the microphone volume to a low level.
Operation Modes JPEG Picture Discs 2. Load a JPEG picture CD into the disc tray; the unit will load the disc contents automatically. 3. Press to enter the thumbnail mode to preview the pictures. Thumbnail Mode Operation To view a picture, use the navigation keypad to select a picture and then press . To start a picture slide show, use the navigation keypad to select the “Slide Show” option and then press .
Operation Modes On the remote… Press English Press Function When viewing a picture, press and then press or to increase or decrease the magnification level, respectively. When the magnification level is above 100%, use the navigation keypad to pan around the magnified picture. Press again to exit and return to normal viewing mode. Return to thumbnail mode. USB Drives & Memory Cards 1.
Operation Modes Press the or arrows of the navigation keypad to select a folder or a file, then press [ENTER] to enter the selected folder or play the selected file. (You can also use the numeric keypad to select and confirm folders and files.) Press the arrow to return to the previous menu. Press or to skip to the previous or next menu page, respectively. Press to toggle between FOLDER and FILELIST playback modes.
Operation Modes On the remote… Press English Press Numeric Keypad Press or Press < SEARCH +> or Page 34 Function To save a preset station: Tune to the desired station (e.g., “92.7”) Press Use the numeric keypad to enter the desired preset station number (e.g., 2). The radio station “92.7” has now been saved as preset number 2. Automatically scan for and save stations within reception as preset stations.
System Setup Use the System Setup menu to adjust your player’s system options. Press the or navigation keys to select an item. The submenu of the selected item will be displayed beneath the selected item. Press the or navigation keys to select a submenu item, then press to display the options of the selected submenu item. Press or to select an option, then press to confirm (or press to cancel).
System Setup English 16: 9: If the unit is connected to a wide-screen TV set, select this option. The widescreen image will be displayed in full screen in its native aspect ratio while the 4:3 image will be stretched out horizontally to fit in the screen. Angle Mark Set this item to ON. When a disc encoded with multiple camera angles is playing, the angle mark will display on the screen. Then you can view the video of different camera angles by pressing on the remote control.
System Setup ON: If the image remains motionless on the screen for several minutes, (e.g., the disc is paused, stopped etc.,) a screen saver will appear on the screen. You can press any key or button except to wake it up. The unit will go into the standby mode after about 20 minutes being in the screensaver mode. You can press to switch it on. OFF: Disable the screen saver function.
System Setup 5.1CH: Turn off the DOWNMIX mode. If the unit is connected to a 5.1channel amplifier, this item should be selected. English This function only applies to the Dolby AC -3 encoded 5.1-channel discs. Front, Center, Rear Speaker and Subwoofer Only when the DOWNMIX mode is set to off (i.e., DOWNMIX is set to 5.1CH) are the CENTER SPEAKER and REAR SPEAKERS activated. The FRONT SPEAKER can beset to LARGE or SMALL (small is recommended).
System Setup Digital Audio Setup Set this option to SPDIF/RAW or SPDIF/PCM to activate the coaxial digital audio output connection. SPDIF/OFF: There will be no digital audio signal output. (Coaxial off) SPDIF/RAW: The digital audio signal output will be in its raw format. This mode is usually used for DTS & Dolby Digital 5.1 signals. SPDIF/PCM: The digital audio signal output will be in PCM format. This mode is usually used for audio CD signals.
System Setup Dolby Digital Setup Dual Mono English STEREO: The player outputs the left-channel audio and right-channel audio via the FL and FR speaker respectively. L-MONO: The player outputs the left-channel audio only via both the FL and FR speaker. R-MONO: The player outputs the right-channel audio only via both the FL and FR speaker. MIX-MONO: The player outputs the average signal of the left-channel and right channel audio via the FL speaker and the FR speaker.
System Setup In case the channel delay settings cannot match your speaker configuration, please set all distances to 0cm. If possible, use your receiver/amplifier to set the channel delay. Equalizer Sound Mode Select a sound mode in this item. Bass Boost Set it to ON to boost the bass sound. Super Bass Set it to ON to get the super bass sound effect. Treble Boost Set it to ON to boost the treble sound. 3D Processing 3D processing provides a virtual surround sound experience using just two speakers.
System Setup Pro Logic II functionality is effective only when DOWNMIX is set to 5.1CH and DIGITAL OUTPUT is set to SPDIF/RAW. English PRO LOGIC II This item is used to turn on or off the Pro Logic II processing. ON: Pro Logic II processing is always on. OFF: Pro Logic II processing is disabled AUTO: Pro Logic II processing is on only when Dolby Pro Logic II encoded content is detected.
Panorama This item is used to turn on/off panorama mode and is available only when MODE is set to MUSIC. When panorama mode is turned on, the front stereo audio is partially fed into the surround channels for an enveloping effect. Dimension This item is available only when MODE is set to MUSIC. This item allows gradual adjustment of the soundfield either towards the front or towards the rear. This is useful in setting a more even balance from all speakers with some rooms.
System Setup Karaoke Setup MIC Setup English MIC Set this item to ON/OFF to switch on/off the connected microphone(s). MIC VOL Enter this item, then use the navigation keys or to adjust the microphone volume. Then press to confirm your adjustment. Echo Level Enter this item, then use navigation keys or to adjust the microphone echo level. Then press to confirm your adjustment.
System Setup Color Setting There are three options (HIGH, MEDIUM and LOW) for you to choose in this item. Brightness, Contrast, Hue and Saturation Adjust the brightness, contrast, hue, and color saturation of the picture. Gamma There are four options (HIGH, MEDIUM, LOW and NONE) for you to choose in this item. Luma Delay There are two options (0T and 1T) for you to choose in this item.
System Setup MULTI: Select this mode if the unit is connected to a multi-system TV. The video signal output format will match the video signal of the disc. English NTSC: Select this mode if the unit is connected to an NTSC-format TV (used in Taiwan, America, Canada, etc). It will convert the video signal of a PAL disc and output in NTSC format. PBC (Play Back Control) ON: Activate the PBC function. When playing a disc encoded with PBC function, press
System Setup Default Enter to restore all options to their factory-default state. The PARENTAL settings and PASSWORD will not be reset. Password Setup Page Password Mode Switch the password function on/off. You must key in the correct password and press to confirm before you change the option in this item. The default password is 136900. Password Reset the password. The default password (136900) will always be recognized even if the password has been changed or reset. www.cobyusa.
Specifications Power English Operating Environment Disc Output Tuner Amplifier Source Consumption Temperature Relative Humidity TV System Frequency Response S/N (A weight) Frequency Range THD + Noise WOW Flutter AM Range FM Range Power Output (Max) Frequency Response AC ~120 V, 60 Hz 150 W Approx -10º – +40º C (14º – 104º F) Approx 5% – 90% PAL/NTSC 20 – 20,000 Hz >80 dB (1 KHz) ≥ 70 dB (1 KHz) ≤ -60 dB (1 KHz) Under the detectable limit of measure 530 KHz – 1710 KHz 87.
If you have a problem with this device, please read the troubleshooting guide below and check our website at www.cobyusa.com for Frequently Asked Questions (FAQs) and firmware updates. If these resources do not resolve the problem, please contact Technical Support. Address Coby Electronics Technical Support 56-65 Rust Street Maspeth, NY 11378 Email techsupport@cobyusa.com Web www.cobyusa.
Troubleshooting Symptom No Power English There is no picture or the picture is distorted There is no sound or the sound is distorted Page 50 Cause Remedy The AC power cord is not connected to the power supply or is not connected securely The Video Input mode of the connected TV is set incorrectly. Please check that the AC power cord is connected securely. Set the TV to the correct source mode. Most TVs have a “Source” or “TV/Video” button that changes the source mode.
Troubleshooting Unable to play a disc The buttons on the unit don’t work www.cobyusa.com Cause The disc is loaded incorrectly in the disc tray The disc is incompatible with the unit. The rating of the disc is higher than permitted by the parental control rating. The disc is dirty. Static electricity may have interfered temporarily with the operation of the unit. Remedy Check that the disc is placed in the disc tray with its label side upwards. Load a compatible disc.
Troubleshooting English Symptom Cause The remote There are no batcontrol does not teries in the remote function control. The batteries have lost their charge. The player freezes when a USB drive or a memory card is inserted into the player Page 52 Remedy Install two AAA/1.5V batteries in the remote. Replace the batteries with new ones. The remote control Make sure that there are no isn’t pointed at the large objects between the remote sensor.
English Safety Notices The lightning flash with arrowhead symbol within an equilateral triangle is intended to alert the user to the presence of uninsulated “dangerous voltage” within the product’s enclosure that may be of sufficient magnitude to constitute a risk of electric shock. The exclamation point within an equilateral triangle is intended to alert the user to the presence of important operation and servicing instructions in the literature accompanying the appliance.
Safety Notices FCC Statement: This device complies with Part 15 of the FCC Rules. Operation is subject to the following two conditions: English (1) This device may not cause harmful interference, and (2) This device must accept any interference received, including interference that may cause undesired operation. Note: This equipment has been tested and found to comply with the limits for Class B digital devices, pursuant to Part 15 of the FCC rules.
Safety Notices 1. 2. 3. 4. 5. 6. 7. 8. 9. 10. 11. Read Instructions: All the safety and operating instructions should be read before the product is operated. Retain Instructions: The safety and operating instructions should be retained for future reference. Heed Warnings: All warnings on the product and in the operating instructions should be adhered to. Follow Instructions: All operating and usage instructions should be followed. Cleaning: Unplug this product from the wall outlet before cleaning.
Safety Notices 12. 13. English 14. 15. 16. 17. 18. Overloading: Do not overload wall outlets, extension cords, or integral convenience receptacles as this can result in a risk of fire or electric shock. Object and Liquid Entry: Never push objects of any kind into this product through openings as they may touch dangerous voltage points or shout-out parts that could result in a fire or electric shock. Never spill liquid of any kind on the product.
English www.cobyusa.
English Page 58 Coby Electronics Corporation
English www.cobyusa.
Coby Electronics Corporation 1991 Marcus Ave, Suite 301 Lake Success, NY 11042 www.cobyusa.com www.ecoby.com Coby is a registered trademark of Coby Electronics Corporation. Printed in China. Print v1.