
Instruction manual


28
Basic Settings using the Subdisplay
Chapter 3 Basic Adjustments and Settings
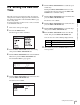
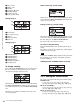
Settings page 1
2
Select [Step], then press the MENU SEL/ENTER dial.
3
Turn the MENU SEL/ENTER dial to select the shutter
value.
Pressing the MENU SEL/ENTER dial confirms the
setting, and reflects the changed value on the camera.
Pressing the BACK button cancels the shutter setting, and
restores the previous value.
To set using the VF menu
Set on the <Shutter/FPS> page in the Camera menu (page
43).
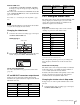
Selecting an arbitrary shutter value
In Continuous mode, an arbitrary shutter value can be set.
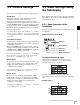
1
Select the shutter value on settings page 1, then press
the MENU SEL/ENTER dial.
Settings page 1
2
Select [Continuous], then press the MENU SEL/
ENTER dial.
3
Turn the MENU SEL/ENTER dial to select the shutter
value.
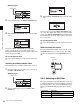
You do not need to press the MENU SEL/ENTER dial to
set a value. The shutter value changes are reflected on the
camera as the MENU SEL/ENTER dial is turned. Pressing
the BACK button cancels the shutter setting, and restores
the previous value.
To set using the VF menu
Set on the <Shutter/FPS> page in the Camera menu (page
43).
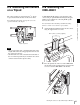
When not using the shutter
Press the E. button or M. button, whichever is lit, on the
SHUTTER button for one second or longer. The shutter
switches off and the light on both SHUTTER buttons go
out.
3-3-4 Selecting an ND Filter
The camera has built-in optical ND filters that can be used
to match the illumination and natural lighting conditions.
The following filters can be selected in F65RAW mode or
HD mode. In F65RAW-HFR mode, the filter is fixed to
Clear.
Shutter value
Shutter value
Filter density Description
Clear No filter is used.
0.9 1/8 optical transmittance
M. button
E. button