0910 For model: 0910 Smoke Alarm User’s Guide Lithium (non-replaceable sealed in) Battery-Operated Smoke Alarm with Alarm Memory and SMART HUSHTM Control to temporarily silence nuisance alarms. Thank you for purchasing this smoke alarm. It is an important part of your family’s home safety plan. You can trust this product to provide the highest quality safety protection. We know you expect nothing less when the lives of your family are at stake. For your convenience, write down the following information.
This alarm detects products of combustion using the ionization technique. It contains 0.9 microcurie of Americium 241, a radioactive material (see Section 9). Distributed under U.S. NRC License No. 32-23858-01E. Manufactured in compliance with U.S. NRC safety criteria in 10 CFR 32.27. The purchaser is exempt from any regulatory requirements. Do not try to repair the smoke alarm yourself. Refer to the instructions in Section 12 for service.
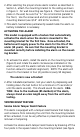
m) CEILING The closed door may prevent an alarm not located in that room from waking the sleeper. BEST HERE NEV HE • Smoke, heat, and combustion products rise to the ceiling and spread horizontally. Mounting the smoke alarm on the ceiling in the center of the room places it closest to all points in the room. ACCEPTABLE HERE Ceiling mounting is preferred in ordinary residential 4" (10 cm) construction.
• Install Smoke Alarms on sloped, peaked or cathedral ceilings at or within 3ft (0.9m) of the highest point (measured horizontally). NFPA 72 states: “Smoke alarms in rooms with ceiling slopes greater than 1 ft in 8 ft (.3m in 2.4 m) horizontally shall be located on the high side of the room.” NFPA 72 states: “A row of detectors shall be spaced and located within 3 ft (0.9m) of the peak of the ceiling measured horizontally” (see figure 3).
• In insect-infested areas. • Smoke alarms should not be installed within 3 ft (.9m) of the following: the door to a kitchen, the door to a bathroom containing a tub or shower, forced air supply ducts used for heating or cooling, ceiling or whole house ventilating fans, or other high air flow areas. • Kitchens. Normal cooking may cause nuisance alarms. If a kitchen alarm is desired, it should have an alarm silence feature or be a photoelectric type. • Near fluorescent lights.
2.After selecting the proper smoke alarm location as described in Section 1, attach the mounting bracket to the ceiling as shown in figure 3. For wall mounting see figure 4. Place the mounting plate on the wall; be sure the “A” line is horizontal (parallel to the floor). Use the screws and anchors provided to secure the mounting bracket (use 3/16” drill bit for anchors). 3.This alarm has batteries permanently sealed inside the alarm no battery installation is necessary.
). When the posts are broken off, the tamper resist on the base is allowed to engage the mounting bracket. Rotate the alarm onto the mounting bracket until you hear the tamper resist tab snap into place, locking the alarm on the mounting bracket. Using the tamper resist feature will help deter children and others from removing the alarm from the bracket.
CAUTION: BEFORE USING THE ALARM SMART HUSHTM FEATURE, IDENTIFY THE SOURCE OF THE SMOKE AND BE CERTAIN A SAFE CONDITION EXISTS. FLASHING LED LIGHT: This smoke alarm is equipped with a flashing red indicator light with four modes of operation: • The LED will flash every 40-45 seconds in the standby mode signifying that the alarm is receiving power. • The LED will flash every 1.5 seconds when the alarm is sounding. • The LED will illuminate for 1.
which vents to the outside (non-recirculating type) will also help remove these combustible products from the kitchen. This model 0910 has a SMART HUSHTM control that is extremely useful in a kitchen area or other areas prone to nuisance alarms. For more information refer to Section 4, OPERATION AND TESTING. If the alarm does sound, check for fires first. If a fire is discovered, get out and call the fire department.
Break out the crosshatched area with a screwdriver or similar tool. Using a screwdriver or similar tool slide the exposed piece towards the center of the alarm. This will deactivate the alarm, stop the low battery “chirp” and render the alarm safe for disposal by draining the batteries. CLEANING YOUR ALARM YOUR ALARM SHOULD BE CLEANED AT LEAST ONCE A YEAR If the tamper resist feature has been activated you will need to follow the instructions in Section 3 to remove your alarm for maintenance.
often unpredictable. For maximum protection, Kidde recommends that both Ionization and Photoelectric alarms be installed. • A battery powered alarm must have a battery of the specified type, in good condition and installed properly. • AC powered alarms (without battery backup) will not operate if the AC power has been cut off, such as by an electrical fire or an open fuse. • Smoke alarms must be tested regularly to make sure the batteries and the alarm circuits are in good operating condition.
• Familiarize everyone with the sound of the smoke alarm and train them to leave your home when they hear it. • Practice a fire drill at least every six months, including fire drills at night. Ensure that small children hear the alarm and wake when it sounds. They must wake up in order to execute the escape plan. Practice allows all occupants to test your plan before an emergency. You may not be able to reach your children. It is important they know what to do.
9. NRC INFORMATION Ionization type smoke alarms use a very small amount of a radioactive element in the sensing chamber to enable detection of visible and invisible combustion products. The radioactive element is safely contained in the chamber and requires no adjustments or maintenance. This smoke alarm meets or exceeds all government standards. It is manufactured and distributed under license from the U.S. Nuclear Regulatory Commission. 10.
11. CAUTION (AS REQUIRED BY THE CALIFORNIA STATE FIRE MARSHAL) “Early warning fire detection is best achieved by the installation of fire detection equipment in all rooms and areas of the household as follows. A smoke alarm installed in each separate sleeping area (in the vicinity of, but outside of the bedrooms), and heat or smoke detectors in the living rooms, dining rooms, bedrooms, kitchens, hallways, attics, furnace rooms, closets, utility and storage rooms, basements and attached garages”.
TEN YEAR LIMITED WARRANTY KIDDE Safety warrants to the original purchaser that the enclosed smoke alarm will be free from defects in material and workmanship or design under normal use and service for a period of ten years from the date of purchase.
0910 Para el modelo: 0910 Guía del usuario de alarma contra humo Alarma contra humo alimentada por batería de litio (no reemplazable y sellada) con memoria de alarma y control SMART HUSHTM para silenciar temporalmente las alarmas molestas. Gracias por comprar esta alarma contra humo, ya que es parte importante del plan de seguridad para el hogar. Puede confiar en que este producto proporcionará una protección de seguridad de la más alta calidad.
Esta alarma detecta productos de combustión usando la técnica de ionización. Contiene 0.9 microcurios de americio 241, que es un material radiactivo (consulte la Sección 9). Se distribuye bajo licencia de NRC de EE.UU., Nº 32-23858-01E. Fabricada en conformidad con los criterios de seguridad de NRC de EE.UU. en 10 CFR 32.27. El comprador está exento de todo requisito reglamentario. No intente reparar usted mismo la alarma contra humo.
MEJOR AQUÍ NUNCA AQUÍ • Al instalar la alarma en la pared, use una pared interior con el borde superior de laSOLO PIS MÁXIMO PLAN DE UN pulg. alarma a un mínimo de 4 pulg. (10 cm) y un máximo de12 12 pulg. (30.5 cm) bajo el cielo (30,5 cm.) DORMITORIO COCINA DORMITORIO DOR raso. (consulte la Figura 1). AQUÍ ES ACEPTABLE • Ubique las alarmas contra humo en ambos extremos del dormitorio, pasillo o habitación grande, si el pasillo o la habitación tienen más de 30 pies (9.1 m) de largo.
ADVERTENCIA: PRUEBE EL FUNCIONAMIENTO DE LA ALARMA DESPUÉS DE QUE SU CASA RODANTE HAYA ESTADO GUARDADA O DESOCUPADA, Y, COMO MÍNIMO, UNA VEZ A LA SEMANA CUANDO ESTÉ EN USO. 2. UBICACIONES QUE ES NECESARIO EVITAR • En el garaje. Se generan productos de la combustión al hacer partir el automóvil. • A menos de 4 pulg. (10 cm) del vértice de un cielo raso tipo “A”. • En un área donde la temperatura pueda descender a menos de 40º F o aumentar sobre 100º F, tales como garajes o entretechos. • En áreas con polvo.
2. Después de seleccionar la ubicación adecuada para la alarma contra humo como se describe en la Sección 1, conecte el soporte de montaje al cielo raso como aparece en la Figura 3. Para instalar la alarma en la pared, consulte la Figura 4. Coloque la placa de montaje en la pared y asegúrese de que la línea “A” esté horizontal (paralela al piso). Use los tornillos y anclajes suministrados para asegurar el soporte de montaje en su lugar (use una broca de 3/16 de pulg. para los anclajes). 3.
4. FUNCIONAMIENTO Y PRUEBA FUNCIONAMIENTO: La alarma contra humo empieza a funcionar una vez que ésta se activa (consulte la Sección 3) y se termina la prueba. Cuando la alarma detecta productos de combustión, la unidad hace sonar una alarma pulsante fuerte de 85 db hasta que el aire esté limpio. CONTROL SMART HUSHTM: La función SMART HUSHTM tiene la capacidad de insensibilizar el circuito de la alarma durante aproximadamente 8 minutos.
5. ALARMAS MOLESTAS Las alarmas contra humo están diseñadas para reducir al mínimo las alarmas molestas. El humo de cigarrillo normalmente no la activará, a menos que llegue directamente a la alarma. Las partículas por combustión provenientes de la cocina pueden activar la alarma si está ubicada demasiado cerca del área en que se cocina. Se generan grandes cantidades de partículas combustibles por derrames o al asar.
LIMPIEZA DE SU ALARMA LA ALARMA SE DEBE LIMPIAR UNA VEZ AL AÑO COMO MÍNIMO Si se activó la característica de protección contra la manipulación indebida, será necesario que siga las instrucciones en la Sección 3 para retirar la alarma para mantenimiento. Para limpiarla, sáquela del soporte de montaje como se indica al principio de esta sección.
8. BUENAS PRÁCTICAS DE SEGURIDAD ELABORE Y PRACTIQUE UN PLAN DE ESCAPE • Instale y mantenga extintores de incendios en cada nivel de la casa, en la cocina, sótano y garaje. Sepa cómo usar un extintor de incendios antes de que se produzca una emergencia. • Elabore un plano en que estén señaladas todas las puertas y ventanas, y al menos dos (2) rutas de escape desde cada habitación. Las ventanas del segundo piso deben tener una escala de cuerdas o de cadena.
9. INFORMACIÓN DE NRC Las alarmas contra humo de ionización usan una pequeña cantidad de un elemento radiactivo en la cámara de detección para permitir la detección de productos de combustión visibles e invisibles. El elemento radioactivo está guardado en forma segura en la cámara y no necesita ajustes ni mantenimiento. Esta alarma contra humo cumple o supera todas las normas gubernamentales. Se fabrica y distribuye bajo la licencia de la Comisión reguladora nuclear de los Estados Unidos. 10.
GARANTÍA LIMITADA DE DIEZ AÑOS KIDDE Safety garantiza al comprador original que la alarma contra humo adjunta estará libre de defectos de material y mano de obra o de diseño en condiciones normales de uso por un período de diez años a partir de la fecha de compra.