
User manual

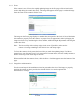


2.4.4 Server Settings
The final step on the installation wizard contains the most important of the server settings. If
necessary, consult the network administrator or ISP service for the appropriate information.
Use the text input fields and pull-down menus on this page to adjust the camera s necessary
server settings. All settings will be activated once a setting is selected.
name Enter a descriptive name for the camera (or leave as default), up to
16 characters long. The name can include numbers and letters. Use
the underscore character (_) instead of any spaces.
TCP/IP gateway Enter the IP address of the router to be used as a TCP/IP gateway
between networks. Traffic destined for another network will be
routed to the gateway and then forwarded to their destination. If
the camera will be used only over a local network, no gateway
setting is required. However, to access the camera on the Internet,
an appropriate TCP/IP gateway must be entered.
time zone Choose the appropriate time zone setting from the settings
contained in the pull-down menu. The camera's clock is
preconfigured. Only the time zone setting is required for the
camera to display the proper time.
Note: The camera will use the time zone setting to properly adjust time-based
information it later receives from the network. Most of this time information is
sent using GMT, a format that does not contain a time zone setting. The camera
will operate better if the time zone is properly configured.
set date Sets the date of the camera. This setting is important when
transferring images to a remote FTP server, at which time the
default settings will use the date to create a file. Enter the
date in the MM/DD/YY format.
19 of 60