
Installation Guide
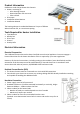
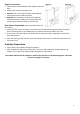
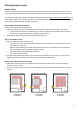
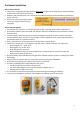
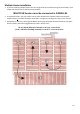
Table Of Contents
- Introduction
- Product Information
- Tools Required for Heater Installation
- Electrical Information
- Underlay Preparation
- Planning Heater Layout
- Pre-Heater Installation
- Heater Installation
- Multiple Heater Installation
- Laying Floor Covering over Coldbuster Floor Heating:
- Thermostat Fit off & Connection to Mains Power
- Damage and Repair
- Safety & Operating Instructions
- Economy Tips
- Warranty

5
Plug-In Connections
• Thermostat mounted between 300 - 600mm from the
floor
• Power point must be RCD protected
• Option A: For cavity walls, fit heater lead and floor
temperature sensor inside the cavity
• Option B: For brick walls, fit heater lead and floor
temperature sensor inside PVC trunking and notch
out the thermostat baseplate for cable access
Floor Sensor Preparation (typically provided with your
thermostat)
• Install the floor sensor as shown in the electrical connection drawing, particularly if another
form of heating such as air conditioning or a fireplace will also be used in the area
• Floor sensor is essential where the thermostat is mounted inside a cupboard or outside the
area being heated
• After the heating is laid, the floor sensor should be secured at an even distance between 2 of
the heater runs
Underlay Preparation
• Ensure floor is clean before fitting the underlay
• After underlay has been fitted to the floor, vacuum it and remove any foreign objects (e.g.
staples, nails or grit) that could possibly damage the carpet heater
The underlay MUST NOT be stapled or nailed to the floor but can be butted together and taped
at joints and edges if necessary