
User's Manual

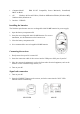
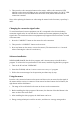


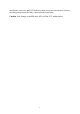
Table Of Contents
3. Then press the code connection button on the mouse, and the code connection LED
indicator on the mouse will light up once, and while moving the mouse, the "RCV" LED
indicator on the receiver will flash when the mouse works, which indicates that the
connection is normal.
Note: After replacing the batteries or when using the mouse for the first time, repeat Step 2
and 3.
Changing the connection signal codes
To avoid interference between equipment, one PC corresponds to the relevant desktop
connection signal codes. In case that there is interference between equipment, change the
signal codes. The interference between equipment only happens when several mice are used
at the same time.
1. Press the "CONNECT" button on the mouse for code connection.
2. Then press the "CONNECT" button on the receiver.
3. Press any button on the mouse, or move the mouse. (The time interval is 1~2 seconds
when connecting the codes of several mice.)
Software installation
WIN95/98/ME/2000/XP has the drive program, and it is unnecessary to install the drive
program. To achieve the best performance of the mouse, install the supplied drive program.
1. Turn on the PC and run "WINDOWS".
2. Insert the CD-ROM, and run "
F:\Wireless Mouse Driver\Setup.exe" program.
3. Follow the screen messages for the operation procedures step by step.
Using the mouse
Press the code connection button on the mouse and the receiver to ensure that the signal of
the mouse and the receiver is connected. Your mouse has three buttons: the left button, the
right button and the third button.
1. The usage of the scroll wheel is the same as the one on the common mice.
2. Before installing the drive program of the mouse, the function of the third button is the
same as that of the scroll wheel.
3. After installing the drive program, the third button can be set.
4. Energy saving technique is used for our mice, and there are 4 energy saving modes.
3