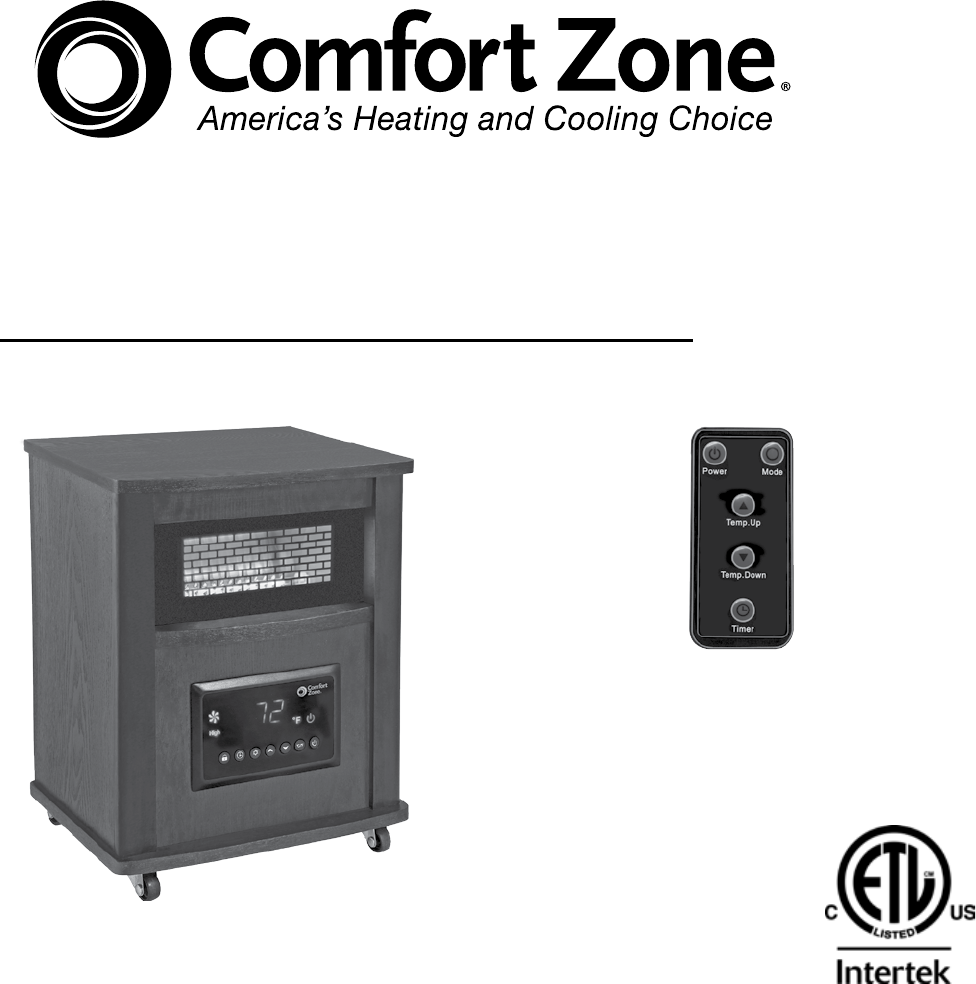
CZ2032O – Oak Finish CZ2032C – Cherry Finish CZ2032W –Walnut Finish QUARTZ INFRARED HEATER OWNER’S MANUAL PLEASE SAVE THESE INSTRUCTIONS
WARNING: READ THIS OWNER’S MANUAL CAREFULLY BEFORE USE. Thank you for choosing a Comfort Zone® Infrared Heater. This owner’s manual will provide you with valuable information necessary for the proper care and maintenance of your new product. Please take a few moments to thoroughly read the instructions and familiarize yourself with all the operational aspects of your new heater.
16. To disconnect heater, turn controls to OFF, then remove plug from outlet. Pull firmly on the plug, DO NOT unplug by pulling on the cord. 17. Always unplug the unit before moving or cleaning, or whenever the heater is not in use. 18. Use only for intended household use as described in this manual. Any other use not recommended by the manufacturer may cause fire, electric shock, or injury to persons. The use of attachments not recommended or sold by unauthorized dealers may cause hazards. 19.
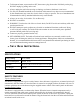
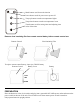
WARNING: This heater has a voltage rating of 120 volts. The cord has a plug as shown in (A). An adapter as shown in (C) is available for connecting three-blade grounding-type plugs to two-slot receptacles (B). The grounding lug extending from the adapter must be connected to a permanent ground such as a properly grounded outlet box. The adapter should not be used if a three-slot grounded receptacle is available. DO NOT DEFEAT THE SAFETY PURPOSE OF THE GROUNDED PLUG.
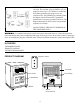
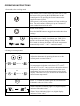
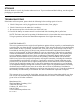
Control Panel 2 11 14 17 6 7 8 3 15 1 16 12 5 9 10 13 4 1. Signal-receiving window: for receiving remote control signal. 2. Digital display indicates set room temperature or time value of the timer. 3. Power indication light: indicates when the unit is connected to power supply and rear master power switch is on. 4. ON/OFF switch button: for power-on or off. 5. Mode button: for selecting the running mode. 6. High power mode indication light: the light is on when high power mode is set. 7.
Mode button: used for mode selection Power button: used for power-on or power-off Temp up button: to make set temperature higher Temp down button: to make set temperature lower Timer button: used for setting timer and adjusting time value of the timer Remove clear insulating film from remote control battery before remote control use Remote Control Clear Insulating Film To replace remote control battery, insert 1pc CR2025 battery Remote Control Battery Cover Battery PULL PUSH Preparation Place the
Operating Instructions 1. Start and select working mode With master power switch at the rear of the unit on, turn the heater on by pressing the POWER button on the control panel or by pressing the Power button on the supplied remote control. Once power is off, heating elements will stop working at first. Fan will continue working for up to 2 minutes to emit residual heat inside the unit. Select a heat setting. Press the MODE button to toggle between the three heat settings.
3. Setting timer-power-off Note: ONLY under power-on mode can you set timer-power-off function. Timer function not an excuse to leave heater unattended. After starting the unit, press the timer button on the control panel or remote control. Digital display changes from set temperature to time value for the timer. Each press of the timer button will increase the timer length by 1 hour up to 12 hours.
Maintenance 1. Turn off the power switch in the rear of the unit. 2. Unplug the unit and let it cool completely. 3. To keep the heater clean, the outer shell may be cleaned with a soft, damp cloth. You may use a mild detergent if necessary. After cleaning, dry the unit with a soft cloth. CAUTION: DO NOT let liquid enter the heater. 4. DO NOT use alcohol, gasoline, abrasive powders, furniture polish, or rough brushes to clean the heater. This may cause damage or deterioration to the surface of the heater. 5.
Storage Store the heater in a cool, dry location when not in use. To prevent dust and dirt build-up, use the original packaging to repack the unit. Troubleshooting If the heater will not operate, please check the following before seeking repair of service: 1. Check if the power cord is plugged into an electrical outlet, if not, plug in. 2. Check if electricity to the main fuse is working. 3. Be sure master power switch on the rear of the unit is on. 4.