
Installation Guide


© 2014 Johns Manville Inc. All Rights Reserved | 4
Insulating Basements:
How to Install Basement Insulation on Unframed Walls: Horizontal Installation
How to Install Basement Insulation on Unframed Walls: Vertical Installation
How to Install Insulation in a Finished Basement
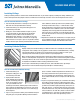
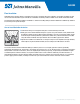
Basement walls and walls in unvented crawl spaces should be insulated to help prevent substantial heat loss. (A crawl space is
an unfinished, accessible area below the first floor of a building. An unvented crawl space is part of the basement while a vented
crawl space opens to the outside.) Unframed, exterior basement walls should be insulated with blanket insulation, which can be
installed horizontally or vertically. Typically, the blanket is held against the sill plate at the top of the basement wall with furring
strips. In addition to the furring strips, you will need patch tape, and depending on the installation method you choose, possibly a
Hilti-type gun and special fasteners for driving into concrete or cinder blocks.
Finished basements are insulated like any other room in your house.
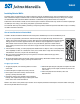
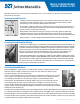
1. Seal around all penetrations in band joists. Any walls that leak water must be repaired
before insulating.
2. Pre-drill an ample supply of 1x2 furring strips.
3. Measure the length of insulation you’ll need for the full wall and cut it on the unfaced side.
4. Grip the insulation by the flange, and with the faced side toward you, position it against the sill
plate at the top of the basement wall. Then position a furring strip and nail through the furring and
the flange to the sill plate to secure the insulation. Whenever possible, pull the insulation behind
any ductwork, plumbing, or electrical that may lie along the walls. Otherwise, carefully cut and fit
the blanket around obstructions.
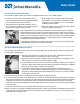
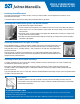
1. Seal around all penetrations in band joists. Any walls that
leak water must be repaired before insulating.
2. Cut lengths of insulation a few inches longer than the height
of the walls.
3. Attach the blanket to the wall using furring strips or a
Hilti-type gun to drive fasteners into the concrete or cinder
blocks. Fit adjacent blankets tightly together.
4. Trim the bottom of the insulation flush with the floor.
5. To give the insulation a finished look, tape over all joints and
with 3"-wide, white vinyl patch tape.
WALLS
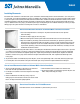
5. When you cover the full wall, you’ll need to attach a second length of the blanket to the lower edge of the first one. If you have
cut a piece to fit and there is no flange, create one by pulling back the insulation. Overlap the flanges of the top and bottom
pieces so that the insulation butts together tightly. Then, staple through the flange to hold the pieces together. An alternate
method is to attach furring strips to the wall at the mid-point and bottom of the wall. Then staple the blanket flange to the
furring strips.
6. To give the insulation a finished look, tape over all joints, seams and stapled edges with 3-inch wide, white vinyl patch tape.
7. Cut small pieces of batt insulation to fit against the header joists and push them into place between each floor joist.