
Installation guide

5.0 Powering Up the Device
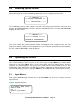
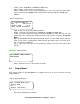
After powering up the unit, the following initialization screen is displayed on the LCD:
** COMMUNITY ***
** DXP4800 CONTROLLER ***
------ INITIALIZING ------
The initialization process takes about 8 seconds and during that period the unit boots and
displays the DXP4800 firmware version. After the initialization process is finished the DXP4800
displays its main screen:
** COMMUNITY ***
******** DXP4800 ********
PROGRAM:01 XXXXXXXXXXXX
The screen shows the current program number and program name assigned to the unit. The
program assigned is always the last program the user recalled or stored before powering down
the unit. Now the DXP4800 is ready to operate.
6.0 Operating the Device
Tips: Channel Linking - If the user presses one of the Input or Output Menu keys, holds it down
and presses any other Menu key(s) in the same group (Input or Output group), then the
channels are linked together. The green menu LEDs for the linked channels are lit. Any
modification of the data for the selected channel will be applied to the linked channels as well.
To cancel the linking, just press any other Menu key or the Sys key after releasing the held key.
6.1 Input Menus
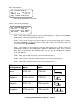
Each of the DXP4800 input channels has a separate Menu key. There are 3 menus for each
input channel.
Signal - Signal parameters
IN
_
1:XXXXXX MENU:Signal
LEVEL:0.00dB
POL :+
DELAY:0 (000.000ms)
Community DXP4800 Owner’s Manual Page 8