
Manual

COMP Cams®
3406 Democrat Rd.
Memphis, TN 38118
Phone: (901) 795-2400 Fax: (901) 366-1807
www.compcams.com
Part #187
Revised 7/17/06
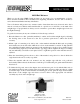
#4999 Rod Balancer
Thank you for choosing COMP Cams® products; we are proud to be your manufacturer of choice.
Please read this instruction sheet carefully before beginning installation, and also take a moment to
review the included limited warranty information.
Your rod balancer will produce very accurate results—better than almost any electronic unit—but it
must be correctly used. Please understand that this is a precision tool and relies on the truth of the
straight edges for proper function. Always store in a manner to protect these straight edges from even
the slightest damage.
To get the best accuracy from your rod balancer, follow the steps as listed.
1. Place the balancer on a flat - preferably machined – surface, and level the straight edges by adjusting
the leveling screw on the bottom cross bar. Use a precision spirit level to achieve the desired
accuracy.
2. Mount a pair of connecting rods, side by side, on the mandrel such that the little ends are pointing
horizontally away from each other while the cross hole in the mandrel is vertical. To help stabilize
the rod/mandrel assembly when it is mounted on the straight edges, set the rods at a slight 5-degree
downward facing angle away from their directly opposing positions. Tighten the large rod securing
nut just sufficiently to hold the rods in place but not so tight their position on the mandrel cannot be
adjusted.
3. Place the desensitizing pin into the cross hole of the mandrel, and position it so that it divides the
angle between the rods as evenly as possible.
4. Place the mandrel with the rods mounted onto the straight edge with the rods positioned
horizontally. When released, the heaviest rod will drop. To balance this pair, grind material from the
heaviest rod.
5. To balance the big ends, remove the adapter sleeve and mount a pair of rods with the little ends on
the mandrel and the big ends pointing away from each other. As before, make sure there is a slight
downward angle on the rods and that the desensitizing pin evenly splits the angle between them.
Place them on the straight edge and release as before. Grind on the appropriate rod until the
assembly stays level on the straight edge.
INSTRUCTIONS