
Troubleshooting guide
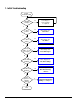
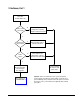
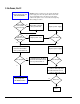
Table Of Contents
- Quick Troubleshooting Guide
- CONTENTS
- ABOUT THIS GUIDE
- GENERAL SERVICE INFORMATION
- TROUBLESHOOTING FLOWCHARTS
- 1. Initial Troubleshooting
- 2. No Power, Part 1
- 3. No Power, Part 2
- 4. No Power, Part 3
- 5. No Video, Part 1
- 6. No Video, Part 2
- 7. No Video, Part 3
- 8. Error Messages Part 1
- 9. Error Messages, Part 2
- 10. Error Messages, Part 3
- 11. No O/S Loading
- 12. No O/S Loading from Hard Drive, Part 1
- 13. No O/S Loading from Hard Drive, Part 2
- 14. No O/S Loading from Hard Drive, Part 3
- 15. No O/S Loading from Diskette Drive
- 16. No O/S Loading from CD-ROM Drive
- 17. No O/S Loading from Network
- 18. Non-Functioning Device
- FURTHER TROUBLESHOOTING
- POST ERROR MESSAGES
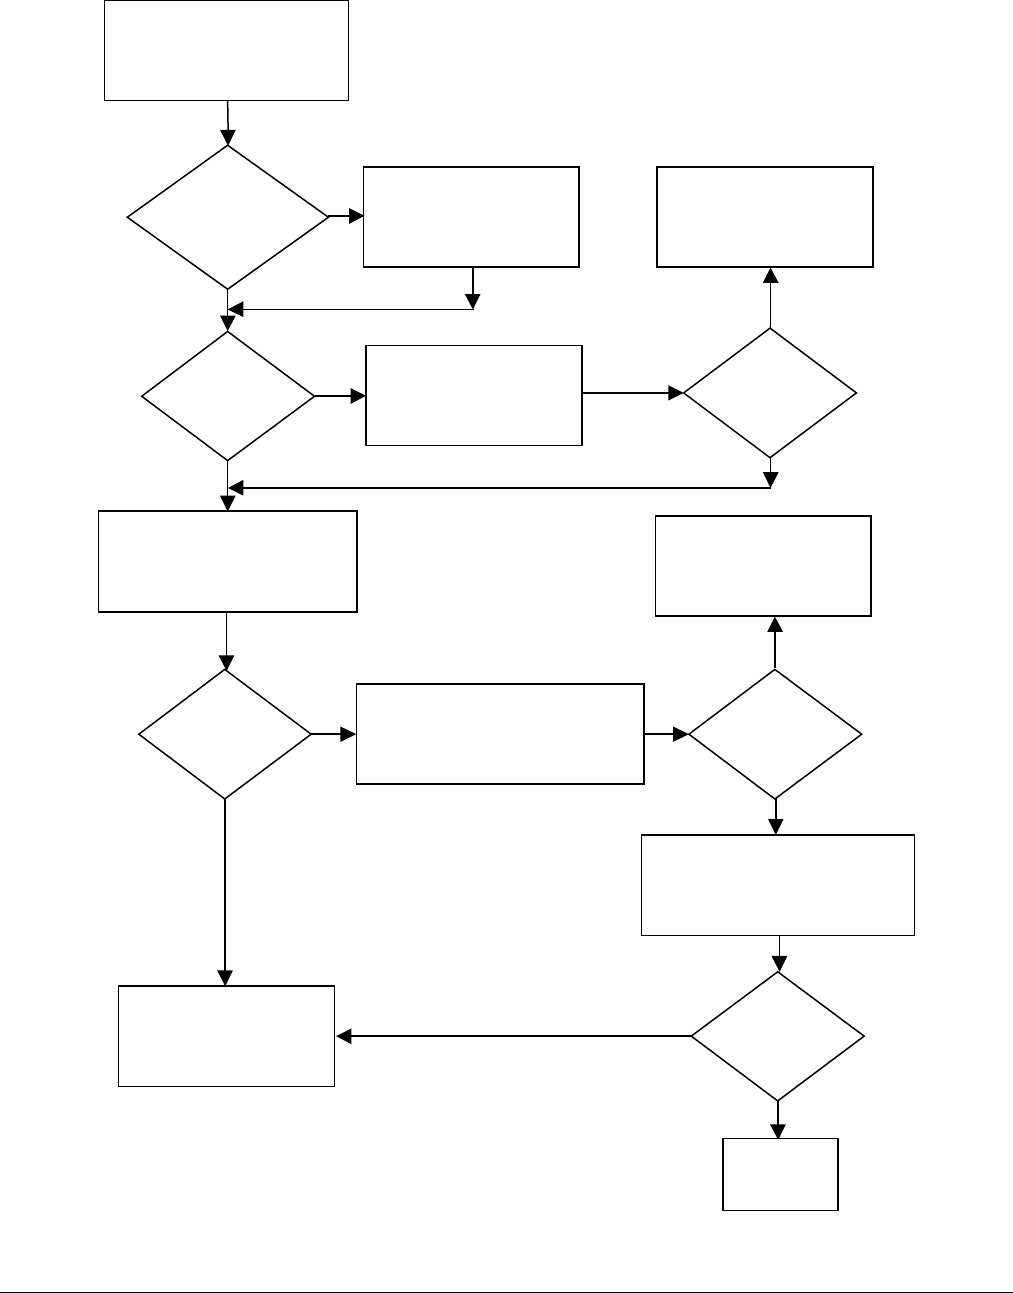
2-4 Troubleshooting Flowcharts
3. No Power, Part 2
Continued from page 2-3,
No Power, Part 1.
System
board have 5V
Aux LED?
Plug power connector
into system board.
N
Plug in power cord.
Power supply
connected to
system board?
5V Aux LED on?
Replace power supply.
1. Press power button on.
2. Check for fan rotation.
3. Press power button off
.
Does fan spin?
N
N
1. Unplug power to all drives.
2. Remove all installed cards.
3. Press power button on.
Does fan spin?
Replace power supply.
YY
1. Add drives back one-at-
a-time to find faulty drive.
2. Add cards back one-at-
a-time to find faulty card.
Power on?
Done
Y
N
Go to Page 2-5,
No Power, Part 3
Caution: Power is continuous to the system board and
power supply even when the power switch is turned off.
To prevent damage to the unit, disconnect the power
cord from the power source or the unit before beginning
disassembly procedures
.
Y
N
Y
N
Y