Compaq Armada 6500 Family Reference Guide Part Number: ER-PM1CC-UA.
June 1998 The information in this document is subject to change without notice and should not be construed as a commitment by Compaq Computer Corporation. Compaq Computer Corporation assumes no responsibility for any errors that might appear in this document. The software described in this document is furnished under a license and may be used or copied only in accordance with the terms of such license.
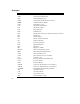
Table of Contents 1 Documentation Kit Quick Setup Guide...................................................................................................................... 1-1 Reference Guide ......................................................................................................................... 1-1 HTML On-line Help ................................................................................................................... 1-2 Related Documentation ................................
Using Your Modem .................................................................................................................. 2-19 Country Select Utility ........................................................................................................ 2-19 How to Use Country Select ............................................................................................... 2-20 More Information ..................................................................................................
Memory Upgrades Installing Additional Memory ............................................................................................. 5-2 Removing Memory.............................................................................................................. 5-4 6 Troubleshooting Notebook Computer Troubleshooting ........................................................................................ 6-2 LCD Troubleshooting........................................................................
Acronyms Acronyms vi Meaning ACPI Advanced Configuration Power Interface APM Advanced Power Management BIOS Basic Input/Output System CMOS Complementary Metal Oxide Semiconductor DIMM Dual In-line Memory Module DMA Direct Memory Access DVD Digital Video/Versatile Disk FAT File Allocation Table FDD Floppy Disk Drive HDD Hard Disk Drive IDE Integrated Drive Electronics (internal hard disk drive interface) FIR Fast Infrared IRQ Interrupt Request ISA Industry Standard Architecture
Special Notices Three kinds of special notices are used in this guide to emphasize specific information. ________________________ WARNING __________________________ Warning: Indicates the presence of a hazard that can cause personal injury if the hazard is not avoided. ____________________________________________________________ _________________________ Caution ___________________________ Caution: Indicates the presence of a hazard that might cause damage to hardware or that might corrupt data.
viii
1 Documentation Kit This chapter overviews the contents of the documentation kit provided with the Compaq Armada 6500 Family notebook computer. The Compaq Armada 6500 Family documentation kit contains: · Compaq Armada 6500 Family Quick Setup Guide · Compaq Armada 6500 Family Reference Guide · Compaq Armada 6500 Family HTML On-line Help Quick Setup Guide This guide assists you in setting up your Armada 6500 Family notebook for the first time.
Documentation Kit · Chapter 2: Getting To Know Your Computer – introduces you to the notebook’s industry leader features and controls. It also describes how to use the integrated touch pad as well as how to replace the notebook computer’s main battery pack. · Chapter 3: System Software & Restoration – provides an overview of the applications and utilities supplied on the Compaq Software CD. It also provides detailed instruction on how to restore your system using the Compaq QuickRestore CD.
Documentation Kit · PC Cards – provides detailed instructions on using and configuring PC Cards in Windows 95, Windows 98, and Windows NT. Included in this section is an IRQ resource table showing which IRQ resources can be freed in the event of a conflict. · Modules – provides basic instruction on removing and installing your CD-ROM, Floppy, and Optional Drive Modules.
Documentation Kit Compaq Web Sites Please visit the Compaq Web Site to download the latest Compaq Armada 6500 Family operating system drivers and on-line User information. A comprehensive list of country specific Compaq Web Sites has been added to your Favorites folder. To access the Compaq Web Site for your country: 1. Click the Start button located on the Windows Taskbar, then click Favorites. 2. Select the general area that applies to you: · Compaq Americas · Compaq Asia Pacific · Compaq Europe 3.
2 Getting to Know Your Computer This chapter identifies and describes the industry leader features, components, controls, and indicators of your Compaq Armada 6500 notebook computer. It also describes how to use the integrated touch pad as well as how to replace the system battery. Features The Compaq Armada 6500 is a high-performance notebook computer designed for the mobile professional. It offers the best-in-class features for a notebook computer. · Intel Pentium II Processor 300 MHz or greater.
Getting to Know Your Computer Components, Controls, and Indicators This section shows the locations and provides a description of the different components on your Compaq Armada 6500 notebook computer. Front and Right Side Components 2-2 Component Description ➊ Power LED Battery Charging LED The green Power LED (lower) lights when the notebook is On. The amber Battery Charging LED (upper) lights when the battery is charging. ➋ Lid Release One of two lid releases.
Getting to Know Your Computer DEC01547-2 Figure 2-1 Front and Right Side View 2-3
Getting to Know Your Computer Front and Left Side Components 2-4 Component Description ➊ Lid Release One of two lid releases. Push in both releases at the same time to open the LCD panel. ➋ ➌ Speaker Left stereo speaker used to hear sound files and system sounds. PC Card Ejectors Ejects a PC Card. Top button releases a PC Card from the top slot; the bottom button releases a PC Card from the bottom slot. ➍ PC Card Slots Supports two Type I or Type II cards or one Type III card.
Getting to Know Your Computer DEC01546 Figure 2-2 Front and Left Side View 2-5
Getting to Know Your Computer Back Components Component Description ➊ ➋ External Power In Input connection for Universal AC adapter. Universal Serial Bus (USB) Port A USB device, such as a mouse, keyboard, or digital camera connects to this port. ➌ RJ45 Ethernet Network Port A 10 or 100BaseT Ethernet line connects to this port. ➍ ➎ RJ11 Modem Port An analog telephone line connects to this port. Serial Port A serial device, such as a mouse, graphics tablet or scanner connects to this port.
Getting to Know Your Computer Bottom Components Component Description ➊ ➋ ➌ Battery Release Releases the LiIon battery from the notebook computer. LiIon Battery Provides power to your notebook computer. Expansion Bay Module Release Releases the drive module installed in the Expansion Bay. ➍ ➎ Memory Door Provides access to notebook computer’s memory. Docking Connector Door Provides access to the notebook’s docking connector.
Getting to Know Your Computer Controlling Power The Suspend/Power button not only enables you to take advantage of the built-in power saving features but also turns the notebook On and Off. Goal Action On/Resume Press this button to turn the system On or resume normal operation from the Suspend mode. Suspend Press this button to place your system in Suspend mode. Lid Switch Close the LCD panel to place the system into Suspend mode.
Getting to Know Your Computer Using the Touch pad The touch pad is a touch-sensitive pointing device that provides all the features of a mouse. Although its operation differs from a mouse, its function is the same – to move the cursor around the screen. Please refer to Figure 2-5 and the following explanation on how to use the touch pad.
Getting to Know Your Computer 1. With your fingers on the keyboard in the normal typing position, the touch pad is easily accessible by moving either your thumb or a finger down on to the touch pad. 2. Gently move your thumb or finger across the touch pad in the direction you want the cursor to move. 3. By default, the touch pad’s left button is equivalent to the left button on a conventional two-button mouse.
Getting to Know Your Computer To power the notebook using the supplied Universal AC Adapter, refer to the following instructions: 1. Connect the Universal AC Adapter cord to the External Power input port on the notebook computer (Figure 2-6, step 1). The arrow on the connector should be on top. 2. Plug the power cord into the Universal AC Adapter (Figure 2-6, step 2). 3. Plug the power cord into a working electrical outlet (Figure 2-6, step 3). 4.
Getting to Know Your Computer ________________________WARNING_____________________________ Do not use an external power adapter other than the one provided by Compaq Computer Corporation for the Compaq Armada 6500 notebook computer and options. To avoid personal injury and/or equipment damage, do not open the case of the power adapter. There are no customer serviceable parts.
Getting to Know Your Computer Using the Battery Your Compaq Armada 6500 notebook computer has an easily removable main battery pack. This section describes how to maintain and replace the notebook computer’s main battery pack. Preparing the Battery for Use Your Compaq Armada 6500 notebook uses a Smart Battery. The battery has circuitry that reports the amount of charge in the battery to the system.
Getting to Know Your Computer Battery Removal and Installation Your Compaq Armada 6500 is equipped with a Bridge Battery that provides power for up to four minutes when changing the notebook computer’s main battery. The addition of the Bridge Battery means you do not have to waste valuable time powering off and rebooting the system in order to change the main battery. Place the notebook into Suspend, remove the drained battery and replace it with a fully charged one. Then resume normal operation.
Getting to Know Your Computer 3. While depressing the battery near the latch (Figure 2-8a, step 1), slide the battery latch to the unlock position (Figure 2-8a, step 2).
Getting to Know Your Computer 4. Lift the battery up and out of the notebook computer (Figure 2-8b, step 3).
Getting to Know Your Computer Installing the Battery To install the battery: 1. Verify that the battery latch is in the unlock position (Figure 2-9a, step 1). 2. Place the battery in the battery compartment (Figure 2-9a, step 2).
Getting to Know Your Computer 4. While pressing down on the battery near the latch (Figure 2-9b, step 3), slide the battery latch to the lock position (Figure 2-9b, step 4).
Getting to Know Your Computer Using Your Modem Prior to using your internal modem, you must ensure the following: · The modem is properly configured for the country in which it will be used via the Country Select Utility, and · The appropriate adapter cable is supplied. A modem adapter cable is supplied for the country in which the notebook computer was purchased.
Getting to Know Your Computer How to Use Country Select The Country Select utility is automatically copied to your hard drive during Windows Setup. A Country Select icon is also installed in the Windows program group so that the utility can be rerun if the country settings need to be changed. Follow the steps below to run Country Select. 1. Click the [Start] button located on the Windows Taskbar, then click [Programs]. 2. Double-click the Country Select icon in the CreditCard program group. 3.
3 System Software & Restoration This chapter provides an overview of the applications and utilities supplied on the Compaq Software CD as well as directions on how to restore your system using the Compaq QuickRestore CD. Installing Optional Software The Compaq Software CD contains on-line documentation, applications, utilities, and drivers for the notebook computer. The Software CD has a menu driven program making it easy to install and access the applications and information.
System Software & Restoration Application Description The following details the applications available on your Compaq Software CD and provides an explanation of each. Software Title Software Description Adobe Acrobat Reader 3.1 Acrobat Reader allows you to view .PDF user documentation files provided on the Compaq Software CD. Puma IntelliSync97 IntelliSync97 for Windows is a powerful notebook-to-notebook or notebook-to-PC software solution that allows you to synchronize all your data.
System Software & Restoration Utilities The following details the utilities available on your Compaq Software CD and provides explanation of each. Utilities Utility Description Make Boot Diskettes This utility allows you to create a bootable diskette set. The Boot Diskette set allows you to boot directly to DOS. It provides a menu-driven interface offering options to partition and format the hard drive or run the AMI Diagnostics utility.
System Software & Restoration 6. The program will prompt you to remove your CD-ROM Drive and insert the Floppy Drive. The CD-ROM and Floppy Drives are hot swappable; there is no need to power down the notebook before swapping drives. Replace the drive now. There will be a short delay as system the recognizes the new drive. When touch pad/mouse functionality returns, insert the first formatted diskette and click [OK]. 7.
System Software & Restoration 4. Choose option [3] Run AMI System Diagnostics. 5. You will be informed that the AMI Diag Program files will be extracted to a RAM drive and that the process will take approximately one minute. Press [Y] to proceed. 6. The utility will detect your system hardware configuration and extract the required compressed diagnostics files into RAM drive. Upon file de-compression the main menu will be displayed.
System Software & Restoration Using AMI Diagnostics on Diskette AMI Diagnostics can also be run from the Boot Diskette Set created in Creating a Boot Diskette Set. If you would prefer to run AMI Diagnostics from diskette instead of CD, create a Boot Diskette Set now. To run AMI Diagnostics from diskette: 1. Insert Armada Boot Diskette 1 into the Floppy Drive and power on the notebook. Enter the System Setup Program by pressing [fn]+[F3] key combination when the Compaq logo appears. 2.
System Software & Restoration 7. At the end of each diagnostic run, you will be notified if the test ran successfully or if errors were encountered. If errors were encountered, you will be given a choice to view the error log file to determine the nature of the problem encountered by the diagnostic. All test results are written to a file named AMIDIAG.LOG. This file can be viewed by selecting the Display Error Log File option from the Options menu.
System Software & Restoration QuickRestore Procedures Before using the Compaq QuickRestore CD to restore the factory installed software on a new hard drive or a non-Windows 95/98 formatted hard drive, you must first complete steps 1 through 13. If you are using the Compaq QuickRestore CD to restore the factory installed software on a hard drive formatted for Windows 95/98, proceed to step 14.
System Software & Restoration 7. The FDISK menu will appear. If using QuickRestore on a non-Windows 95/98 formatted hard drive, choose option [3]. If using QuickRestore on new hard drive, proceed to step 9. 1) Create DOS partition or Logical DOS Drive 2) Set active partition 3) Delete partition or Logical DOS Drive 4) Display partition information 8. A Delete menu will appear. Choose option [4] to delete a non-DOS partition. FDISK will delete the existing partitions and return you the FDISK Options menu.
System Software & Restoration 16. Choose the option [2] Restore your system using the QuickRestore CD. You will be prompted whether or not to continue the Restore process. Press [ctrl]+[c] at any prompt to exit this process or press the space bar to continue. After the last question, the system will format and copy the system files onto your Drive C:. ________________________ CAUTION ___________________________ Do not press any keys beyond this point. Pressing certain keys may cause QuickRestore failure.
4 Configuring Your Notebook This chapter provides information on how to configure your notebook computer and its security features using the System Setup Program. Your notebook computer is configured with default settings selected for typical notebook computer use. If you are familiar with System Setup programs, refer to the appropriate sections in this chapter for information on configuring or updating your notebook computer.
Configuring Your Notebook Updating Your Notebook Computer's Configuration There are a number of hardware features that can be configured on your notebook computer.
Configuring Your Notebook Helpful Hints There are several keyboard keys assigned to help you select menus and sub-menus, options, and to change option values. Legend Key Alternate Key Function F1 Alt + H Displays the General Help window. ESC Alt + X Exits the current menu and returns you to the previous screen. ¬ or ® Selects a different menu bar item. - or ¯ Moves the cursor up and down between fields.
Configuring Your Notebook Main Menu Feature Settings Comments System Time Enter current time: hour, minute, second format. Sets the system to specified time. System Date Enter current date: month, day, year format. Sets the system to specified date. Diskette Display only field Indicates the notebook is configured to support a 1.44/1.25MB 3 ½ " floppy drive.
Configuring Your Notebook Advanced Menu Field Settings Comments Secured Setup Configurations No* Select Yes to prevent a Plug and Play Operating System from changing system settings. I\O Device Configuration Submenu Peripheral Device Configuration: Refer to I/O Device Configuration Submenu for a description of the available settings. Reset Configuration Data No* Select Yes to clear all Plug and Play configuration information stored in Extended System Configuration Data non-volatile RAM.
Configuring Your Notebook Continued Field Settings Comments Serial Port Disabled Disables the onboard Serial Port. Enabled Enables and allows you to manually configure the I/O address and Interrupt Request (IRQ) line for the Serial Port. Auto* Enables and automatically configures the Serial Port. Disabled Disables the onboard Infrared Port.
Configuring Your Notebook Security Menu Feature Settings Comments Supervisor Password Is Display only field. When set to Clear, a Supervisor Password has not been set. User Password Is Display only field. When set to Clear, a User Password has not been set. Set Supervisor Password Enter a password of up to eight alphanumeric characters. Password is not case sensitive. This option allows you to set a Supervisor Password that will be required to enter the System Setup.
Configuring Your Notebook Notebook Computer Security Notebook Computer Security is important to avoid theft or accidental loss of your computer software and hardware. The Compaq Armada 6500 provides the following levels of protection: · User Password – Used to prevent unauthorized access to your notebook computer and prevent unauthorized removal of the notebook from a docking option. The User Password also allows access to a subset of the System Setup options.
Configuring Your Notebook 6. Type in your password and press [Enter]. The password can be up to eight alphanumeric characters and is not case sensitive. Symbols and other keys are ignored. To confirm, type in your Supervisor Password a second time and press [Enter]. __________________________ Note _____________________________ If a password already exists, you will be prompted to enter the old password before a new one can be set. ____________________________________________________________ 7.
Configuring Your Notebook __________________________ Note _____________________________ If a password already exists, you will be prompted to enter the old password before a new one can be set. ____________________________________________________________ 7. When the Notice dialog box appears notifying you that changes have been saved, press [Enter]. 8. Select the Exit menu and choose Exit Saving Changes to save your new settings and exit System Setup.
Configuring Your Notebook Password on Undock Setting a User Password and enabling Password on Undock prevents unauthorized undocking of the notebook from the Compaq Mobile 6500 Expansion Unit and/or the Compaq Armada 6500 Convenience Base. When a request is made to undock the notebook, you will be prompted for a password. Enter either the Supervisor or User Password to complete the undock request and undock the notebook.
Configuring Your Notebook Continued Feature Settings Comments Auto Suspend Timeout Off This option allows you to specify a period of time the system is in Standby before entering Suspend. Selected times Suspend is similar to Standby except all devices are powered down (with the exception of system memory, if Suspend Mode is set to Suspend to RAM). To resume operation, press the Suspend/Power button.
Configuring Your Notebook Continued Feature Settings Comments Resume On Time Off* When this option is set to On and Suspend Mode is set to Suspend to RAM, the system wakes the system up at the time defined in Resume Time. Resume on Time will not work when the Suspend Mode is set to Save to Disk. On Resume Time Enter resume time: hour, minute, second format. This option sets the time that the system will wake up from Suspend.
Configuring Your Notebook Exit Menu Enter the Exit Menu to save changes, set factory defaults or exit the System Setup Program. 4-14 Feature Action Comments Exit Saving Changes Exit System Setup and save your changes to CMOS. Exit Discarding Changes Exit System Setup without saving data to CMOS. Load Setup Defaults Load default values for all System Setup items. Discard Changes Load previous values from CMOS for all Setup items.
5 Memory Upgrades Your Compaq Armada 6500 notebook computer comes with 64MB of onboard SDRAM memory. You can add additional memory up to a total of 192MB or greater. The Compaq Armada 6500 supports 3.3V SDRAM 66MHz (or faster) 144-pin SO-DIMM modules. Additional memory is available in 32MB and 64MB SO-DIMMs. DIMMs can be installed as single modules. ________________________ CAUTION___________________________ · You must turn Off the notebook computer's power before removing or installing memory.
Memory Upgrades Installing Additional Memory To install additional memory: 1. Save all data and shutdown any running applications, then turn off the notebook computer. Ensure that the notebook computer is not in suspend mode. 2. Turn the unit over so the bottom is facing up. 3. Remove the memory compartment cover using your fingernail (Figure 5-1).
Memory Upgrades 4. Align the notch in the 3.3v SDRAM memory module with the plastic tab in the memory cradle (Figure 5-2, step 1). 5. Install the memory module by inserting it at an angle of approximately 45 degrees into one of the two sockets (Figure 5-2, step 2). 6. Gently press the module down until it snaps into place (Figure 5-2, step 3). 7. Replace the memory compartment cover and press around the edges to make sure it is properly seated.
Memory Upgrades Removing Memory To remove memory: 1. Save all data and shutdown any running applications. 2. Turn off the notebook computer. Ensure that the notebook computer is not in suspend mode. 3. Turn the unit over so the bottom is facing up. 4. Remove the memory compartment cover using your fingernail (Figure 5-1). 5. Push the tabs away from the edge of the memory module to be removed (Figure 5-3, step 1). The memory module will pop up at an angle of approximately 45 degrees when released.
6 Troubleshooting This chapter provides troubleshooting tables listing specific problems, probable causes, and recommended actions to take if you are experiencing difficulty with your notebook computer’s hardware or software. If your notebook fails after trying the techniques described in this chapter, run the AMI Diagnostics utility as described in Chapter 2 and contact your Compaq service center representative.
Troubleshooting Notebook Computer Troubleshooting Problem Possible Cause Action System does not start when the notebook computer is turned on and running on battery power. Battery Pack is drained. Charge the Battery Pack. Battery Pack is defective. Replace the Battery Pack. Main logic board failure. Press the Reset Button located on the rear of the notebook computer (Figure 2-3), then restart the system.
Troubleshooting Problem Possible Cause Action Notebook computer operates incorrectly after installing an optional memory module. Memory module installed incorrectly. Power off the notebook before removing the memory door. Remove memory module and reinstall (Figures 5-1 - 5-3). Memory module failed. Replace memory module. Used non-qualified memory. Refer to the list of qualified memory DIMMs located in the Compaq Windows Enterprise Web site. System in locked state.
Troubleshooting Problem Possible Cause Action Notebook computer does not boot from the Diskette Drive. Diskette is worn or damaged. Try another diskette. The Boot Priority “Diskette Drive” option in System Setup is set to lower priority than the other devices. Reboot the system and press the [fn] + [F3] key combination when the Compaq logo appears to enter System Setup. Set the Boot Priority “Diskette Drive” option in System Setup to priority 1 position. Diskette does not contain system files.
Troubleshooting Problem Possible Cause Action An external monitor is connected and is not working. Loose or incorrect cable connections. Check all cable connections, including AC power. The notebook’s video mode may be in LCD Display Only mode. Use the [fn] + [F4] key combination to switch to Simul Scan mode (simultaneously viewing both LCD display and External Monitor display) or External Monitor Only mode. TV output is selected.
Troubleshooting LCD Troubleshooting Problem Possible Cause Action Power is on, but there is no LCD display. Notebook computer Standby Timer expired. Press any key to resume operation. Notebook computer Video Timer expired. Press a key on the keyboard or move your finger across the touch pad. Notebook computer Auto Suspend Timer expired. Press the [Suspend/Power] button to resume operation. Notebook computer running in CRT mode. Press [fn] + [F4] until the LCD display is active.
Troubleshooting PC Card Troubleshooting Problem Possible Cause Action PC Card does not work. Card improperly inserted. Insert the card label-side up. When card is inserted properly, you should hear at least 1 short beep. Two beeps indicate the card has been inserted properly and recognized. Device drivers missing or improperly installed. Run the troubleshooting wizard from the operating system’s on-line help. Card not supported.
Troubleshooting Problem Possible Cause Action SRAM card does not work (single beep). Missing device driver(s). Refer to the operating system’s on-line help for information on configuring SRAM PC Cards. SRAM card does not work (double beep). Incorrect drive letter assigned. Refer to operating system’s on-line help. SRAM card not formatted.
Troubleshooting Audio and IR Troubleshooting Problem Possible Cause Action Sound is not working. Audio volume needs to be increased. Adjust audio volume by pressing the [fn]+[s] hot key combination. System audio has been turned off. Check the sound icon located on the Windows Taskbar. If sound is disabled/muted, press [fn] + [F7] to toggle on the internal audio feature. Configuration problem.
Troubleshooting 6-10
A Technical Specifications GTX6300MD System Specifications Feature Specification CPU Intel Pentium II 300 MHz MMX LCD 14.1" XGA TFT HDD 6 GB L2 Cache 512KB Base RAM 64MB – SDRAM 3.3v Maximum RAM 192MB or greater RAM Expansion Dual 144 pin SO–DIMM 3.
Technical Specifications Feature Specification Size 9.7" x 12" x 1.4" Weight (no FDD or CD-ROM in bay) 5.96 lbs. (approximate) Weight (FDD in bay) 6.27 lbs. (approximate) Weight (CD-ROM in bay) 6.46 lbs. (approximate) Operating System Windows 95 or Windows NT 4.0 Warranty 3 years The information in this document is subject to change without notice and should not be construed as a commitment by Compaq Computer Corporation.
B Compaq Customer Support Preparing for a Technical Support Call If you cannot solve a problem using the troubleshooting tips in Chapter 6, you may need to call technical support.
Compaq Customer Support Worldwide Telephone Numbers Locate your geographical area in the following table and use one of the telephone numbers for Compaq assistance General Information Numbers—Product information, technical assistance, and the location of your nearest Compaq authorized dealer, reseller, or service provider. Technical Support Numbers—Hardware technical support in analyzing system configuration and diagnostic problems or troubleshooting.
Compaq Customer Support Worldwide Telephone Numbers Continued Country Code Telephone Number Compaq Care Center Bel Lux 0903-99036 (45 BFr/min.) 089/89.
Compaq Customer Support Worldwide Telephone Numbers Continued Location Country Code Telephone Number Denmark General Information Technical Support +45 +45 -45-90-45-90 -45-90-45-45 Eastern Europe, Middle East, and Africa Technical Support and Information +353 Technical Support Fax +353 -1-402-6833 -1-402-6855 Ecuador General Information +59 -3-225-4343 +358 +358 (9) 615-599 0203-206-720 (9) 615-559-870 +33 +33 -1-41-33-41-33 -1-41-33-44-55 Finland General Information Technical Support* QuickL
Compaq Customer Support Worldwide Telephone Numbers Continued Location Country Code India General Information PaqFax BBS Telephone Number 91-80-559-6023 91-80-559-8989 91-80-559-8900 Israel General Information +972 -3-6363-444 Technical Support +972 -3-6363-444 PaqFax +972 -3-6396-601 Italy Presales Information* 167 464911 Technical Support +39 (02) 69633281 BBS +39 (02) 89200222 Order Software Backup* Fax 167 859030 +39 (02) 69633282 Japan General Information* 0120-101-589 Technic
Compaq Customer Support Worldwide Telephone Numbers Continued Location Country Code Telephone Number Netherlands General Information 0182-565805 Customer Support* 06-91681616 (Dfl. 0.75/min) Fax* 06-8991116 (Dfl. 0.
Compaq Customer Support Worldwide Telephone Numbers Continued Location Country Code Telephone Number General Information +46 -8-703-5240 Technical Support +46 -8-703-5240 PaqFax (hämtfax) +46 -8-703-5225 QuickLine (BBS) +46 -8-703-5220 Sweden Switzerland General Information 0844 844 111 Technical Support 01/838 22 22 (German) 01/838 22 23 (French) QuickLine Bulletin Board 01/838-24 21 Order Software Backup 0800 556 206 Taiwan General Information 886-2-7351000 Technical Support 886
Compaq Customer Support Worldwide Telephone Numbers Continued Venezuela General Information B–8 +58 -2-953-6944
C Regulatory Notices Throughout these regulatory notices, Compaq products are referred to by their regulatory agency series numbers. Regulatory Agency Series Numbers Regulatory agencies worldwide use agency series numbers for product identification. Each approved product displays the assigned agency series number. To ensure continued safe and reliable operation, the products listed below should be used only with the Compaq PP2020 agency series of computers.
Regulatory Notices Federal Communications Commission Notice This equipment has been tested and found to comply with the limits for a Class B digital device, pursuant to Part 15 of the FCC Rules. These limits are designed to provide reasonable protection against harmful interference in a residential installation. This equipment generates, uses, and can radiate radio frequency energy and, if not installed and used in accordance with the instructions, may cause harmful interference to radio communications.
Regulatory Notices For questions regarding this declaration, write Compaq Computer Corporation P. O. Box 692000, Mail Stop 510101 Houston TX 77269-2000 or call 281-514-3333 To identify your product, refer to the part, series, or model number found on the product. If you have questions about your product that are not related to this declaration, please write Compaq Computer Corporation P. O.
Regulatory Notices Japanese Notice German Ergonomics Notice The Compaq PP2020 agency series of computers meet the requirements of ZH 1/618 (German Safety Regulations for Display Work Places in the Office Sector) when used in conjunction with docking bases, keyboards, and monitors that bear the “GS” approval mark. The Compaq PP2020 agency series of computers in a stand-alone mode are not intended for continuous use in an office environment.
Regulatory Notices Battery Notice ________________________ WARNING __________________________ This computer contains two internal batteries: a lithium coin cell real time clock battery and a nickel metal hydride bridge battery pack. There is a risk of explosion and injury if the batteries are incorrectly replaced or improperly handled. Do not attempt to recharge, disassemble, immerse in water, or dispose of them in fire.
Regulatory Notices greater than the voltage and current rating marked on the product. In addition, the diameter of the wire must be a minimum of 0.75 mm²/18AWG, and the length of the cord must be between 5 feet (1.5 m) and 6½ feet (2 m). If you have questions about the type of power cord to use, contact your Compaq authorized service provider. A power cord should be routed so that it is not likely to be walked on or pinched by items placed upon it or against it.
Regulatory Notices Laser Information Laser Type: Semiconductor GaAlAs Wave Length: 780 ± 35 nm Divergence Angle: 53.5° ± 1.5° Output Power: Less than 0.2mW or 10,869 W·m sr Polarization: Circular Numerical Aperture: 0.45 ± 0.04 -2 -1 Only authorized technicians trained by Compaq should attempt to repair this equipment. All troubleshooting and repair procedures are detailed to allow only subassembly/module level repair.
Regulatory Notices Modem Notices FCC Regulations - Part 68 To comply with the Federal Communications Commission (FCC) Rules and Regulations, Part 68, these instructions must be followed: 1. Your modem must not be connected to a party line or coin-operated telephone. 2. If a problem occurs on the telephone line, your modem must be disconnected from the telephone line until it has been determined that your modem is not the cause of the problem. 3. All repairs to your modem must be made by Xircom, Inc.
Regulatory Notices If your telephone equipment causes harm to the telephone network, the telephone company may discontinue your service temporarily. If possible, they will notify you in advance. But if advance notice is not practical, you will be notified as soon as possible. You will be informed of your right to file a complaint with the FCC. Your telephone company may make changes in its facilities, equipment, operations or procedures that could affect the proper functioning of your equipment.
Regulatory Notices Users should ensure for their own protection, that the electrical ground connections of the power utility, telephone lines and internal metallic water pipe system, if present, are connected together. This precaution may be particularly important in rural areas. Caution: Users should not attempt to make such connections themselves, but should contact the appropriate electric inspection authority, or electrician, as appropriate.
Regulatory Notices British Approvals Board for Telecommunications (BABT) The following information is provided in compliance with requirements of the British Approvals Board for Telecommunications (BABT). It includes a sample “Application Form for Installation of Modular Telephone Sockets.” Xircom CreditCard Ethernet 10/100+Modem 56 User’s Guide p/n 800-0161-001/Revision B September 1997 This user guide refers to: CreditCard Ethernet 10/100+Modem 56 Manufactured by:Xircom Europe n.
Regulatory Notices for approval under General approval NS/G/1234/J/10003. Further details of this general approval and the conditions pertaining to it are given in OFTEL update SA29, available from: The Librarian OFTEL Export House 50 Ludgate Hill London EC4M 7JJ This modem is not approved for UK leased line operation. Suitability for Use If you have any doubt about the suitability, connection or use of this modem consult a suitably qualified person before continuing.
Regulatory Notices The output power of this modem is fixed and cannot be changed by the user. The approval mark attached to this product indicates that the modem itself carries BABT approval. No approval is conferred on the host computer or the serially connected computer and the label must not be transferred to the case of the computer. A copy of the approval label may be attached to the telephone line cable. The approval label must not be removed.
Regulatory Notices Pulse Dialing The &Pn command is provided for software compatibility only. The pulse ratio is fixed at 67:33 and cannot be changed. The setting of this parameter is ignored by the internal control software. Timing The S-Register ranges for S6, S7, S8, and S11 are restricted and cannot be altered outside the UK permissible limits. Repeat Attempts The modem cannot initiate repeat call attempts.
Regulatory Notices Call Attempt Minimum duration between call attempts for call pattern Attempts A B C D Initial attempt 5S 5S 5S 5S 1st repeat attempt 1 min 2 min 10 min 3 min 2nd repeat attempt 1 min 2 min 10 min 3 min 3rd repeat attempt 1 min 2 min 10 min 3 min 4th repeat attempt End of sequence 2 min 10 min 3 min 2 min 10 min 3 min (Note 1) 6th repeat attempt End of sequence 7th repeat attempt nth repeat attempt (Note 1) 10 min 3 min 10 min 3 min (note 2) (note
Regulatory Notices Identification of Ports The modems is fitted with a multi-way connector which provides the power and digital signals to the modem. The RJ11 style connector provides the interface to PSTN. Network Connection The modem is supplied with a lead terminated with a BT modular plug. The connections are as follows: (PSTN) A Wire 2 B Wire 5 Dialing Modes BS6789:Section 3.1 defines three dialing modes. Modes 2 and 3 cover autodialing devices which play recorded messages.
Regulatory Notices Application Form For Installation Of Modular Telephone Sockets To the customer: If your current telephone installation is not equipped with the new modular telephone socket you must have one fitted by your telephone service provider. Please complete this form and return it to your local telephone sales office. You will find the address and telephone number in the your telephone directory.
Regulatory Notices Modem Approvals Your modem is approved in the following countries: ________________ Telecom Network Approvals ___________________ The telecommunications device in your computer is approved for connection to the telephone network in the countries whose approval markings are indicated on the product label. Additional country approvals may be found on the Compaq web site. To view these approvals, visit http://www.compaq.com and perform a site search for the words "telecom network approvals.
Regulatory Notices Area Country Approval Number Europe Sweden 97122210 Switzerland BAKOM97.1183.D.
Regulatory Notices C-20
Index A AC Adapter, 2-11, 2-12 Acronyms, vi AMI Diagnostics, 3-4, 1 Using AMI Diagnostics on CD, 3-4 Using AMI Diagnostics on Diskette, 3-6 Applications, 3-2 Audio 16-bit stereo feature, 2-1 stereo audio output jack, 2-2 B Battery, 2-14 Bridge Battery, 2-14 charge indicator, 2-2 installing, 2-17 Preparing, 2-13 replacing, 2-14 Battery release description, 2-7 C Compaq phone numbers, B-2 Compaq support, B-1 Compaq Web Site, 1-4, 6-1 Computer security, 4-8 serial number, B-1 Configuring your computer, 4-1
Index External Power In description, 2-6 External power, connecting, 2-10 F Fast IR port description, 2-6 FDD, vi Floppy Disk, vi Floppy Disk Drive, vi H Hard Disk, vi Hard Disk Drive, vi timer parameters, 4-12 HDD, vi Headphones stereo audio output jack, 2-2 I Indicators control and indicators, 2-2 Infrared port features, 2-1 transmitter/receiver port, 2-2 IR, vi K Keyboard external keyboard connector, 2-2 Keyboard/Mouse port description, 2-6 M Memory, vi installing, 5-2 removing, 5-4 Memory door desc
Index PC Card slots description, 2-4 PC Cards Slots, 2-2 phone numbers, worldwide, B-2 Ports Ethernet Network, 2-6 External Power In description, 2-6 Fast IR port description, 2-6 Infrared transmitter/receiver port, 2-2 Keyboard/Mouse port description, 2-6 Modem port, 2-6 Mouse port description, 2-6 Mouse/Keyboard port, 2-6 Parallel port, 2-6 security lock description, 2-4 Serial port description, 2-6 Video port description, 2-6 Power control switches, 2-8 external power connector, 2-2 turning off the compu
Index audio and IR, 6-9 LCD display, 6-6 notebook computer, 6-2 PC Card, 6-7 Turning Off the notebook, 2-8 Turning off your computer, 2-8 Turning On the notebook, 2-8 U User password, 4-9 deleting, 4-10 Utilities, 3-3 AMI Diagnostics, 3-4 Make Boot Diskettes, 3-3 Index-4 V Video port description, 2-6 W Web site, 6-1 worldwide phone numbers, B-2 Z Zoomed Video features, 2-1