
Installation guide

Removal and Replacement Procedures
System Board
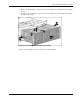
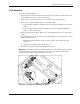
To remove the system board:
1. Power down the server blade and remove it from the server blade enclosure. Refer to the
“Server Blade Preparation” section in this chapter.
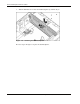
2. Remove the access panel and the system board tray assembly. Refer to the “Server Blade
Preparation” section in this chapter.
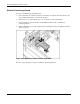
3. Remove the DIMMs. Refer to the “DIMMs” section in this chapter.
4. Remove the PPMs. Refer to the “Processor Power Module” section in this chapter.
5. Remove the processor assemblies. Refer to the “Processors” section in this chapter.
6. Pull the processor fan assembly into the open position using the buttons on the front of
the assembly. Refer to the “Processor Fan Assembly” section in this chapter.
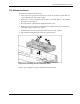
7. Remove the Battery-Backed Write Cache Enabler, if the option is installed. Refer to the
“Battery-Backed Write Cache Enabler” section in this chapter.
8. Remove the Smart Array Plus memory module. Refer to the “DC Power Converter”
section in this chapter.
9. Remove the NIC I/O board. Refer to the “NIC I/O Board” section in this chapter.
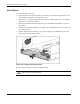
10. Remove all cables connected to the system board.
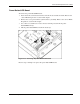
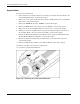
11. Loosen the system board thumbscrew.
Figure 2-35: Loosening the system board thumbscrew
2-36 HP ProLiant BL40p Server Blade Maintenance and Service Guide