ImageReader Express Compact Color Flatbed Scanner User’s Guide P/N DOC-FB4B 799250
Info 580 Division Street Campbell CA, 95008 Phone (408) 538-2500 • Fax (408) 538-2599 Copyright © 1996 – 1997 All rights reserved. No portion of this document may be reproduced without prior written authorization. The Info Technician Copyright © 1994 – 1997 All Rights Reserved The material in this document is for informational purposes only and is subject to change without notice.
Table of Contents Chapter 1 Introduction ..................................... Welcome ........................................ Using this manual ............................ Assistance ................................. What is TWAIN? ................................... A note about application software ................ Package contents ................................. System requirements ............................... 1-1 1-1 1-1 1-1 1-1 1-2 1-3 1-3 Chapter 2 Scanner Installation and Info Technician ..
iii
Chapter 1 Introduction Welcome Thank you for purchasing the Info ImageReader Express Scanner. This product is the result of our efforts to develop high technology computer peripherals that are easy to use, affordably priced, and that enhance your computing experience. Using this manual This manual includes complete instructions for scanner installation, use, and maintenance. Note that “use,” in this context, refers to scanner operation independent of the task performed with the application software.
With the introduction of Windows 95, the TWAIN specification has been overhauled to take advantage of the 32-bit architecture. When you install our scanner driver under Windows 95, you will have two TWAIN sources — one for 16-bit applications and one for 32-bit applications. Use the following as a guide to select the appropriate source. 16-bit applications are legacy Windows 3.x programs that you are running under Windows 95. InfoCenter and Image Pals 2 GO! image editor are 16-bit applications.
OCR: Software in this category is designed to recognize alphanumeric characters in preparation for export to word processing and desktop publishing applications. In other terms, it creates text files. OCR software will not provide image editing capabilities. If there is no intention of editing a given piece of text (with or without graphics), it may be simpler to scan and save it as a graphic. OCR is one of many scanning control features included in the InfoCenter application software.
Because scanners are capable of inputting large amounts of data in relatively short periods of time, they commonly push computer systems to the limits of their capabilities. Before beginning any scanning task or operation, carefully consider your system’s processing capabilities, especially processor speed, RAM, and available hard disk space. OCR processes, fax operations, and the processing of simple black & white graphics are least demanding.
Chapter 2 Scanner Installation and Info Technician Installation Installation of the scanner is comprised of few steps and designed to be as easy as possible. The following instructions walk you through connecting the scanner and cable. It is important to note that both the scanning hardware and its supporting software (e.g. Info Technician and the included applications) must be installed in order for the scanner to operate.
The Info Technician The Info Technician is an automatic installation utility that edits and installs the scanner’s device and TWAIN drivers. These drivers provide the link between the scanning hardware, the scanning application, and the computer’s operating system. Installing the device driver Run the Info Technician to install the scanner drivers. To do so: 1. Place the Info Scanner System Software CD-ROM in the CD Rom drive. Select Run from the File Menu in the Windows Program Manager (Windows 3.
Installing the application software When the hardware and device driver software are installed, install the InfoCenter application software from the System Software CD. Please refer to the Quick Start Guide for InfoCenter and Image Pals 2 GO! Image Editor installation instructions. Manuals for both applications are also included on the Info System Software CD.
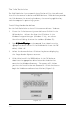
If the diagnostic is unsuccessful you will receive the following message (fig. 2.3) which most commonly indicates that you need to follow the directions below to change the Parallel port option in your computer’s BIOS setup. figure 2.3 In order to ensure the best results possible with your ImageReader Express scanner, you will need to select EPP (Enhanced Parallel Port) mode in your computer’s BIOS or CMOS settings - see instructions below.
2-5
Chapter 3 Using your scanner Scanning features and controls Before scanning images, it is important to understand the scanner’s basic hardware features as well as the software controls. Hardware features Power The scanner requires its own power source (use the adapter provided). There is no on/off power switch on the unit. When the scanner is plugged in to a power source, its power is on and the indicator light is lit.
Paper loading Place the document to be scanned face down on the scanning glass. Books, magazines and other 3-dimensional objects can be easily scanned as well, by laying them on the scanning glass. With bound materials and other objects, the cover is designed to lift up at the hinge to accommodate the item being scanned. Do not force the cover down when scanning these items, it may break or scratch the glass.
Fig. 3.2 TWAIN Interface (Using Image Pals 2 GO! software) Preview Window The interface window’s right side displays Pre-scanned images. The Crop Box (dashed line) surrounding the perimeter is used to select the area of the pre-scanned image that you want to scan. Adjusting this area significantly effects the amount of memory used and thus time required to perform the scan. It is always recommended that you adjust the crop box to scan only the portion of the image that you need to scan.
on Help in the top portion of the window for more information about scan settings. Gamma Gamma refers to the numerical value for the level of intensity or brightness in the tones of color or grayscale images. As the number increases the tonal intensity increases. Your TWAIN interface allows you to make adjustments for two types of gamma settings. Image Gamma refers to the gamma values that directly affect the outcome of the scan and will be saved with the rest of your scanned image information.
• Image Size Displays the amount of memory that the image will use: Image size = scan mode x resolution x scan area. Tip: Image size can be reduced by cropping pre-scanned image. • Image Measurement Displays unit of image measurement. Can be converted between inches or centimeters by selecting Advanced > Preferences. Pre-scan A Pre-scan is a low resolution scan of your image displayed in the TWAIN interface window only.
RGB Color: Scan color images and photographs in RGB Color mode when you want to capture and reproduce all the color data. To manage file sizes efficiently, take careful note of the guidelines for resolution (described later) when scanning in RGB. The combination of RGB Color and a high dpi can create an extremely large file size, as well as take several minutes to scan. Gray Scale: What is referred to as black and white photographs are actually gray scale images.
Faxing images: Any image you intend to fax from a PC-based fax modem should be scanned at 200 dpi. Fax machines only receive images at 200 dpi, and some programs may fault if you try to scan at higher resolutions. Refer to the chart below for resolution setting guidelines.
Scanning images Scanning images with your ImageReader scanner is a relatively simple process. The steps below walk you through selecting the appropriate TWAIN source to use, and then scanning an image or document. If you experience problems during any of these steps, please refer to the appendix, Troubleshooting. You may need to modify the configuration. Select the TWAIN source Before you can scan with your ImageReader, you need to tell the application what scanner you are using.
The scanning process The initiation of the scanning process may vary from application to application. Consult the application’s manual for more information if the steps below don’t result in a scan. The instructions provided in these steps assume the application uses the most common process. To scan an image: 1. Start the TWAIN compliant image editing application in Windows. 2. Select Acquire from the File menu. This displays the Flatbed Scanner window. 3. Place the image face down on the scanner glass.
3-10
Appendix A General Scanning Tips 16-bit versus 32-bit applications: Image Pals 2 GO! - the image editing software and InfoCenter the scanning control software included with the ImageReader Express scanner- are both16 bit applications. 16 bit applications are supported by Windows 3.1x and Windows 95. Selecting the correct source: Before attempting to scan with your ImageReader Express scanner you need to select the source from which you are scanning.
performance. If you still experience problems with your scanning speed, follow the directions on page A-2 and A-3 to verify the scanner’s port address and possibly change your computer’s BIOS setup. Printer Problems? Cannot print to printer Check the cable connections on the printer and the scanner. Be sure the cable is plugged into the port marked Printer on the back of the scanner. Bi-Directional Printers The parallel port does not support Bi-directional printers such as those made by Hewlett-Packard.
2. Be sure you have selected the appropriate source for the application you are scanning into. Most 32-bit applications require you use the Flatbed Scanner (32) source, and 16-bit applications require you use the Flatbed Scanner (16) source. 3. If your computer cannot find or does not recognize the scanner: a) Check your cable connection and retry scanning. b) Verify your port by selecting Info Tech from the program manager in Windows 3.1x or from the Start menu in Windows 95.
2. Check your computer’s BIOS setup to make sure that your printer port is set for EPP or SPP. The ImageReader Express scanner will work on ports that are set for EPP and SPP. The fastest of the modes is EPP. Follow these directions to change your computers parallel port mode. Changing Your Parallel Port Mode 1. Open your System setup (BIOS or CMOS) (check your computer manual for instructions on how to do this). 2.
Scanner care Info ImageReader scanners are designed to provide years of trouble free service. To assist in realizing this end, follow the guidelines listed below. 1. Avoid using the scanner in a dusty environment, and keep it as dust-free as possible. 2. If necessary, clean the scanner glass with a soft lens cloth. 3. Do not scan documents with correction fluid. This will cause spotting on the scanner glass. 4. Do not scan documents with paper clips or staples. The glass may become scratched. 5.
• Changes or modifications not expressly approved by the manufacturer or authorized service center could void the user’s authority to operate this equipment. • Reorient or relocate the receiving antenna • Increase the separation between the equipment and receiver. • Connect the equipment to an outlet on a circuit different from that which the receiver is connected.