HP StorageWorks Command View XP installation guide Part number: B9357–96115 First edition: March 2005
Legal and notice information © Copyright 1999–2005 Hewlett-Packard Development Company, L.P. Hewlett-Packard Company makes no warranty of any kind with regard to this material, including, but not limited to, the implied warranties of merchantability and fitness for a particular purpose. Hewlett-Packard shall not be liable for errors contained herein or for incidental or consequential damages in connection with the furnishing, performance, or use of this material.
Contents About this guide . . . . . . . . . . . . . . . . . . . . . . . . . . . . . . . . . . . . . . . . . . . . . 7 Intended audience . . . . . . . . . . . . . . . . . . . . . . . . . . . . . . . . . . . . . . . . . . . . . Prerequisites. . . . . . . . . . . . . . . . . . . . . . . . . . . . . . . . . . . . . . . . . . . . . . . . . . Related documentation . . . . . . . . . . . . . . . . . . . . . . . . . . . . . . . . . . . . . . . . . . Document conventions and symbols . . . . . . . . . . . . . . . . .
Enabling the SMI-S CIMOM service . . . . . . . . . . . . . . . . . . . . . . . . . . . . . . . . . . . . . . . . . . . Disabling SMI-S CIMOM service . . . . . . . . . . . . . . . . . . . . . . . . . . . . . . . . . . . . . . . . . . . . . Restarting SMI-S CIMOM service . . . . . . . . . . . . . . . . . . . . . . . . . . . . . . . . . . . . . . . . . . . . . SSL support . . . . . . . . . . . . . . . . . . . . . . . . . . . . . . . . . . . . . . . . . . . . . . . . . . . . . . . . . . . . . . Enabling SSL . .
Integrating with miscellaneous management applications GUI integration. . . . . . . . . . . . . . . . . . . . . . . . . . . CLI integration . . . . . . . . . . . . . . . . . . . . . . . . . . . Event notification . . . . . . . . . . . . . . . . . . . . . . . . . . . . . .. .. .. .. .. .. .. .. . . . . .. .. .. .. .. .. .. .. . . . . .. .. .. .. . . . . .. .. .. .. .. .. .. .. . . . . .. .. .. .. .. .. .. .. . . . . .. .. .. .. . . . . .. .. .. .. .... .... .... ....
Contents
About this guide This guide provides information about: • Installing Command View XP, Path Connectivity, SMI-S XP, and the snap-in modules • Setting up the XP disk arrays • Integrating Command View XP with other platforms Intended audience This guide is intended for customers and HP authorized service providers who are experienced with the following: • Disk array hardware and software • Storage systems Prerequisites Prerequisites for installing this product include: • Reading through the installation guid
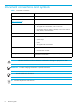
Document conventions and symbols Document conventions Table 1 Convention Element Medium blue text: Figure 1 Cross-reference links and e-mail addresses Medium blue, underlined text (http://www.hp.
HP technical support Telephone numbers for worldwide technical support are listed on the HP web site: http://www.hp.com/support/. Collect the following information before calling: • Technical support registration number (if applicable) • Product serial numbers • Product model names and numbers • Applicable error messages • Operating system type and revision level • Detailed, specific questions For continuous quality improvement, calls may be recorded or monitored.
About this guide
1 Installation HP StorageWorks Command View XP is a disk array management platform for HP StorageWorks XP48/XP512/XP128/XP1024/XP12000 disk arrays. This guide describes how to install Command View. In addition to disk array management functions, Command View includes Path Connectivity functionality. Path Connectivity diagnoses and reports the status of connections between disk arrays and hosts that consume disk array storage space.
Verifying system requirements NOTE: Refer to the readme.txt file on the Command View CD for the most current requirements and any last-minute announcements. Verify management station requirements The management station is the Windows-based host on which Command View is installed. Make sure the workstation that serves as the Command View management station meets the minimum requirements.
Table 2 Management station requirements (continued) Item Requirement Monitor Screen resolution of at least 800 by 600 pixels Pertinent information 1 The Command View XP management station must be a single-processor server only. The management station is not supported on multi-processor servers. 2 These values assume that you are using the array management GUI only and you are only monitoring a few hosts by Path Connectivity.
NOTE: If you install an earlier version of the JRE after installing the supported version, do not set the client browser to use the older JRE. Choosing the older JRE as the default JRE may cause Command View to work incorrectly. In addition to these requirements, review the browser configuration requirements. For Internet Explorer, see ”Verify the Internet Explorer browser requirements and configuration” on page 32. For Mozilla, see ”Verify the Mozilla browser requirements and configuration” on page 33.
Table 4 Operating systems and host disk space requirements (continued) Operating system Disk space AIX 5.1 AIX 5.2 Total: 346 MB /opt: 210 MB /etc: 6 MB /var: 65 MB /usr: 65 MB Red Hat Linux Advanced Server 2.1, 2.4.9 kernel (IA 32) Red Hat Enterprise Linux 3.0 (2.4.21) (IA 32) SuSE Linux Enterprise Server 8 (SLES8)/ United Linux, (2.4.19, 2.4.
Table 5 Path Connectivity HBA support (continued) OS HBA model HBA driver HBA vendor Windows 2000 LP8000 (HP 176479-B21) LP952L 5-4.82a4 (SNIA 1.8), 5-5.00a10-1 (SNIA 1.12.2.0), 5-2.13a4 (SNIA1.8), 5-2.20a12-2 (SNIA 1.12.2.0) Emulex D8602B (HP Netserver only) 2.0.25.44 HP KGPSA-CB FCA2101 FCA2355 5-4.82a14 (SNIA 1.6), 5-4.82a16 (SNIA 1.6) HP FCA2408, FCA2404/FCA2404DC 5-4.82a16 (SNIA 1.6) HP FC2214/FCA2214DC, FC Mezzanine Card for BL20P 5-8.2.0.73 (SNIA 1.27.15.
Table 5 Path Connectivity HBA support (continued) OS HBA model HBA driver HBA vendor Red Hat Linux Advanced Server 2.1/Red Hat Enterprise Linux 3.0 LP9002 (2 GB) LP9000 LP8000 LP952 (2 GB) 4.20p (SNIA 1.3) Emulex FC2214/FCA2214DC, FC Mezzanine Card for BL20P 6.04.00 HP FCA-2214 FCA-2214DC 6.06.50 HP QLA2340 QLA2342 6.06.50 QLogic SuSE Linux Enterprise Server 8 (SLE8) FC2214/FCA2214DC 6.04.00 HP Solaris 8 QLA 2310F V3.22 (SNIA 2.02 Qlogic QLA 2340 V4.08 (SNIA 2.
Table 5 Path Connectivity HBA support (continued) OS HBA model HBA driver HBA vendor Solaris 9 LP9002L LP9802DC 5.01e-1 (SNIA 1.6a) Emulex FCE-6410 FCE2-6410 FCE2-6412 4.1.3 (SNIA 2.0), 4.1.5 (SNIA 2.0) JNI FCI-1063 FC64-1063 2.5.18 (w/ SNIA 1.0 lib) JNI FCE-1063 FCE2-1063 4.1.3 (w/ SNIA 2.0 lib) JNI FCE-1473 5.1.1 (w/ SNIA 2.0 lib) JNI FCE-6460 (2 GB) FCE2-6560 (2 GB) FCX-6562 (2 GB) FCX2-6562 (2 GB) FCC-6460 (2 GB) FCC2-6560 (2 GB) 5.1.1 (SNIA 2.0), 5.2.1 (SNIA 2.0), 5.3.0.
Installing Command View Prepare for upgrade If you are upgrading from a previous version of Command View XP, consider the following before installing the new version: • Command View XP 2.1 does not support the XP256 disk array except as external storage. • Command View XP 2.1 does not support XP1024 and XP128 disk arrays with firmware version 21.09.XX or lower or early versions of 21.10.XX. Refer to the HP StorageWorks Command View XP ReadMe document for the required firmware version.
NOTE: For the XP128/XP1024/XP12000, Command View array management web clients communicate directly with the array. Therefore, access through the firewall is needed for each XP128/XP1024/XP12000 web client. To support Command View access through a firewall, assuming that all inbound and outbound traffic is blocked by default, you must allow access to the ports listed in Table 6 and Table 7.
Table 8 Ports to be opened for a firewall on the Command View management station (continued) XP128/XP1024/ XP12000/XP48/ XP512 Port 443 inbound TCP Used for Command View web clients, CLI clients, and the Command View management station if it is used as a web or CLI client when the Command View management station is configured for SSL XP128/XP1024/ XP12000/XP48/ XP512 Port 5988 inbound TCP Used by SMI-S clients XP128/XP1024/ XP12000/XP48/ XP512 Port 5989 inbound TCP Used by SMI-S clients that us
Confirming or modifying the system name 1. From the Control Panel in Windows, click System. 2. Depending on your version of Windows, click the Network Identification tab or the Computer Name tab to display the system name. 3. To modify the system name, click Properties (Windows 2000) or Change (Windows Server 2003, Windows XP). 4. Enter a new system name and click OK to save your changes.
Uninstall Command View XP If you have a previous version of Command View XP installed, you must uninstall it prior to installing Command View XP 2.1. Refer to the installation guide for the currently installed version of Command View XP for more information on uninstalling the management station. Installing Command View XP 2.1 If you have a previous version of Command View XP installed, you must uninstall it prior to installing Command View XP 2.1. Refer to ”Uninstall Command View XP” above. 1.
c. Click Next. d. Select the operating systems that your hosts are running in the Choose Host Agent Platforms window, and click Next. e. The setup program transfers and/or removes application files to and from the destination folder, and configures Command View. When complete, click Finish. 7. To repair Command View: a. Click Repair and click Next. b. The setup program transfers application files to the destination folder and configures Command View. When complete, click Finish.
Table 9 Command View services (continued) Component Service name Process name(s) Command View Data Collector Service HpssDataCollectorService JWrapper_DataCollectorService.exe Array Manager servlet engine HpssDMTomcat Path Connectivity servlet engine HpssE2ETomcat Command View Proxy SubAgent HpssCVSubAgent SMI-S XP Service hp StorageWorks SMI-S CIMOM hpSMIS_CIMOMService.exe See ”Verifying SMI-S XP installation” on page 26. hp SMI-S array providers hpSMIS_LicenseFrameworkService.
After installation, SMI-S XP, by default, starts in the SSL mode. If the client application does not support SSL communication with the SMI-S server, you need to disable the SSL mode. See ”Disabling SSL” on page 30 for more information. NOTE: After you install SMI-S XP, the hp StorageWorks SMI-S CIMOM service is created. This service is disabled, by default. To use SMI-S XP, you need to enable the service. See ”Starting and stopping SMI-S XP” on page 28 for more information.
Table 11 Parameters in the cim.properties file (continued) Parameter Description LogFilesCount Indicates the number of log files maintained by the CIMOM. The default number is 5. Modify this value to change the number of log files. When you initiate the CIMOM, it starts logging to the +0 file. (The serverDebugFile is specified in the cim.properties file).
NOTE: The -LG is the only input parameter that you can use to list the available groups and users. Currently, the available groups are Administrator and User. You cannot add or remove groups. User accounts in the Administrator group have complete control of all operations. User accounts in the User group can only execute read-only operations.
• Manual: If the service is enabled to start manually, the service starts when the Command View services are started or restarted, but it does not start when the machine is started. • Disabled: If the service is disabled, which is the default, the service does not start when the Command View services are started or restarted, or when the machine is started. Enabling the SMI-S CIMOM service 1. From the Control Panel in Windows, click Administrative Tools. 2. Click Services. 3.
1. Import the server certificate into the client trust store. a. Copy the server certificate to the client system. b. Execute the following Java keytool command to import the certificate into the client trust store. $ keytool -import -alias hpsmis -file hpSMIS.cert -keystore mytruststore 2. You are prompted to enter a password. NOTE: This password is required for modifying mytruststore in the future.
Set up event notification and history reporting To set up event notification and reporting, use the instructions located in Command View under Support > Integrating HP StorageWorks Command View XP with Other Products. By setting up event notification, Command View can display events, which are communicated to other management applications through SNMP traps. For additional information, refer to ”Integrating with miscellaneous management applications” on page 44.
Disable the Web Proxy service When you are using a Web browser to manage an XP128/XP1024/XP12000, disable the Web proxy on the client by completing one of the following: • Internet Explorer only: Disable the proxy server in your browser, or • Internet Explorer or Mozilla: Add the XP128/XP1024/XP12000 IP address to the list of excluded addresses (that are not to be directed through a Web proxy service). Disabling proxy service in the Internet Explorer browser 1.
• Use Java 2 v1.4.2 for
Certain users may find they need the flexibility of the ALWAYS setting, which ensures that Command View always determines the timeout value. Using this setting means that Command View checks the CommandView.properties file every time a user in Modify mode clicks a tab to manage an XP128/XP1024/XP12000 (Identity and Status tabs excluded). You may want to consider using this setting if you or someone else needs to change the timeout value on the SVP, but you want to override that when using Command View.
3. Click Licensing in the left panel in Command View. 4. Click the disk array you want to access from the Serial Number column. The License Key Management main pane is displayed. 5. From the License Key Management main pane, click Install. The License Key Management (Install) pane is displayed. 6. Select the check box for each license key you want to install. 7. Enter the license key code(s). 8. Click OK to add the license key and return to the License Key Management main pane.
Path Connectivity is installed as part of the Command View installation, and it is required to manage an XP disk array with Command View. However, you have to perform additional steps (primarily installing host agents) to make Path Connectivity active. Path Connectivity runs on the Command View management station. Path Connectivity has a Command Line Interface (CLI) that can run on a host connected to the Command View management station.
Table 13 Supported switches (continued) Switch model Tested firmware HP SureStore Director FC-64 05.02.00-13, 06.01.00-18, 06.02.00-22 (rec.) HP StorageWorks Edge Switch 2/16, 2/24, 2/32, 2/64 05.02.00-13, 06.01.00-18, 06.02.00-22 (rec.) HP StorageWorks Director 2/64, 2/140 05.02.00-13, 06.01.00-18, 06.02.00-22 (rec.) McData ES-3016, ES-3032 05.02.00-13, 06.01.00-18, 06.02.00-22 (rec.) Compaq McData Sphereon 3016 Fabric Switch 05.02.00-13, 06.01.00-18, 06.02.00-22 (rec.
• Only one remote deployment tool may run at a given time. • Review the online Host Software Installation checklist. To view the checklist, start the host agent deployment utility and click Host Software Installation Checklist. Click the link for the remote host’s operating system. CAUTION: Do not deploy Path Connectivity host agents and Command View SDM host agents to the same host system. They cannot coexist.
• Enter rpm -Uvh /mnt/cdrom/RedHat/RPMS/rsh-ser*. You may need to mount your CD-ROM if the OS cannot find the directory. The command mount /dev/cdrom should work. 3. Verify that the rexec service is started. • Enter ntsysv at the command prompt. • Check the rexec and rsh services and click OK. • Restart the service by entering service xinetd restart. • Edit /etc/pam.d/login. Comment out (add “#” to the line): # auth required /lib/security/pam_securetty.so • Edit /etc/pam.d/rexec.
2. Click Add Multiple Hosts. A dialog box displays a table. 3. In the table, enter the host name or IP address, admin user name, and password in their respective columns. 4. Click Add All Hosts Now. Installing the host agents 1. The Managed Host list should now contain all the hosts previously added. From this list, select the hosts to which you want to deploy a host agent. 2. Re-authenticate the selected hosts by right-clicking and selecting Re-authenticate from the menu. 3. If Performance Advisor XP 2.
Installing host agents using the local method Downloading the host agent file 1. Access Command View from your workstation. 2. Click the Support tab. 3. Navigate to the Path Connectivity Host Agent Download section. A list of supported host agents is provided. 4. Click the link for the desired host. 5. Download the Host Agent tar file (which contains all of the required software) to your computer. 6. FTP the Host Agent tar file to the tmp directory of the remote host. Installing the host agent locally 1.
4. Run the uninstall script by entering: unix_local_uninstall.sh. Add or remove host agent installation files If you have already installed Command View and Path Connectivity, but need to add or remove host agents, see ”Modify or repair Command View” on page 23. Verify data collection from disk arrays, hosts and switches Verify that Path Connectivity is working correctly by using the following procedure. After that, data is collected regularly on a default schedule or a schedule you set.
Integrating Command View with other platforms Integrating with HP OpenView Storage Area Manager Command View and Storage Area Manager should not be installed on the same management station. However, Storage Area Manager provides a way for users to launch a browser and access Command View from a Storage Area Manager client GUI. Also, host agents with compatible versions of each software product can coexist on the same host.
Integration can occur at the following levels: • Graphical User Interface (GUI) • Command Line Interface (CLI) • Message or “event” notification using HP Enterprise Integrations or SNMP traps. GUI integration Command View is a Web-based application. If an application supports a Web interface, you can configure it to reference the Command View URL. CLI integration You can write scripts or batch files containing Command View CLI commands.
2 Troubleshooting This chapter contains troubleshooting information about installing, configuring, and logging on to Command View. This chapter also has suggestions for solving host agent installation and configuration problems.
Table 15 Unable to start Command View (continued) Symptom Cause/Solution The browser displays the message, “Invalid user name or password,” but never displays a login box. Your session authorization may have expired. The easiest way to resolve the problem is to close the Web browser displaying the error and restart your management session in a new Web browser. You receive a “Web page not found on host” error message.
General Command View connection errors Table 16 General connection errors Symptom Cause/Solution Your browser crashes while running the application. It is most likely related to the version of JRE running on your client system. Command View only supports JRE 1.4.2 (Windows) or JRE 1.4.2.05 (HP-UX). Because it is possible for a machine to have multiple JREs installed, verify that your browser is running the correct JRE version.
Table 16 General connection errors (continued) Symptom Cause/Solution Error Message: “A connection error occurred between the Remote Control and the controller.(Control: {Array #} )” If you receive a connection error after clicking a disk array in the Device Launcher pane, do the following: (XP48/XP512 only) • Verify the SVP of the disk array is not in Modify mode. • Verify that another Remote Control has not locked the disk array.
Host agent deployment errors Table 17 Host agent deployment errors Symptom Cause/Solution The host agent does not deploy successfully. The network or host to which you are deploying may be down. Verify that the network and host to which you were attempting deployment are up and functional. If necessary, repeat deployment. The deployment may have timed out due to network congestion. Deployment stops if it is not successful within 10 minutes.
Table 17 Host agent deployment errors (continued) Symptom Cause/Solution You are not able to reload the Emulex driver for the Linux host after installing the host agent. When the host agent is running on Linux, it keeps contact with the HBA driver. You may receive a lpfcdd: Device or resource busy message when trying to rmmod the driver. Try to stop the host agent and then reload the HBA driver.
A Installation checklist This appendix contains a helpful installation checklist that you can print out and reference when installing and setting up Command View. For details about each task, refer to ”Installation” on page 11. Verifying the system requirements • Verify that the hardware and disk space requirements are met on the Command View management station and Web client (page 12). • Verify that the firmware requirements are met on all disk arrays.
Setting up Command View • If you are moving from an existing management station to a new management station, use the Backup Utility to migrate the Command View data, settings, and preferences from the previous management station (page 31). • If you are managing an XP128/XP1024/XP12000, disable the Web proxy for your Web browser (page 32). • If you are using Internet Explorer for your Command View browser client session, verify that the browser has been configured correctly (page 32).
Index A adding disk arrays 34 host agent installation files 42 switches 36 Apache Web Server 22 audience 7 authorized reseller, HP 9 B bypassing a firewall 20 C checklist 51 Collect Data Now operation 42 Command View CLI 35 Command View, setting up 31 connections through a firewall 20 conventions document 8 D disk array firmware levels 14 document conventions 8 prerequisites 7 related documentation 7 documentation, HP web site 7 F firewall 20 additional configurations 20 bypassing 20 firmware 14 H help
U uninstalling Command View 24 V verifying Command View execution 25 Command View services 24 disk array firmware levels 14 SNMP 22 W warning rack stability 9 Web proxy configuration 32 web sites HP documentation 7 HP storage 9 HP Subscriber’s choice 9 54 Index
Figures 1 2 Example of a network with added security from a firewall. . . . . . . . . . . . . . . . . . . . . . . . . . . . . . . . 19 Internet Options (Internet Explorer) . . . . . . . . . . . . . . . . . . . . . . . . . . . . . . . . . . . . . . . . . . . . . . . .
Tables 1 2 3 4 5 6 7 8 9 10 11 12 13 14 15 16 17 18 Document conventions . . . . . . . . . . . . . . . . . . . . . . . . . . . . . . . . . . . . . . . . . . . . . . . . . . . . . . . . . . 8 Management station requirements . . . . . . . . . . . . . . . . . . . . . . . . . . . . . . . . . . . . . . . . . . . . . . . . . 12 Web client requirements . . . . . . . . . . . . . . . . . . . . . . . . . . . . . . . . . . . . . . . . . . . . . . . . . . . . . . . .