BSD3543W User Manual BT-DA22W/BT-DB22W 1
About this manual This user manual is specially designed to explain functions and features of BT-DA22W/BT-DB22W, and it will be referred as the device hereinafter. The user manual provides information for service and safety operation. Be sure to read this manual thoroughly before using the device. Device specifications or contents of this manual may be changed without prior notice due to upgrade of detector functions.
Copyright This manual is protected under international copyright laws. No part of this manual may be reproduced, distributed, translated or transmitted in any form or by any means, electronic or mechanical, including photocopying, recording, or storing in any information storage and retrieval system, without the prior written permission of BONTECH. Product specifications or the contents of this manual may be changed without prior notice due to an upgrade of the device’s functions.
Table of Contents Safety Information…………………………………………………………………..…….…………………………6 Notes……………………………………………….……………………………………………………………….……………………………….8 General Hazards…………….…………..…………………………………………………………………………………………………….9 Regulatory…..………………………….………………..…………..………………………………………………………………………….11 1. Overview……………………………………………………………………………………………………………...13 Features……………………………………………….…………………………….…………………………………….……………………...13 ComponentsDescription…………….…………..……………………………………………………………………………………..
7. Calibration……………………………………………………………………..…………………………………….43 General Principle……………………………………………….…………………………….…………………………………………...…43 Calibration Steps………………………………………………………….…………..……………………………………………………..44 8. Acquisition……………………………………………………….………………………………………………….51 Obtaining Images……………………………………………….…………..……………….……………………………………………..51 Importing Images…………….…………..………………………………………………………………..……………………………….53 9. Inspection and Maintenance………………………………………………………………..……….……54 10.
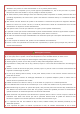
Safety Information The BT-DA22W/BT-DB22W is designed to provide a reasonable protection against harmful interference in a typical medical installation. If not installed used in accordance with the instructions, it may cause harmful interference to other devices in the vicinity. However, there is no guarantee that interference will not occur in a particular installation.
▩ The other product or componenet which have not approved by BONTECH Co., Ltd,shall not be connected or attached to this product. It could cause disorder or not to protect patient’s safety. ▩ L'autre produit ou composant qui n'a pas été approuvé par BONTECH Co., Ltd, ne sera pas relié à ce produit. Elle pourrait causer des troubles ou ne pas protéger la sécurité du patient.
périodiquement par les opérateurs autorisés. ▩ You should ensure continuous power supply to the system, with voltage and current according to the product specifications. If power failures are frequent, an Uninterrupted Power Supply (UPS) should be installed to avoid loss of data. ▩ Vous devez assurer une alimentation continue du système, avec une tension et un courant conformes aux spécifications du produit.
- Milieu salin ou sulfuré. - High humidity - Haute humidité - Ambient temperature is higher than the operating temperature stated in User Manual. - La température ambiante est supérieure à la température de fonctionnement indiquée dans le manuel de l'utilisateur ▩ Do not inflict excessive shock and mechanical vibration. Otherwise, it may result in poor image quality cuased by noise. ▩ N’infligez pas de chocs ou de vibrations mécaniques excessifs.
communications. However, there is no guarantee that interference will not occur in a particular installation. If this equipment does cause harmful interference to radio or television reception, which can be determined by turning the equipment off and on, the user is encouraged to try to correct the interference by one or more of the following measures: - Reorient or relocate the receiving antenna - Increase the separation between the equipment and receiver.
General Hazards Radiation Hazards This system can be connected to X-ray generating equipment. Be certain to follow the safety instructions and specifications for wearing proper lead apron when X-ray exposures are planned or possible. All personnel should wear protective equipment during all phases of installation, operation and maintenance of the system. Electric Shock Hazards To reduce the electric shock hazard, the system must be connected to an electrical ground.
Cleaning the System Use a dry cloth to clean surfaces of the system. Do not use detergents or organic solvents to clean the system. Strong detergent, and organic cleaners may damage the finish and cause structural weakening. Do not clean the system when the power is on. Disposal Disposal of this product in an unlawful have negative effects on health and on the environment.
Notice ▩ Refer to the X-ray exposure guideline provided by X-ray system manufacturer or generator manufacturer.
Product safety standards MDD ISO 13485[2016] Council Directive 93/42/EEC as amended by Directive 2007/47/EC concerning medical devices Medical Device Quality management systems – Requirements for regulatory purpose MEDDEV 2.12-1 Rev.
1 Overview BONTECH’s BT-DA22W/BT-DB22W is a cassette type detector providing versatile usages with fantastic image quality. BT-DA22W/BT-DB22W provides large X-ray images which maximizes the area of anatomical view with minimal number of X-ray shots. The images transmitted from this system to the RawImageViewer(BT-IV01) are processed and transmitted to printers for output to film or to image servers for storage in place of the radiographic images of the conventional film system.
Components Description BSD3543W(BT-DA22W/BT-DB22W) has the following components: - Flat Panel X-ray Detector (BSD3543W(BT-DA22W/BT-DB22W)) - Detector Handle (BT-DH02) - Control Box (BT-CB02) - Charger - Battery pack - Switching adaptor(MPU51-105) - AC Power Supply Cord(BT-SC01) - Main Cable (BT-MC06) - Ethernet Cable (BT-EC02) - Extended Cable (BT-MC05) - X-ray Enable Signal Cable(sync cable) (BT-TC03) Refer to p. 23~25 for more information on components.
Switching adaptor (MPU51-105) Battery pack AC Power Supply Cord (BT-SC01) Main Cable (BT-MC06) Ethernet Cable (BT-EC02) Extended Cable (BT-MC05) X-ray Enable Signal Cable(Sync Cable) (BT-TC03) Notice ▩ Compatible with not only new X-ray generators based on DR interface but also conventional X-ray generators. ▩ Check each component’s identification label before installation. ▩ Contact BONTECH’s representative or distributor if problem occurs with these parts or you need to purchase individual parts.
Detector Configuration 18
Labels and Symbols Labels’ different locations on the product and their description of the signs Label on the bottom surface of the Detector (BSD3543W(BT-DA22W/BT-DB22W)) This label can be used for Detector CsI and GOS.
Labels and their meanings Sign Description Product Model Serial number Caution Manufacturer Date of manufacture Type B applied part Follow Instruction for use Consult instructions for use (LOWER) (UPPER) Temperature limit Fragile, handle with care Humidity limitation Do not disassemble Earth ground Authorized representative in the European Community Alternating Current Direct Current “ON” (power: connection from the mains) “OFF” (only for a part of equipment) Keep dry 20
Fragile, handle with care This way up Stack up to 4 boxes Handle with care Use no hooks Disposal instruction Authorized by CE THE EQUIPMENT WITH RESPECT TO ELECTRIC SHOCK, FIRE AND MECHANICAL HAZARDS ONLY IN ACCORDANCE WITH UL 60601-1, CAN/CSA C22.2 No. 601.
2 Notes for Using the Instrument Handling The Equipment must be handled with care to avoid personal injury damage to the internal image sensor. Caution(Attention) ▩ Do not hit or drop the Equipment since the jolt may damage the detector. ▩ Ne pas frapper ni laisser tomber l’équipement, car la salve pourrait endommager le détecteur. ▩ Do not put pressure on the detector locally since it will cause permanent damage to the internal image sensor.
3 Description General Description The digital x-ray detector which uses a large area amorphous silicon sensor array allows the acquisition of x-ray exposures without the use of conventional film/screen system. Warning(Averissement) ▩ Please use the product to diagnose only. ▩ Veuillez utiliser le produit pour diagnostiquer seulement.
Safety in Use This device should be operated under radiology professional’s presence only. The patient should not operate this device nor touch the device physically. This cassette size device is designed to be placed into a system, therefore the device would not touch the patient body directly.
4 Specifications Main Specification Item Description BT-DA22W(CsI) Model BT-DB22W(GOS) Purpose General radiography Image Matrix Size 2500 x 3052 Pixel Pitch 140 um Effective Imaging Area 350 mm x 427.28 mm Grayscale 16 bit, 65,536 grayscale CsI Scintillator GOS Image Acquire &Transfer Time Preview: less than 6 sec Spatial Resolution 3.5lp/mm Battery 7.5V, 5,500mAh Battery performance More than 4 hours Durability IP0 Interface Wireless : IEEE 802.
5 Components System Requirements Item Specification 32-bit WindowsOS, 64-bit Windows,WindowsXP (SP2 or later), Operating System Windows Vista, Windows 7, Windows 8 or higher CPU Dual Core 2.5GHz or higher Memory 2GB or higher Hard Disk 165MBfor Installation Gigabit (Detector Only) LAN Card Intel PRO 1000 Series (Gigabit LAN Card for network interface) Min.
Detector(BSD3543W(CsI: BT-DA22W, Gdos: BT-DB22W)) Dimensions: 460(Horizontal) X 384(Vertical) X 15(Height) (mm) Weight: 2.92kg (Including battery) Detector indicator 1 Status Remarks 8 step LED display. Battery indicator 4 LED Blinking : Low battery Blinking(0.
Control Box (BT-CB02) Dimensions: 115(Horizontal) X 120(Vertical) X 34(Height) (mm) Weight: 285 g Control boxConfiguration Purpose 1 DR STATE LED Red: Error LED 2 EXPOSE LED Yellow : Exposure LED 3 POWER LED Green : Power LED 4 POWER S/W Detector Power On/Off Switch 5 Equipotential Potential Equalization 6 DC IN+12 DC 12V Power Connector 7 SYNC X-ray Sync Connector 8 DETECTOR Detector Main cable 9 NETWORK Gigabit Ethernet Connector Remarks Checking the detector connection.
Charger indicator 1 Battery indicator Status 4 LED Blinking : Low battery ※ Charging is required if the four LEDs blink simultaneously. 29 Remarks 8 step LED display.
Battery pack Dimensions: 187(Horizontal) X 168(Vertical) X 6.4(Height) (mm) Weight: 265g Other Accessories Switching adaptor(BT-SA01): Size-145(W)x72(L)x42(H), Weight-560g AC Power Supply Cord(BT-SC01): Length–1.5m, Weight-160g Ethernet Cable (BT-EC01): Connecting between Control Box(BT-CB01) and PC LAN port. CAT (Category) 7 cable is recommended. Length-10m (If you need longer one, contact Bontech.), Weight-380g X-ray Enable Signal Cable(Sync Cable) (BT-TC01): It is necessary for Trigger connection.
6 Installation The detector is composed of sensitive electronic parts and components. Use ESD protection while installing the detector in its operation place. It is recommended to use the product in a clean place and to exercise caution to ensure that it is not affected by dust or liquids. When the detector is contaminated, it is recommended to use a dry and soft cloth to clean the detector housing, and be sure to respect to ESD safety conditions.
2) Wired system 2) Wired System Installation A. Attach the battery to the detector. B. Connect DC main connector(BT-MC04) to the Control Box(BT-CB02). C. Connect Switching adapter(MPU51-105) to the Control Box(BT-CB02). D. Connect the control box Ethernet cable(BT-EC02) to the workstation. E. Connect the AC Power Supply Cord(BT-SC01) to the Switching adapter(MPU51-105). F. Turn on the Control Box(BT-CB02). G. Power on the Detector.
Warning(Avertissement) ▩ To avoid risk of electric shock, this equipment must only be connected to a supply mains with protective earth. ▩ Afin d’éviter les risques de choc électrique, ces équipements ne doivent être raccordés qu’à une conduite d’alimentation avec une terre protectrice. ▩ Be aware of significant risks of reciprocal interference posed by me equipment during specific investigations or tretments.
System Uninstallation C. Press the power switch on the Detector to turn it off. B. Power off the AP and disconnect the cord (BT-SC01). A. Disconnect Ethernet cable(BT-EC02) from Workstation. X-ray Exposure Mode Trigger Mode Connect to X-ray Generator with the Trigger Cable. X-ray Generator Connection Connect the X-ray enable cable between the X-ray enable connector of power supply with X-ray generator.
Connection Description Signal PREP IN EXPOSURE READY EXT POWER Label Color Input/Output 12V~24VDC White Input PREP IN Black Input EXP READY Red Output EXP READY COM Green Output + 5V Blue Output GND Yellow Output Notice ▩ 12~24V should be supplied to detector.
Notice ▩ Please, refer to Connection Image’s “D” part from p. 25. ▩ #1 connects to Control Box (BT-CB02). ▩ #2 connects to Generator. (Refer to the Generator’s manual.) Timing t1 / t2 Description t1 Offset stabilization time (Max. 0.
Auto Expose Detect Mode You do not need to connect directly with the X-ray Generator. Notice ▩ Unexpected external shocks may cause malfunction.
Network Setting Notice ▩ You must use a NIC which supports Gigabit Ethernet. A. IP Settings 1. Set the PC IP to belong to the same Broadcast domain with the sensor. Set the C class of the PC IP to 3 since the Sensor IP is 192.168.3.240. Notice ▩ You can set the Host PC IP as 192.168.3.XXX, and the XXX can be any number between 1 and 255. ▩ When you set the Host PC IP, avoid 192.168.3.240 since it is the Sensor IP given by the factory.
B.Router Setting 1. Change router to AP mode. 2. Set SSID to “bsdw#1” 3. Set password to “bontech1” 4. Set the Router IP’s 192.168.3.xxx. 5. When the detector power on, it is connected to the router. Notice ▩ The setting method for each router may be different. ▩ The detector must be set to wireless mode. PC Firewall Settings Use after turning off the firewall settings. Notice ▩ Depending on the Firewall settings, the RawImageViewer cannot be operating.
Folder Description Program executive file (RawImageViewer.exe) and library file are located. BSD Sensor configuration file (ImageCapture.ini,Ref2.dat, Ref2.dat, Reference.ini) config image Save the image file acquired by Sensor (Image_YYMMDD_HHMMSS.raw) Save data to calibrate the acquired image. reference log Save the log in process of Calibration. 2. Run RawImageViewer.exe file. Name : RawImageViewer Model: BT-IV01 .
RawImageViewer Configuration Number Description 1 Menu Bar 2 Image Acquisition Section 3 Image Control Section 4 Status Bar 41
1. Menu Bar Menu File View Sub Menu Description Open(O) Select a file to open. Save BMP(S) Save an open image in BMP format. Quit(X) Exit program. Status bar(S) Enable/disable the Status bar at the bottom of the Viewer. Control bar Enable/disable the Control bar on the right side of the Viewer. Folder view Enable/disable the Folder view on the left side of the Viewer. Window Time Adjust Window Time (0.5sec ~ 1 sec).
2. Image Acquisition Section Sensor Connect 1. Check if Sensor Connect section’s Host PC IP and Sensor IP information is correctly input. Sensor Connect section on the left side in the middle of the RawImageViewer screen, inside Folder view (Refer to p.36). 2. Click Serch. Notice ▩When connection is made succesfully, “Connect success” pop-up appears: when there is no Detector found nor connection cannot be made, “Connect fail” pop-up appears.
3. Image Control Section Image size & Mouse Option Item Descriptions Image size Input size of the loading image. Zoom Zoom In / Zoom Out an image. Wheel (Mouse Option) Scroll Move vertically on the image with scrolling the mouse wheel up and down. Zoom Zoom In / Zoom Out the image with scrolling the mouse wheel. Drag (Mouse Option) Hand Size Drag the mouse to move the image position. - (10~100 selected) Fixed ROI size - (Custom selected) Designate the ROI size by dragging the mouse.
Mouse Option- [Drag] [10~100] : The fixed square becomes ROI area. RIO :Size Image information ROI information [Custom] :User can drag to designate the ROI area.
Custom size ROI-information Histogram Item Auto Descriptions - Contrast Auto-Adjustment Function - Select “Custom” among the Mouse options, and then designate any ROI area by dragging. - Click the Auto button. (Shortcut: F1) The image automatically adjust its Contrast in order to show designated area clearly. H-offset Minimum, Maximum - Change the vertical scale of the histogram graph. - Also changeable with [+][-] buttons. - [X]button can initialize. - Change the Contrast value 4.
Status Bar displays the image size, the coordinates of the current mouse position, and the level values. Item Width, Height Descriptions - Shows the size of the image currently displayed on the screen. - The values in parenthesis mean the starting coordinates (left, top) and the ending coordinates (right, bottom) of the displayed image. [X, Y] WW, WL - Displays the coordinates and level of the current mouse location. - Displays Window Width and Window Level.
Gain correction Compensate gain variance of pixel Notice ▩ X-ray detector should be used at stable state within driving temperature range. ▩ Acquire the X-ray images after power on and 30 minutes warming up is recommended in order to obtain high quality images. Calibration Steps Calibration steps are described as below. Step Descriptions Preperation Prepare for Calibration. Step 1 Acquire Dark Frame. Step 2 Acquire Bright Frame. Step 3 Generate Defect map& Gain map. [Preperation] 1.
The Default value is 0, and if it is changed, click Save to save the new value. Notice ▩ If the X-ray Exposed Area is smaller than the detector, input Margin of the remaining edge before performing Calibration. ▩ You may skip this step if there is no need to adjust Margin.
Click Get Dark, and acquire 3 Dark frames. The gap between each frame is 10 seconds. After acquiring all 3 Dark Frames, [Step1] OK sign appears in the Step window and Dark image saved message in the Log window.
Notice ▩ The Dark Frame acquisition failure messages and what they mean - Not Ready for Image acquisition Detector is not ready for an image acuisition. After 10 seconds, it will automatically retry. - Dark image acquisition fail Failure in image acquisition. After 5 times of automatical retries fails, the Calibration process ends. Check Detector’s connection status.
After completing Step 1, wait about 10 seconds, and then click Get Bright. When this pop-up appears, get ready to expose the X-ray. When you are ready, click OK, and then expose the X-ray.
window will be appeared for reacquisition. When acquisition is completed properly, Acquisition completed [1-1] - Save completed [1-1] message appears in the Logwindow, and after 10 seconds, acquisition for the Bright frame automatically repeats. Notice ▩ If acquired Bright Image is not a suitable lelvel for Calibration, the following pop-up windows appear. Click OK and retry.
2. Click OK, and then close the Calibration window to complete the processe. Notice ▩ When in AED Mode, files appear as below: Bright frame(1 pc) : AED_Bright.raw Dark frame(1 pc) Defect map(1 pc) : AED_DefectMap.raw Gain map(1 pc) : AED_Dark.raw : AED_Reference00.raw ▩ When in Trigger Mode, files appear as below: Bright frame(1 pc) : Trigger_Bright.raw Dar frame(1 pc) Defect map(1 pc) : Trigger_DefectMap.raw : Trigger_Dark.
8 Acquisition General Information When acquiring the X-ray image, you can obtain calibrated image when the calibration is completed. If the calibration is not completed, you can obtain uncalibrated images. During the image acquisition, detector and library communicate via Ethernet TCP. Obtaining Images 1. Select a mode among the selections of Acquisition Mode. Notice ▩ If the Acquisition Mode displays AED button, it means that the current mode is set to AED mode.
Mode Descriptions AED(Auto Exposure Detection) automatically detects X-ray exposure signal without a AED direct connection between Detector and Generator. Trigger 1. It sends Ready Signal to Detector and Generator. 2. When Detector is ready, it sends EXPOSURE OUT signal to Generator. [READY IN (GeneratorDetector), EXPOSURE OUT (DetectorGenerator)] 3. When Generator receives EXPOSRUE OUT signal, expose the X-ray. 2. Click Acquisition. 3. Press Hand switch to expose X-ray.
Importing Images Location and File Name of the acquired images Path : C:\BSD\192.168.3.240\Image File name : Image_YYMMDD_HHMMSS.
9 Inspection and Maintenance The instrument must be repaired by a qualified engineer only. If it is not repaired properly, Caution (Attention) it may cause fire, electric shock, or accident. L'instrument ne doit être réparé que par un ingénieur qualifié. S'il n'est pas réparé correctement, il peut causer un incendie, un choc électrique ou un accident. For safety reasons, be sure to inspect the instrument before using it.
Cleaning The exterior of the array can be cleaned with common hospital decontamination solutions, including 20% chlorine bleach solution (1 pat bleach to 4 part water). 70% alcohol solution, power down the system and disconnect from power source, moisten a cloth with the solution, and wipe the panel. Notice ▩ The user must follow hospital cleaning and decontamination policies and procedure. ▩ Do not spray cleaning directly on to the panel.
10 Service Information Repair If problem cannot be solved even after taking the measures indicated in the User Manaul, contact BONTECH’s representative or distributor for repair. Please refer to the name label, and inform us the model name and serial number with your problem described in detail. Warranty BONTECH Co., Ltd. warrants that this product will be free from defects in materials and workmanship for a period of twelve (12) months from the date of delivery.
Electrical Specification The unit meets the Collateral Standards of Electromagnetic compatibility - Requirements and tests EN 606011:2007(IEC 60601-1-2) the limits and methods of measurement of electromagnetic disturbance characteristics of industrial, scientific and radio frequency equipment EN 55011 Group 1, Class A, Electrical Equipment is subject in regard to the electromagnetic compatibility(EMC) and its special precautionary measure The unit must in reference to the mentioned EMC-hints in the accompan
± 1 kV line(s) to ± 1 kV differential Surge line(s) mode Mains power quality should be that of a typical IEC 61000-4-5 ± 2 kV line(s) to ± 2 kV common commercial or hospital environment.
level level Portable and mobile RF communications equipment should be used no closer to any part of the e-Re Model device, including cables, than the recommended separation distance calculated from the equation applicable to the frequency of the transmitter.
The e-Re Model device is intended for use in an electromagnetic environment in which radiated RF disturbances are controlled. The customer or the user of the e-Re Model device can help prevent electromagnetic interference by maintaining a minimum distance between portable and mobile RF communications equipment (transmitters) and the e-Re Model device as recommended below, according to the maximum output power of the communications equipment.
11 Reference of X-ray Exposure Condition *BMI = [Weight(kg)] / [Height(m)]2 - SMALL : BMI = under 18.4 - MIDDLE : BMI = 18.5 ~ 29.9 - LARGE : BMI = over 30.0 #Table of Exposure Condition below could be used as refecene only. #Depending on the patient’s body type and generator’s specification, the expert can adjust the exposure condition appropriately.
Apico 110 250 4 110 250 6.3 115 250 8 AP 66 320 16 66 320 20.5 66 320 32 Oblique 66 320 20 66 320 25 75 500 36 AP 66 320 16 66 320 20.
Toe AP 48 80 3.2 48 80 3.2 48 80 3.2 Foot AP 48 100 3.2 48 100 3.2 48 100 3.2 Ankle AP 52 100 4 52 100 4 52 100 4 Lower Tibia AP 48 80 3.2 48 80 3.2 48 80 4 Extrimity Knee AP 55 100 4 55 100 4 60 100 10 52 100 3 52 100 3 52 100 3 Merchant Femur AP 66 100 6 66 100 6 66 100 6 Calcanus Axial 48 80 4 48 80 4 48 80 4 CMC Medical Devices & Drugs S.L. C/Horacio Lengo Nº 18, CP 29006, Málaga, Spain. BONTECH BONTECHCo., Ltd.
BT-UM-004(E) 02/26/2020 Rev 1.