Operator Manual Compuprint 3046 REV.
Compuprint Products Information Thanks for choosing the Compuprint 3046 printer. Your printer is a reliable working equipment that will be very useful in your daily job. Our printers have been designed to be compact and respectful of the work environment. They offer a wide range of features and multiple functions that confirm the high technological level of Compuprint brand.
FCC Notes This equipment has been tested and found to comply with the limits for a Class A digital device, pursuant to Part 15 of the FCC Rules. These limits are designed to provide reasonable protection against harmful interference when the equipment is operated in a commercial environment. This equipment generates, uses and can radiate radio frequency energy and, if not installed and used in accordance with the instruction manual, may cause harmful interference to radio communications.
EEC Regulations Hereby Sferal WWT declares that this product is in compliance with the essential requirements and other relevant provisions of EU Directives 2006/95/EC and 2004/108/EC. Sferal WWT cannot accept responsibility for any failure to satisfy the protection requirements resulting from a non recommended modification of the product, including the fitting of non Sferal WWT-Compuprint option cards.
Safety Information In order to prevent personnel injury, electronic shock, or cause fire, machinery fault, etc, please read this guide and the instructions carefully, save them for later reference and follow all warnings and instructions marked on the printer. Warnings must be followed to avoid body injury. Cautions must be observed to avoid damage to your equipment or cause personnel injury. Notes contain important information and useful tips in the box.
z When you switch off the printer, you should wait for 5 seconds, do NOT switch it back ON until all of operator panel indicators are turned off. Failing to do so may damage the printer. z Don’t touch the moving parts of printer while device is moving, in order to prevent personnel injury or device damage. z Moving the print head while the printer is ON may damage the printer or cause scald.
Contents Safety Information ........................................................................................... iv Contents ............................................................................................................ vi Getting to know your printer ........................................................................... 1 Unpacking the Printer ................................................................................. 2 Printer parts..........................................
The Disposal of Printing Paper ................................................................. 61 Maintenance and Transportation ............................................... 64 Cleaning the Printer .................................................................................. 64 Replacing the Ribbon Cartridge................................................................ 65 Printer Transportation ...............................................................................
Getting to know your printer Printer Features 1. Providing letter quality, draft, and high speed draft printing mode. At 10CPI, the printing speed can reach 300 CPS in draft and 400 CPS in High Speed Draft mode. 2. High performance and long-life print head: double in-line, high-hardness material printer head. The life of its printer head can reach as high as 300 million dots, and copy capacity is one plus four. In addition, its printing speed is higher. 3.
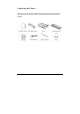
Unpacking the Printer Make sure your printer box includes the following items and that no damage has occurred to any of them. Please save the packing properly for the next shipping.
Remove the protective material Push into 1 4 2 3 5 7 6 Note: To prevent printer from being damaged during shipping, several pieces of protective materials which are marked with 1 to 14 are packed with the printer. Please take these out before assembling the printer. And please preserve the protective materials for preparing the next shipping.
Printer parts 4
Setting up the printer Choosing a Suitable Location Consider the following points when selecting a location for your printer: • Place the printer on a sturdy, horizontal and stable surface. • Place the printer near the host computer, in order to be convenient for interface cable connection. • Leave adequate room around the printer for easy operation and maintenance. Keep the printer away from direct sunlight, heat sources, or excessive moisture or dust. • Use a grounded electrical outlet.
Setting up the printer Installing the Ribbon Cartridge Make sure the printer is turned off. If the printer is connected to an electrical outlet, unplug it from the outlet. 1. Take out the printer cover unit, pinch the tabs on each side of the paper tension unit then lift the unit up and off the printer. 2. Slide the print head to the middle position. Moving the print head while the printer is ON may damage the printer.
3. For an easy installation of the ribbon Cartridge, turn the ribbon-tightening knob in the direction of the arrow to tighten the ribbon. Then hold the cartridge handle, make sure that the pegs of the cartridge fit over the notches on each side of the printer. Gently press down the cartridge until the hooks on the cartridge click into the notches. It shows as the following figure: 4.
5. Slide the print head from side to side several times. Make sure the print head moves smoothly and the ribbon is not twisted or creased. 6. Place the paper feeder on the installation column nail inside the printer and put it down, as shown in the following illustration. Then press gently on both sides of paper feeder until you hear the sound “clack”, this means that installation has been well done.
7. Reinstall the printer cover unit. Insert the pegs of printer cover unit into the notches and put the cover down, as shown in the following figure: Installing the Paper Guide Rear Insert the pegs of the paper guide into the notches of the printer then let down the paper guide, as shown in the following illustration.
Front As shown in the below illustration, hold the handles of the front paper guide. Push the paper guide along the slot until it clicks into place. While installing, push both sides smoothly with little strength. The front paper feeder is installed correctly when you hear the sound of “Clack”. Test the printer Before connecting the printer to the host, please run the printer’s self test to inspect whether the printer is able to work well.
Power connection 1. Make sure the printer is turned off. 2. Check the label on the back of the printer to make sure its voltage matches that of the electrical outlet. Also make sure that the plug on your printer’s power cord matches your electrical outlet. If the rated voltage and your outlet voltage do not match, contact your dealer for assistance. Do not plug in the power cord. 3. If the power cord is not attached to the printer, plug the appropriate end into the AC inlet on the back of the printer. 4.
2. Keep pressing the LF/FF button and turn on the printer until the printer beeps several times. Then the power indicator and the paper empty indicator will lit. 3. As shown in the illustration, move the left edge guide to the left position indicator, then move the right edge guide until the distance between left and right edge guides fit to the width of paper. Use paper that is at least 360 mm (14 inches) wide, otherwise the print head will print directly on the platen (black glue roller).
4. Insert a cut sheet paper between the left and right edge guides until it meets resistance. About 1 second later, paper will be loaded automatically and the self test printing will begin. 5. Press the Ready button to pause the self test printing. Press the button again to resume the printing. 6. To end the self test, press the Ready button to pause printing, then eject or tear off the printed page(s) and turn off the printer.
If the self test does not print properly, please refer to the “troubleshooting” chapter Connecting to Host If the result of the self test is satisfactory, you can connect the printer to the host. Parallel port Follow the steps below to connect the printer to your computer using the parallel interface: 1. Make sure both the printer and computer are turned off.
Follow the steps below to connect the printer to your host using the USB interface. 1. Make sure both the printer and computer are turned off. 2. Plug the USB cable connector into the printer’s USB interface connector. 3. Plug the other end of the USB cable into the host. Network interface (Compuprint 3046N only) Please refer to the “USER GUIDE of NETWORK INTERFACE” Install driver At this point it is necessary to configure your printer for your application package.
4. Appoint the USB port you installed as the port of the printer and you can support USB printing.
Operating the Printer Operator Panel The operator panel includes two sections: indicators and buttons. Indicators indicate the current status of the printer, and buttons are used to control the status of the printer. Indicators Power (green) Lights up when the printer is powered on. Ready (green) Lights up when printer is ready to receive and print the data. Lights off when the printer is paused or the paper is out.
NLQ (green) Lights up when Near Letter Quality is selected using Font button. Draft (green) Lights up when Draft Quality is selected using Font button. HSD speed is selected if LQ, NLQ and Draft light off. Buttons Ready button When the READY indicator is lit, pressing this button causes the temporary stop of the printing job at the end of the current line; the READY indicator is turned off. When the printing is paused pressing this button the printing will be enabled and the READY indicator is turned on.
Clear buffer (Shift + Ready button) Clears up data in buffer, and initializes the printer. Micro adjustment function: Shift + LF/FF button Feed paper forward in 1/180 inch increment. Shift + LOAD/EJECT button Feed paper backward in 1/180 inch increment. Font button Press this button to choose LQ, NLQ, DRAFT, HSD printing mode. It can also be realized through software command.
adjustment mode. This function helps to correct printout alignment problems. Resume factory default settings Hold down Shift button and Ready button simultaneously, and turn on the printer. After a long beep, the printer resumes factory default setting. EDS (Electronic Dip Switches) setting While holding down Shift button and Font button simultaneously, turn on the printer. The printer enters into EDS setting mode.
Reservation Page Length Skip Perf. Auto Tear Off Pin Broken Reservation Reservation Zero Style Reservation Interface Strobe Timing Font Line Spacing Reservation Char Pitch Quiet Mode Data Length Protocol Parity Baud Rate Code Page International Character Set 11inch, 5.5inch, 8.
2. Press LF/FF button to change setting options forward until the status of LQ indicator, NLQ indicator and Draft indicator indicates the right function option. 3. Press Load/Eject button to change setting options backward until the status of LQ indicator, NLQ indicator and Draft indicator indicates the function option. 4. Press Shift button to change relative parameter setting until the status of Tractor indicator, Thick Paper indicator and Paper Empty indicator indicates the right parameter setting. 5.
The adjustment of the loading position for the cut sheet can be saved after the printer is powered-off. The printer will feed the paper to the adjusted loading position after it is powered-on again. How to use the micro adjustment function Use the buttons for the micro adjustment function on the operator panel and follow the steps below: 1. Make sure that the printer has stopped printing before adjusting. 2. Hold down the Shift button while pressing the LF/FF button to feed the paper forward.
2. Load the continuous paper or the cut sheet (Use the LOAD/EJECT button to load the cut sheet). The Top of Form Position can be adjusted only when the paper has just been loaded. 3. Hold down the Shift button while pressing the LF/FF button to adjust the position forward. Hold down the Shift button while pressing the LOAD/EJECT button to adjust the position backward. The newly adjusted loading position is automatically saved and the printer will always feed the paper to this new position.
Tear-off Function This function is designed to feed the continuous paper to the tear-off position along the print cover after the printing has been finished. When the printer resumes printing, it will feed the continuous paper to the loading position automatically. This function can help saving continuous paper wasted between two printing files. This function can be executed in two ways: set the tear-off function to Auto or press the tear-off button on the operator panel.
4. Tear off the printed continuous paper. If the tear-off position is not in line with the perforation, use the micro adjustment function (refer to micro adjustment function for details). 5. When the printer resumes printing, it will feed the continuous paper to the loading position automatically before printing. Using the Tear-off Button Even if the tear-off function is set to Auto, this function can still be executed using the tear-off button on the operator panel. Please follow the steps below: 1.
1. Make sure that the paper has been set to the tear-off position. 2. Hold down the Shift button while pressing the LF/FF button to adjust the position forward. Hold down the Shift button while pressing the LOAD/EJECT button to adjust the position backward. Note: The newly set tear-off position is automatically saved. 3. Tear off the printed continuous paper. 4. When the printer resumes printing, it will feed the continuous paper to the loading position automatically before printing.
z Paths for cut sheet The cut sheet paths are designed to load the cut sheet, and the printer can feed the paper from the front-in path, top-in path and the cut-sheet feeder. z Front-in path for continuous paper When the tractor is set to the front, continuous paper from the front-in path is selected. z Rear-in path for continuous paper When the tractor is set to the rear, continuous paper from the rear-in path is selected.
1. Choose the cut sheet by the path selection lever, and set the paper guide upward. 1. Turn on the printer, the power indicator on the operator panel lights up. 2. Move the left edge guide to be in line with the triangle label, and adjust the right edge guide to suit the width of the paper. 3. Load the cut sheet along the edge guides and slide the paper downward steadily until it is stopped, then the printer will feed the paper for printing automatically about 2 seconds later.
Use the platen knob on the left of the printer only when the printer is turned off and the paper jams, otherwise the printer will be damaged or the position of the top of form will be changed. If the printer cannot feed the paper by turning the platen, take out the cut sheet and load it again. Please press the LOAD/EJECT button to eject the paper. Front-in 1. Choose the cut sheet using the path selection lever, and open the cover of the front-in path.
2. Turn on the printer. The power indicator on the operator panel lights up. 3. Move the edge guide and locate it when the sound of “click” is heard. 4. Load the cut sheet along the left edge guides and push the paper forward steadily until it is stopped, then the printer will feed the paper for printing automatically about 2 seconds later.
Use the platen knob on the left of the printer only when the printer is turned off and the paper jams, otherwise the printer will be damaged or the position of the top of form will be changed. If the printer cannot feed the paper by turning the platen, take out the cut sheet and load it again steadily. Please press the LOAD/EJECT button to eject the paper.
Using the continuous paper The printer allows you to load continuous paper through the front, rear and bottom directions. You can use the continuous paper with width up to 406 mm (16 inch). When you use continuous paper, the tractor should be set to one of the following positions: the front, the rear push tractor or the pull tractor. Make sure the paper path selection lever is pointed to the mark with same position as the tractor. For more information, please see “Paper path selection” section.
The factory setting of path selection lever is in rear location. In order to load the paper smoothly into the printer, make sure the continuous paper is properly loaded in the tractor. If you want to load paper from the bottom location, use printer shelf, there is a hatch to load paper smoothly. Using paper out path guide It is convenient to change paper out path using the paper out path guide.
Release the tractor by pressing the tractor lock tabs and pushing the tractor forward, then lifting it up. Set the rear push tractor 1. Make sure the printer is powered off. Lift the tractor and remove it from the printer. 2. Hold the tractor lock tabs, and lay down the tractor into the mounting slot of the printer. Release the tractor by pressing the tractor lock tabs, pushing the tractor backward and removing the tractor away from the printer.
Set pull tractor 1. Make sure the printer is powered off, and remove the printer cover and paper guide. Then remove paper tension unit by grasping both sides and lifting it up. 2. Press the tractor lock tabs, and lay down the tractor into the mounting slot. See the picture below. 3. Remove the tractor by pressing tractor lock tabs, pushing the tractor backward, and lifting it away from the printer. Load continuous paper with the front push tractor 1. Make sure the printer is powered off.
2. Make sure the tractor is in the front mounting slot and the paper path selection lever is set to the front push tractor position.
3. Push the tabs of the tractor backward and loose the sprockets locks. 4. Slide the left sprocket to the left side, about 12mm (0.5 inch) to the left margin of printer, and fasten the sprocket locks, then slide the right sprocket in order to match the width of continuous paper. 5. Make sure the edge of continuous paper is straight and clean. Open the sprocket cover, and fit the hole of continuous paper to the pin of tractor.
6. Close the sprocket cover. 7. Move the right sprockets to tension continuous paper, and lock the sprockets. 8. Set the front paper guide and the cover of the front paper load location. 9. Turn on the printer. After receiving data from PC, the printer starts to load paper automatically. Remove continuous paper from the front push tractor If the tear-off position is not in line with the perforation, use the micro adjustment function. 1. Press Tear-off button to feed the paper to the tear-off position. 2.
Load continuous paper from the rear tractor 1. Make sure the printer is powered off and remove paper guide. 2. Make sure tractor is set in rear push position and paper path selection lever is in rear push position too. 3. Unlock the tractor by holding the tractor lock tabs.
4. Slide the left sprocket to the left about 12mm (0.5inch) to the left margin, and push the left sprocket lock backward to fix it. Then slide the right sprocket to match the width of the continuous paper, but not lock it. Move the paper support to the centre of the two sprockets. 5. Keep the edge of continuous paper clean and straight. Open the sprocket cover, fit the holes of continuous paper to the pins of sprockets.
6. Close the sprocket cover. 7. Slide the right sprocket to tension the continuous paper, and then lock it. 8. Place paper guide to keep it horizontally, and then slide the left and right edge guides to the center of the paper. 9. Turn on the printer. When the printer receives data from PC, it will print after loading paper automatically. Another way is to press “load/eject ” button to load the paper.
pages in one time may cause paper damaged. Make sure the printed paper is moved before pressing Load/eject button. Otherwise it may cause paper jam by feeding paper backward for several pages. Loading continuous paper with the pull tractor 1. Make sure the printer is powered off, and take away the front cover and paper guide. 2. Make sure the pull tractor is set in right position, and the path selection lever is in pull tractor position too. 3.
4. Slide the left sprocket to the left about 12mm (0.5 inch ) to the left margin of the printer, then lock the sprocket by pushing the lock tab backward. Slide the right sprocket to match the width of continuous paper, but don’t lock it. Move the paper support to the center of both sprockets. 5. Make sure the edge of continuous paper is clean and straight. Load the paper from the right slot (front slot, bottom slot or rear slot).
6. Open the sprocket cover to fit the holes of continuous paper to the pins of tractors. 7. Close the sprocket cover. 8. Slide the right sprocket to tighten the continuous paper, and then lock it. 9. Place paper guide and keep it horizontally, then slide both edge guides to the centre of continuous paper. 10. Turn on the printer. 11. Adjust the top of form position with the micro-adjustment function. Refer to the “Setting top-of-form position”.
12. Close the front cover. Do not use the platen knob on the left side of printer to feed paper when the printer is powered on, or else, it may change the top of form position or damage the printer. Setting top-of-form position You may need specified top-of-form position to satisfy different format printout. For instance, set the top-of form position on the third line of paper. Mark the position 6.5mm above from the perforation, then load the paper, align the mark with the ribbon guide, as shown below.
Remove continuous paper from the pull tractor 1. Tear off continuous paper along the perforation. 2. Eject continuous paper forward by pressing “LF/FF” button. Do not use Tear off and Load/eject button when using the pull tractor. Switching between continuous paper and cut sheets The printer could use cut sheets, and don’t need to remove the continuous paper in the tractor. This function is available only when tractor is in the front or rear position.
4. Load cut sheets from the front or top position, same as described in this chapter. Switching to continuous paper It is easy to switch to continuous paper. 1. If there is cut sheet in the printer, press “Load/Eject” button to eject cut sheet. 2. Lift the paper guide, and make it parallel with the printer. Slide the both edge guides to the centre of the continuous paper. 3. Place the paper path selection lever to the required (front of rear tractor) position.
Load continuous paper with “load/eject” button before printing. Multipart forms Gap lever There are six choices in the gap lever for different thickness forms. They are identified by the mark near the lever. The following table indicates the lever settings. Place it according to the actual thickness of paper used.
The Thick Paper indicator is on when gap lever is set in position “2”or above. Multipart forms The printer can print on up to 5-level multipart forms. Set the lever in right position according to the thickness of paper. The same way can be used to load the multipart forms as ordinary paper except gap lever setting. See the related details in this chapter. Pay more attention to the top of form position setting. Never load multipart form from the top paper feed slot.
Printer Specifications Printing Printing method 24-pin impact dot matrix Printing Speed High-speed Draft 400 cps at 10 cpi Draft 300cps at 10 cpi 360 cps at 12 cpi Letter Quality 100 cps at 10 cpi 120 cps at 12 cpi Printing Direction Bidirectional logic seeking for test and graphics printing (Unidirectional test or graphics printing can be selected by EDS setting or software commands). Line spacing 1/6 inch, 1/8 inch, 2/15 inch, or programmable in 1/360-inch increments.
Font Character Font Width Proportional 15cpi 10 cpi 12 cpi Draft ○ ○ ○ Roman ○ ○ ○ ○ Sans Serif ○ ○ ○ ○ (point) HSD Character ○ You can also use software commands to choose other combination of the fonts /printing space.
Printable Area: Cut-Sheet 8.5 mm(0.33 inch)or more 3.0 mm (0.12 inch) or more 3.0 mm(0.12 inch) or more 13 mm(0.51 inch) or more 13 mm(0.51 inch) or more Printable Area 13.5 mm(0.
The minimum left and right Printing paper width margin 101-377.8 mm 13mm (0.51 inch) (4-14.575 inch) 381-420 mm 15mm (0.59 inch) (15-16 inch) Printing paper thickness Cut-sheet 0.065 to 0.14 mm (0.0025-0.0055 inch) Cut-sheet (multipart forms- Front in) 0.12-0.32 mm (0.0047 to 0.012 inch) Continuous paper 0.065-0.14 mm (0.0025-0.0055 inch) Continuous multipart forms 0.12-0.32 mm (0.0047-0.
Printing Paper Weight Cut-sheet (rear in) 14-24 pounds (52.3 to 90g/m2) Cut-sheet (front in) 17-24 pounds (64 to 90g/m2) Continuous Paper 14-22 pounds (52.3 to 82g/m2) Multipart forms (cut sheet/continuous paper) 12-15pounds×4(40 to 58g/m2×4) Printing paper quality Cut-sheet and continuous paper The paper must be flat, and non-carbon multipart forms.
Ribbon Fabric ribbon cartridge 6 million characters in draft mode. MTBF 10,000 hours. Print Head Life 300million strokes per wire (using genuine ribbon) Size and Weight Length: 623 mm (25 inch) Width: 395 mm (15.2 inch) Height: 173 mm (6.8 inch) Weight: about 12.3 kg Electric Parts Rating Voltage 100 – 240 Vac Rating current 2.
Environmental Specifications Temperature Operating Storing 5deg~35deg -20deg~60deg Humidity Operating 20%~80%RH 20%~80%RH without condensation Storing 5%~85%RH 5%~85%RH without condensation Interface Technological Specifications Centronics parallel interface. USB interface accords with USB 1.1 criterion. Serial interface accords with RS-232C criterion.
Troubleshooting Power No power supply. Power indicator unlit: z Check if the power line inserted in outlet correctly. z If the power outlet is controlled by outer switch or automatic timer, please use another power outlet. z Use another electronic device to make sure if the power outlet works normally. z Power indicator lights up for a while and then lights off, and the indicator is still unlit when you turn on the printer power again.
Paper-empty indicator is lit: z Please load print paper. It sounds the printer is printing, but in fact it doesn’t print a character: z Please check if the ribbon cartridge is installed correctly. As for the installation of ribbon cartridge, please refer to “Ribbon Cartridge Installation” section, or the ribbon may be old, so you can replace ribbon cartridge.
Lose printing dots during printing characters or figures: Lose a line dot in the printout: z The print head is damaged. Stop printing and contact your agent or a qualified maintenance personal, and replace print head. Lose printing dots at random position: z The ribbon is loose, so reinstall the ribbon cartridge. The printing characters are not what you need: The printer does not print the font or character which the application software sets: z Check if application software is installed correctly.
The setting of page length doesn’t match with continuous paper page length: z Please use EDS setting to change the setting of page length. z Check the page length setting of application software, and adjust the page length setting if necessary. The top of form position is too low, or the lower half part of the page is printed on the beginning of the next page: z Reduce or remove the top margin and reduce page length in application software.
z Load cut-sheet smoothly again. Paper-feed slanting or paper-jam: z Turn off the printer power switch, and set the path selection lever to the position of pull tractor, remove cut-sheet and check the following two contents. z Make sure that the size of cut-sheet is within the specified range. z Make sure that the cut-sheet aligns with both edge guides. Cut-Sheet is not ejected completely: z Please use LOAD/EJECT button to eject cut sheet. Do not use LF/ FF button.
z Check if the size of continuous paper is within the specified arrange, please refers to Printing Paper Size. The continuous paper cannot be ejected correctly: z The page length is too long; please use the specified continuous paper.
Maintenance and Transportation Cleaning the Printer In order to keep your printer in perfect condition, you should clean thoroughly the dust and dirt several times every year. 1. Make sure that the printer has been turned off, remove the paper guide, printer cover, tractor and other installed options. 2. Use soft brush to clean dust and dirt carefully. 3. If there are dust and dirt on the outer shell or paper guide, you can spray a neutral detergent on a soft cloth and clean them.
Replacing the Ribbon Cartridge If the printing is fading, then you need to replace ribbon. It is advisable to use the genuine ribbon cartridge provided by our company. As for replacing ribbon, please refer to “Ribbon Cartridge Installation” section. Use genuine ribbon cartridges approved by our company. Failing to do so will cause damage to the printer (especially to the print head). Do not use the ribbon designed for 9-pin printer.
User information according to European Directive 2002/95/EC and 2003/108/EC This unit must be recycled or discarded according to applicable local and national regulations. The symbol shown above, applied to the product or on its packing, indicates that, at end of life, the product is not to be thrown away, or disposed as unsorted municipal waste, but separately collected.