
User Manual

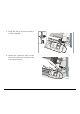
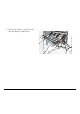
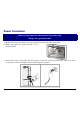
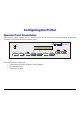
Table Of Contents
- Selecting the Display Language
- Configuring the Printer
- Operator Panel Presentation
- Printer Setups
- Power-On Configuration
- Entering the Power-On Configuration
- Printout of the Printer Settings
- Emulation Options
- Parallel Interface
- Serial Interface
- LAN Interface
- LAN Interface Parameters
- IP Assignment
- Enable/Disable the Novell Service
- Enable/Disable the SMTP Service
- Init IP Address
- Init Net Mask
- ID Default Gateway
- Mail Server Address
- Init Host Name
- Init Workgroup Name
- Security User Name
- Security Password
- E-mail Address
- Print Server Name in Novell Network
- Printer Name in Novell Network
- Queue Name in Novell Network
- Frame Type in Novell Network
- LAN Interface Parameters
- Functions
- Functions Group Parameters
- Setting the Functions Group Items
- Paper Loading Sequence
- Enable/Disable the Buzzer
- Ribbon Type Selection
- Bar Code Density
- Text Print Direction
- Graphics Print Direction
- Bar Codes Print Direction
- Paper Path at Power-On
- Selection of the Language of the Display Messages
- Enable/Disable Lower Tractor Jam Sensor
- Enable/Disable Upper Tractor Jam Sensor
- Adjusting the Tear-Off Position
- Resetting to Factory Default Values
- Entering the Power-On Configuration
- Program Setup
- Entering the Program Setup
- Main Structure
- Printout of the Printer Settings
- User Macro
- Selection of the User Macro
- User Macro Parameters
- Line Spacing
- Line Spacing Lock
- Page Length
- Top of Form
- Skip Over Perforation
- Draft Print Mode Selection
- Font Selection
- Pitch Selection
- Micro Dot Print Mode
- Pitch Lock
- Left Margin
- Right Margin
- Zero Character Printing
- Paper Path Selection
- Tear-Off Mode
- Print Impact Strength
- Paper Perforation
- Quiet Printing
- Adjusting the Distance of the Print Head
- Horizontal Character Tuning
- Vertical Character Tuning
- Resetting the Macro Parameters to the Factory Defaults
- Selecting Another Macro
- Passing over to the Power-On Configuration
- Hexadecimal Dump
- Entering the Program Setup
- How to Select the Paper Path
- How to Use the Tear-Off Function
- How to Lock/Unlock the Printer Setups
- How to Handle the Paper Parking

25
S
S
e
e
l
l
e
e
c
c
t
t
i
i
n
n
g
g
t
t
h
h
e
e
D
D
i
i
s
s
p
p
l
l
a
a
y
y
L
L
a
a
n
n
g
g
u
u
a
a
g
g
e
e
The display messages for this printer can be displayed in five different languages: English (Default),
French, German, Italian and Spanish. To select the language, that you prefer, proceed as follows:
1. Press the
PROGRAM
key and keep it pressed while powering on the printer until the following
message will be displayed:
RELEASE KEY
2. When you release the
PROGRAM
key, the following messages will be displayed:
10200
then,
PRINT OUT? NO
3. Press the ↓ key to enter the setup. The first setup item is displayed:
PARALL INTERFACE
4. Press the ↓ key until the language first level function is displayed:
FUNCTIONS
5. Press the → key to pass to the second level functions:
SEQUENCE NONE
6. Press the ↓ key until the setup language is displayed:
MENU ENGLISH
7. Press the → key to scroll the setup languages. When the desired language is displayed, press the
PROGRAM
key to select it. The printer exits the setup. From now on the display messages appear
in the selected language.