
User's Manual
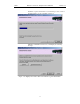
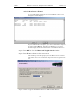
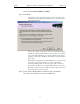
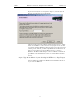


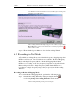
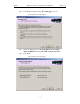
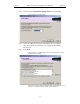
Table Of Contents
- Table of Contents
- 1. Overview
- 2. Quick Installation
- 3. Detailed Installation
- 4. Updates
- 5. Software Overview
- 6. Recording Wizard
- 7. Recording Options
- 8. Display Options
- 9. Reading a CATC Trace
- 10. Decoding Higher Protocols
- 10.1 Introduction
- 10.2 LMP and L2CAP Messages
- 10.3 Decoding and Viewing Higher Protocol Data
- 10.4 Tooltips
- 10.5 Viewing Packets in LMP and L2CAP Messages
- 10.6 Types of LMP and L2CAP Messages
- 10.7 Viewing L2CAP Channel Connections
- 10.8 Viewing Protocol Messages and Transactions
- 10.9 Changing Protocol Assignments
- 11. Other Features
- How to Contact CATC
- Warranty and License
- Index

55
BTTracer Protocol Analyzer User’s ManualCATC Version 1.0
next to the label Piconet Master Address.
Step 14 Press Next.
The following screen will display. This screen asks you which of the
following two options apply to your Master device. For some devices,
both options will apply.
You can select either or both options. They are not mutually exclusive:
If the Master supports inquiries while in a connected state, select the first
option. This will set BTTracer to use the 'Sync & Record' mode in its
attempts to synchronize to the Master. This will also cause the wizard to
skip to step 8.
If the Master can support piconets with multiple slaves, select the second
option. If you select this box alone (i.e., you leave the first box
unchecked), BTTracer will use the 'Passive Sync & Record' mode to
synchronize to the Master. The wizard will then advance to Screen 8*.
If the first checkbox was selected, BTTracer will use 'Sync & Record' no
matter what was set in the second box.
Step 15 If you want to skip the Master verification, put a check in the
box. If you are in doubt, leave the box unchecked.