
User's Manual


9
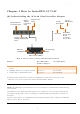
(E) Connecting Your WiFi Devices to the New PG-9172AC
Access Point
7. For some devices (E.g. laptops, cameras, set-top-boxes, etc.)
wireless connectivity can be done via WPS (Wireless Protected Setup). WPS allows
you to simply connect devices to the new Access Point without entering a
username/password manually. To do this, please follow the instructions in
Section F below.
8. You have created a new Internet Access Point and it is now active and ready to use!
To connect your WiFi devices to your new PG-9172AC WiFi Access Point, select the
PG-9172AC Access Point using your WiFi device’s standard network list. The
Network Name (SSID) and Password (WiFi Key) can be found on the bottom of the
PG-9172AC.
9. Go to Section G.
(F) Setup of Wireless Devices via WPS
(WiFi Protected Setup)
10. Press and hold the “WPS” Button for more than 2 seconds on the PG-9172AC to
activate its WPS. The PG-9172AC’s WiFi Indicators
should flash to
indicate a WPS connection is in progress.
11. Within two minutes, press the “WPS” Button (often the WPS/Reset Button) on your
remote Internet-Enabled Devices to activate WPS.