
User guide


8 - Hardware Installation DeviceMaster FreeWire Installation and User Guide: 2000412 Rev. D
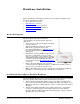
Installing the DeviceMaster FreeWire Hardware
• If the DeviceMaster FreeWire is operating properly, the LEDs will blink
momentarily and then go out, the yellow (10) and green (100) LEDs will
illuminate if the network is active, and the orange (Power) LED will
illuminate, indicating the device is receiving power.
• The unit powers up in the Normal mode, which provides for connection
from the network to the device connected to the serial port of the
DeviceMaster FreeWire.
•If the Power LED blinks continuously in a regular pattern, a problem exists.
If this is the case, try powering the unit off and then on again. If the
problem persists, refer to Troubleshooting
on Page 47.
See LED Indicators
on Page 9 for detailed information about the LEDs.
3. Connect the DeviceMaster FreeWire to your network through a switch or hub
using a category 5 (CAT5) Ethernet cable. The DeviceMaster FreeWire IP
address must be configured before a network connection is available.
• The DeviceMaster FreeWire is configured with a static (fixed) IP address of
192.168.250.250 (see your system administrator for assistance). In most
cases, a fixed IP address is preferred because a DHCP server may not
always assign the same IP address to the DeviceMaster FreeWire when the
DeviceMaster FreeWire is powered on.
• If you want to use DHCP, you must configure the DeviceMaster FreeWire
for DHCP during the network configuration process.
Note: If a wired connection is established to the unit, the wireless link will be
disabled. The IP address must be within a valid range, unique to your
network, and in the same subnet as your PC.
4. Go to Configuring the DeviceMaster FreeWire
on Page 13 for DeviceMaster
FreeWire configuration procedures for Windows operating systems.
Optionally, you can go to Web Browser and Console Configuration
on Page 27.